FYI


Showing posts with label photography. Show all posts

Tuesday, August 2, 2011

Shake it, Baby

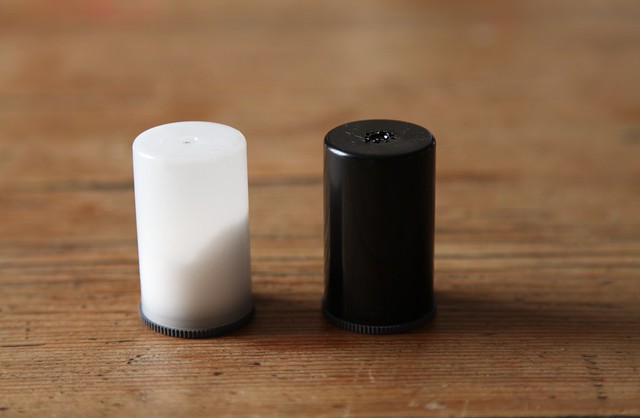
My regular readers know that I am big into photography. So much so, that I have lately channelled most of my creativity into photography and been neglecting Craft-Werk. It takes a photography-related project to get me posting again. And here it comes: salt and pepper shakers for photography enthusiasts. Check this:


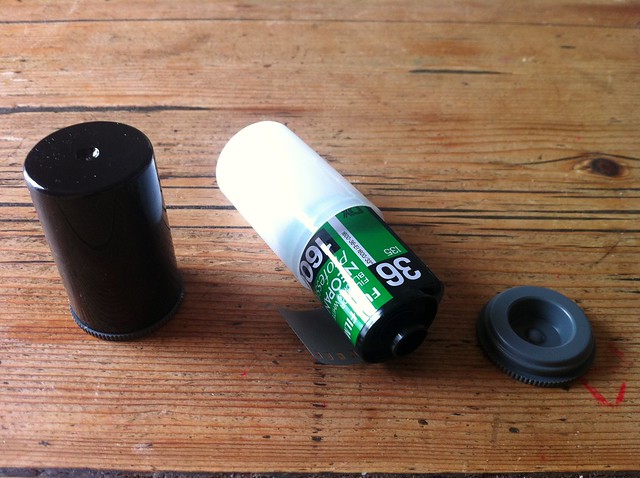
Now, if you were born after 1990, chances are you have no idea what this is (apart from salt and pepper shakers, obviously). Well, sit down kids, and let Auntie Sonja tell you: Long ago, in the days before everything turned digital and swish and instant, those of us who liked to photograph had to insert a spool of light-sensitive material into a recess behind the lens of a camera. It was on that material, that the light would record what the lens caught in that split-second glimpse at the world. And those two cannisters, well, that is what the light-sensitive material, also known as "film", came in.

Ok, joking aside - chances are that you have long left your film days behind you. So have I - except I have reconnected with analog photography through college and keep a whole big stash of films in my fridge. And I have a heap of those film cannisters. I cannot believe it was only today that it occurred to me to use them as salt and pepper cellars, though. And I can believe even less that I have never seen anything like this before - neither on all my favourite photo sites, craft blogs or in novelty shops. Maybe I should have this patented...

Anyhow, here's what you do: First of all make sure you clean out your film containers thoroughly. No kidding, people. We are talking silver halides here - not something you would want on your food, photography-enthusiast or not. I put mine in the dishwasher, to be sure.

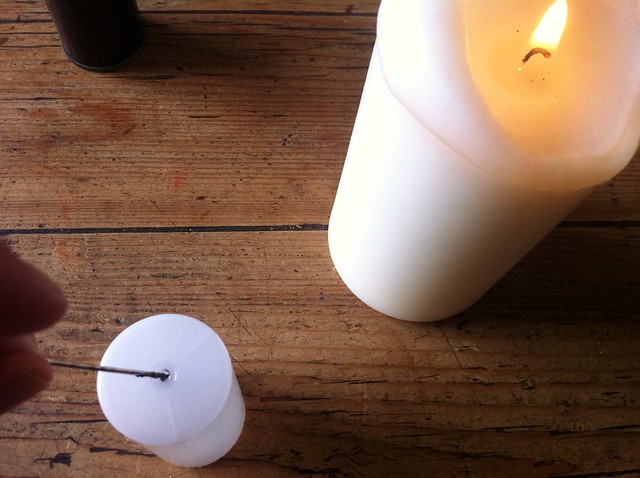
Then grab a candle and a thick sewing needle. Heat the tip of the needle in the candlelight and then push holes into the plastic cannisters. Over here in Ireland, the salt cellar has one big hole and the pepper shaker has many small ones. So I had to move the hot needle in that hole a few times to get a suitably large hole.


And there you are! This has got to be the quickest and easiest craft project I have ever done. So fast, actually, that I am not sure it qualifies as crafts at all. It took me all of five minutes to make this. And yet I am chuffed-er than chuffed about this teeny-weeny little, jokey project of mine. I am sure you well-endowed ... ooops... -equipped crafters out there probably also have a silhouette machine that would cut out some swirly, fancy P or S to stick on the little shakers. I quite like them simple and unadorned as they are.


A word of warning, though: This project will get your needles dirty! Check the image on the right: Dirty or what?

So no sharing of needles!!


This could be an easy-peasy pressie for the photo-enthusiast in your life. Anyway, get shaking, baby - let's put a bit of salt in the soup of our lives.

ArLt2b on Make A Gif, Animated Gifs
make animated gifs like this at MakeAGif

Best,

Monday, March 8, 2010

Cool Collages

Can you read this:


Yay - Craft-Werk!!! If I didn't already have a banner that I am quite happy with, this is what I would use. If you look closely you can see that the images in the collage are all the projects I have presented here on the blog since I started nine months ago (go on, take out that magnifying glass, I dare ya!)

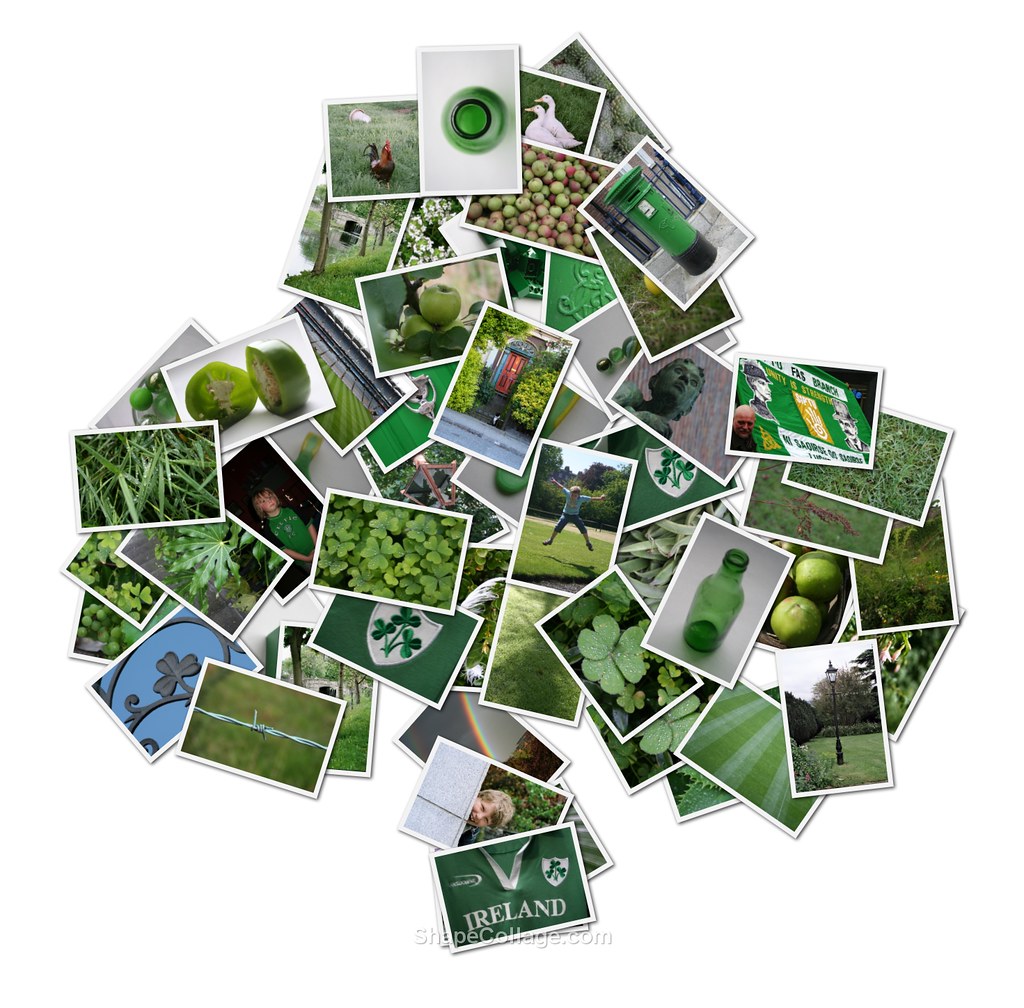
Yep, I have turned into a geek, I know. But it's just so easy to do, I couldn't resist. And while I was at it, I finally also got into the swing and turned all my green photos into a collage for St. Patrick's Day.Strictly speaking it is not created by me - but I thought I'd show you my find because you might want to create a nice little collage for Paddy's Day or any other upcoming event in your busy lives...


No, I did not painstakingly print and cut out every photo and stick it in a shamrock shape - Shape Collage did that for me. It's really cool - you download their application for free, then you drag and drop all your chosen image into the tool, determine the shape you want it arranged in and click "create". Bang, there it is. There are tons of shapes to choose from - or you can (freehand) draw your own shape. I love it - photo collages made easy. Give it a shot...

Best,

PS: Ok, yes, I promise this is not turning into a photography blog. This will - probably - be the last photo post in a while. And: I am not getting paid to promote this site... unfortunately!

Saturday, March 6, 2010

Photography Tips for Bloggers - Part 2

Geek Week continues. I am not done yet with photography tips, so here is part 2 of my do's and don'ts when it comes to taking pictures for your craft blog. In yesterday's post I suggested what you can do to get rid of unsightly shadows in your pictures, how to use flash correctly and explained why a calm and clean background is so important. If you missed the post, click here.

Today I want to look at other common mistakes. Let's jump right in...

4.    Take note of the minimum distance!
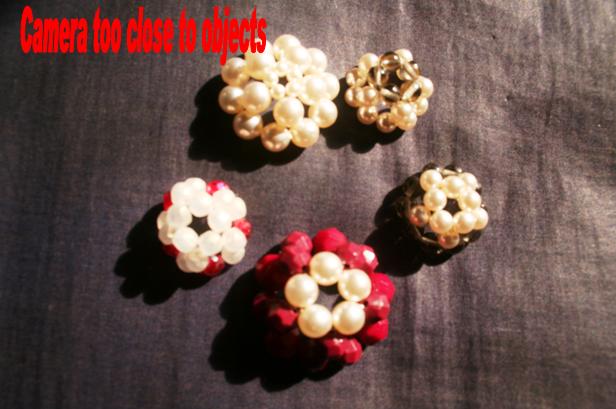
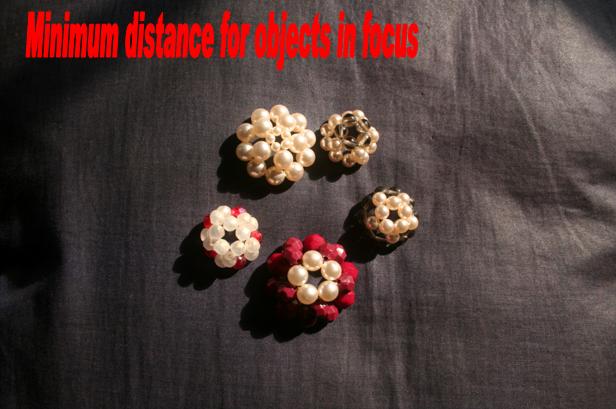
Many pictures I see in blogs are blurry close-ups, accompanied by a note “Sorry for the blur; I don’t know how that happened…”. I can tell you how: You probably came too close to your subject! Automatic cameras will snap anything that you point your camera at. However, all cameras have a specific minimum distance between the lens and the object which the camera is shooting. Moving closer than the suggested minimum distance will result in blurry images. 


I am shooting with a Canon 350 digital SLR. On the lens it tells me the minimum distance I can shoot an object from: 0.28m/0.9ft. What it means is – if I am any closer than 28cm/9 inches to my subject, the lens will not be able to focus on it clearly and the image will come out blurred. Check your camera for the telltale note – or look up your manual to find out.

5.    Frame the subject as big as you can!
If you followed my advice from number 4, you will end up with a focussed picture that has your object in the centre - but a lot of unnecessary background around it. And again I am not happy - frame closer! This tip came from the camera manual of my first “proper” automatic camera, a Pentax. The advice is priceless: Whatever you are photographing, whether it is an object or a group of things – try to get them as big in the frame as you can. That way your readers can see the object clearly and in detail. Alternatively… (read on to number 6).    


6. Crop for best results!
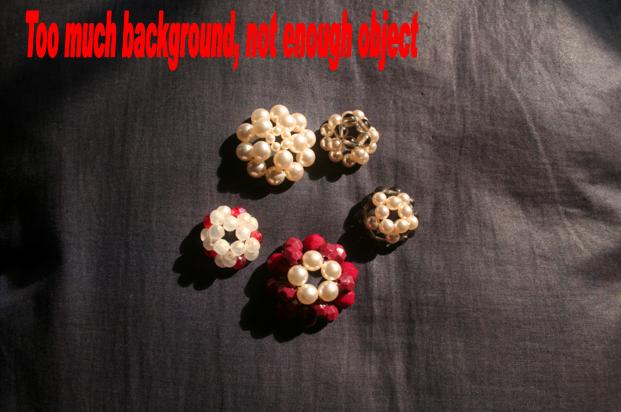
Tip number 6 follows from tip 5: If you have taken a picture that has too much background showing, just crop it down closer to the object. For best effect, leave the same amount of space on opposite sides of the image. 


Compare the next two images:

 Isn't the second one more pleasing to the eye? Plus it gets more detail across to the viewer.

7.    Minimal PS-Intervention is fine!
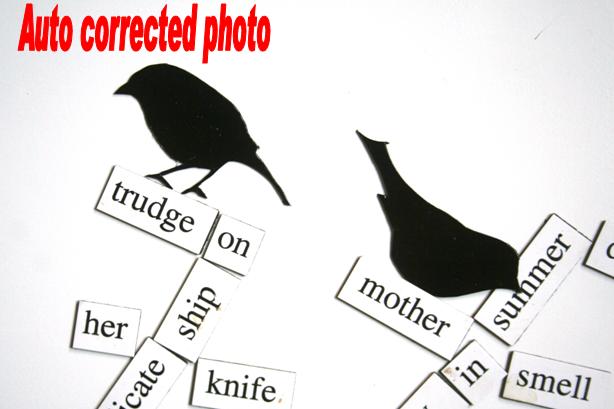
Let’s face it: We are crafters, not photographers. Your photo optimization should not take longer than the time it took to make your craft object. Bearing in mind that photos look pretty good on a computer screen even at low resolutions, there is not that much you need to do. For general purposes it is fine to use the “auto correct” button in MS Picture Manager or in online applications like Picnik. This will automatically set the exposure, colour and contrast on an assumed ideal level and usually takes out the dullness from pictures. I find that it is quicker to use auto correct in Picture Manager than to wait for Picnik to open up on Flickr. So I quickly auto correct my images on my laptop and then upload to the online album where I am hosting my images.
Here is an example where the auto correct chose a better white balance for my image:


This was just done with one click on the auto correct button! Yes, I do know that the pros use Photoshop - but to reiterate: This is photo optimisation for amateurs and not for geeks.

And finally an appeal:

Less is More!Please don’t overload your post with pictures. Concentrate on a few good shots for illustration. Pick out the ones that show your object clearly and attractively. No need to show every single shot which you took during your 3-hour-shoot. – Your readers just get bored having to scroll down your post over shot next to identical shot next to identical shot next to... Either they just scroll without looking properly and will miss the really good shots. Or if worse comes to worst, they get frustrated and jump blog ship mid-post. So keep it sweet - it also makes posting quicker for you!


Ok - sermon over! As you can see, I do not always adhere to my own rules. Of course I have pics on my blog which are washed out, badly composed, full of hard shadow or unnecessarily large background. You can't follow every photo rule religiously. But maybe my tips have made you more aware of the importance of good photography? Give the tips which you found interesting or helpful a shot - quite literally! I would love to hear about your experiences! And if you have any particular photo-related question, please drop me a comment or send me an e-mail.


Happy snapping, everyone!
 

Friday, March 5, 2010

Photography Tips for Bloggers

Photos play a big part in craft blogs on the net. We all want to display our beautiful creations or show how we made them. Illustrations also work like eyecatchers – posting one at the start of your blog post can attract your readers attention. Chances are that the split-second decision whether the visitors to your blog will read your post or not, is made based on the impression the first photo creates. Photo quality is crucial for that. And having looked at thousands of photos since I first entered Craft-Blogland, I have noticed a number of problems that come up again and again. As you all may have noticed, I am big into photography. Actually I am studying for a degree in photography in college at the moment.  And I thought that I might share some of my tips and ideas so you can improve your photography. I’ll illustrate my post with good and bad examples, so you can see my tips in action. So here’s for another “Babes in Geekland”-post... Sonja’s photography tips for dummies bloggers ;-)

1. Centre-stage your Objects!
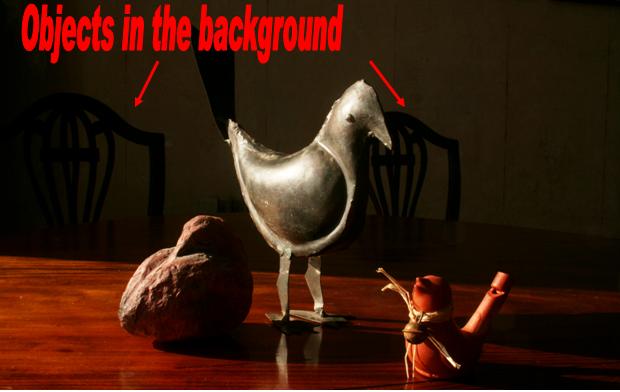
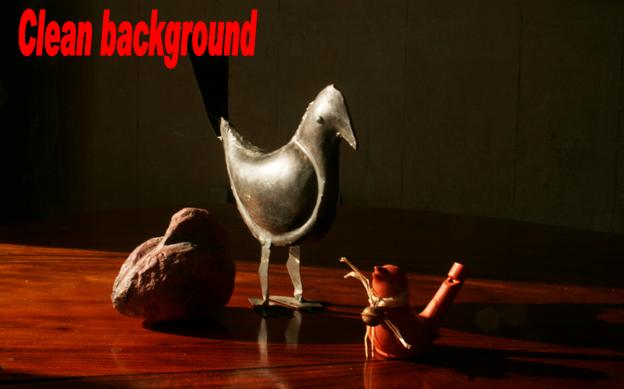
Whether you are taking a picture of your family or of an object – always make sure that nothing distracts from your subjects. So, when photographing something, arrange it nicely and clearly and make sure you have no other objects in the background that might protrude into the scene and distract from the overall image. You get best effects when your background is monochrome – or simply one colour. That way your viewers’ eyes will concentrate on the object in the foreground and their gaze is not distracted by anything else. So set up your object in front of a white wall – or place a piece of board or a sheet behind your object to hide busy and distracting backgrounds.

My example shots are quite subtle, but in picture one you can see some chairs left in the background. Compare with the clean background of shot 2. Which one is more pleasing to the eye when nothing has been changed but the background?

2. Get rid of Shadows!
Try to avoid using flash if you can – either by moving your object near natural light (i.e. window sill) or by scheduling your shoot for daylight hours.
Even daylight will create shadows, but you can even cancel that out by placing a piece of white cardboard or other reflective surface next to your object, but keeping it out of your frame.

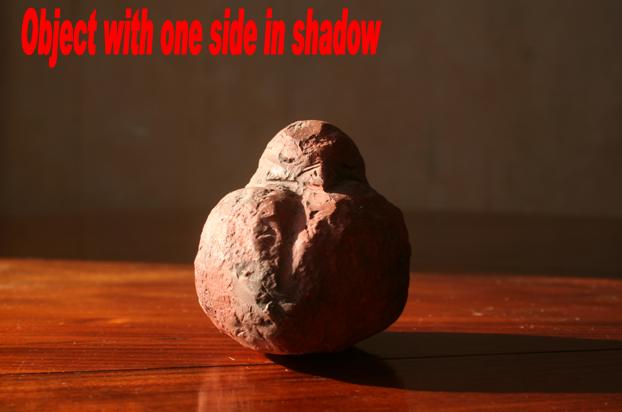
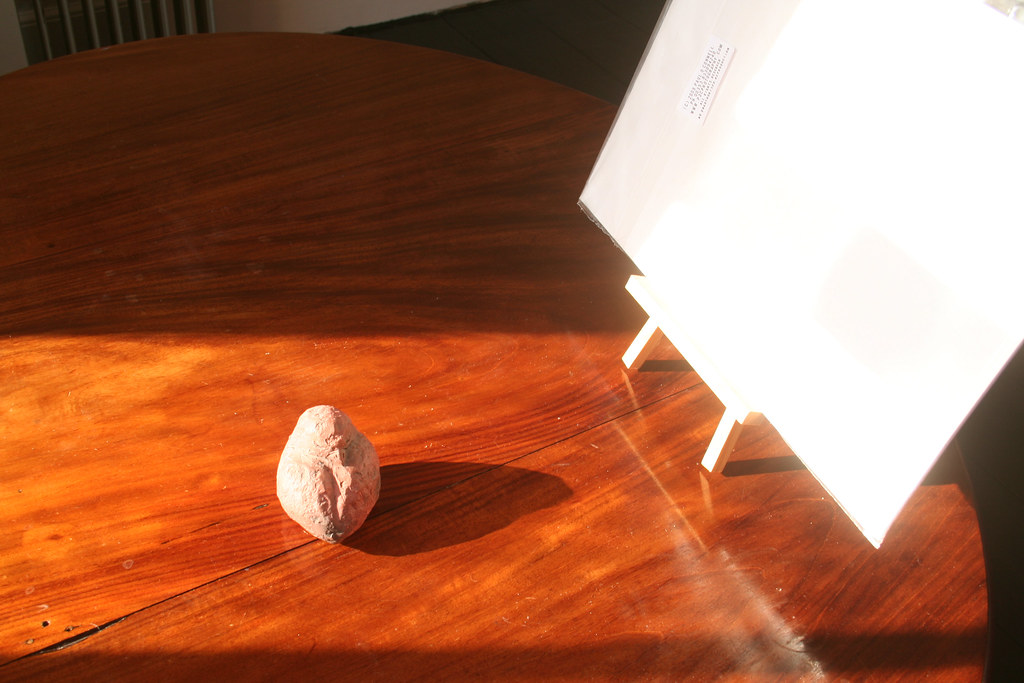
Here is a little birdy which I have shot in the direct sunlight. The effect is actually not that bad, but I have lost some of the bird's detail because the harsh shadow obscures the pretty head. For the second picture I placed white cardboard beside the bird and thus lightened up the shadows.


I have not used any additional lighting, this is the pure sunlight reflected back!!! This is the set-up:

3. Diffuse or Bounce your Flash Light!
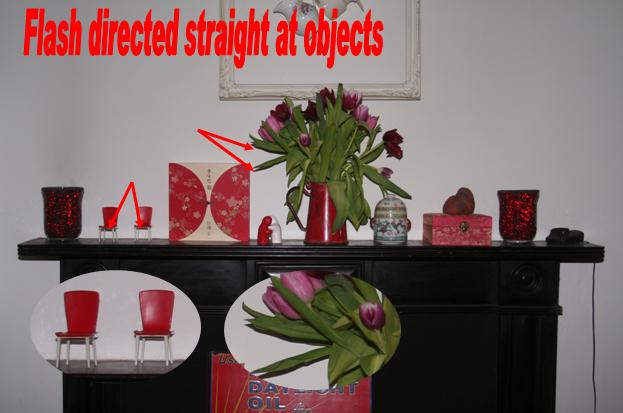
As most of our crafty stuff is indoor decorations, we mostly shoot inside. Depending on the amount of light in your room, the camera will automatically fire its flash to illuminate the subject. The result is unsightly hard shadow of the object against the background. Sometimes the shadow obscures other details in the shot, other times it creates reflections and highlights that distract from the overall image. If you must shoot with flash, there are a couple of tricks that the professionals use:
You can make the shadows softer by diffusing the light that fires from your flash. Simply stick a bit of translucent scotch tape over it. It softens the edges of the shadow but will probably still give enough light to illuminate your scene.

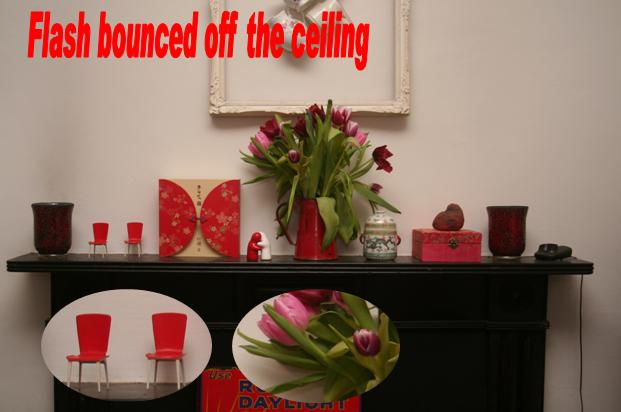
If you are using a separate flash, direct the flash to the ceiling. The theory is thus: Light travels in straight lines. If you point your camera straight onto the object but the flashlight against the ceiling, the light will bounce off the ceiling first, loose some of its brightness and illuminate the scene from above. The shadows will not fall against the background, but more against the surface your object is placed on. Due to the loss in brightness the shadows will also appear softer. As an overall effect the shadows will not be so apparent and will neither distract from nor obscure the object.

In my example, the flash light creates hard shadow against the wall. The light is rather blueish-cold. Check the insets for the details and compare with the second shot, taken with flashlight bounced off the ceiling.
 

Can you see how the light appears softer, warmer and the shadows have almost completely gone?

Come back tomorrow for another series of tips on how to improve your photos!

Best,

Tuesday, January 12, 2010

Trickling-Sand Picture

I love beaches, sea, sand and desert. And when I was on the holiday of a life-time in Namibia two summers ago, I followed my friend Tanja's (of Notizblog) advice and brought back a bottle of Namib Desert sand as a souvenir. I was going to put it in a jar and display it. Or use it in a hurricane and place a candle in it. Then yesterday I had another idea - make one of those trickling-sand-pictures that you have to turn around and see the sand trickle down from one part of the picture to the other.


It is probably strategically wrong to start off a post with the admission that the project in question did not turn out quite to my satisfaction. Well, maybe my standards are too high, but I must say that I encountered a couple of problems along the way which I had to solve with improvisation. In general, however, I really like the idea, so that is why I am showing you this project.


What you need is a picture frame (with glass), photos, mountboard or cardboard, (hot) glue, scalpel and sand. You will print out two pictures, glue mountboard onto it, cover it with glass and put it into the frame. But I already made my first mistake right at the beginning: Choose two pictures and print them in such a way that they both look towards the shorter edges of your rectangular frame. (See correct example to the left!!!) I stupidly printed them both facing inwards *doh*... Anyway, I didn't realize my mistake until well into the project, so I ploughed on, determining the image size, using the glass of the frame as my guideline. Trim your picture with a trimmer.

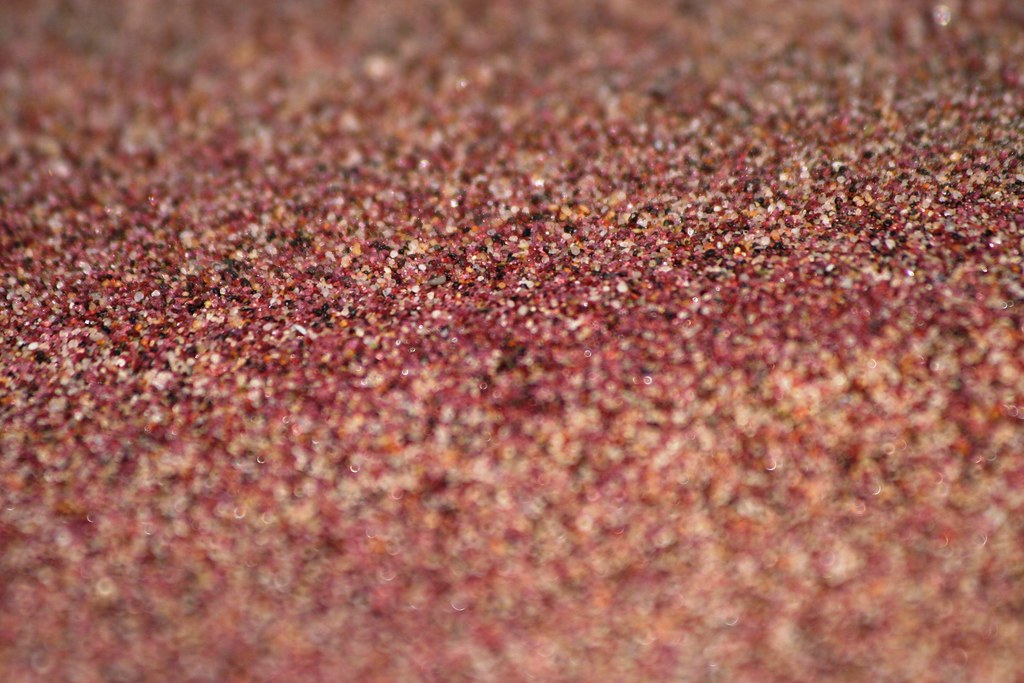
In order to have space for the sand to trickle under the glass, you need too create a frame that you will stick onto the picture. I used mount board which is about 1mm thick. That is enough space - well, depending on the size of your sand particles. Namib desert sand is beautifully red and very fine (sorry, can't resist showing you a picture here:)


Totally unnecessary aside: The sand of the Namib desert is really red, as you can see in this close-up. The red colour is caused by the iron in the sand which oxydises and turns the sand red. Near the coast, the sanddunes of the desert are much lighter in colour as the water has washed the sand. The further inland you look, the darker red the dunes become as the sand re-oxydises.
The black particles visible here are metal - as impressively proven by our guide who hid a magnet in a plastic bag, brushed over the sand with bag and then held the bag up to show all the tiny bits of black "sand" stuck to the bag.


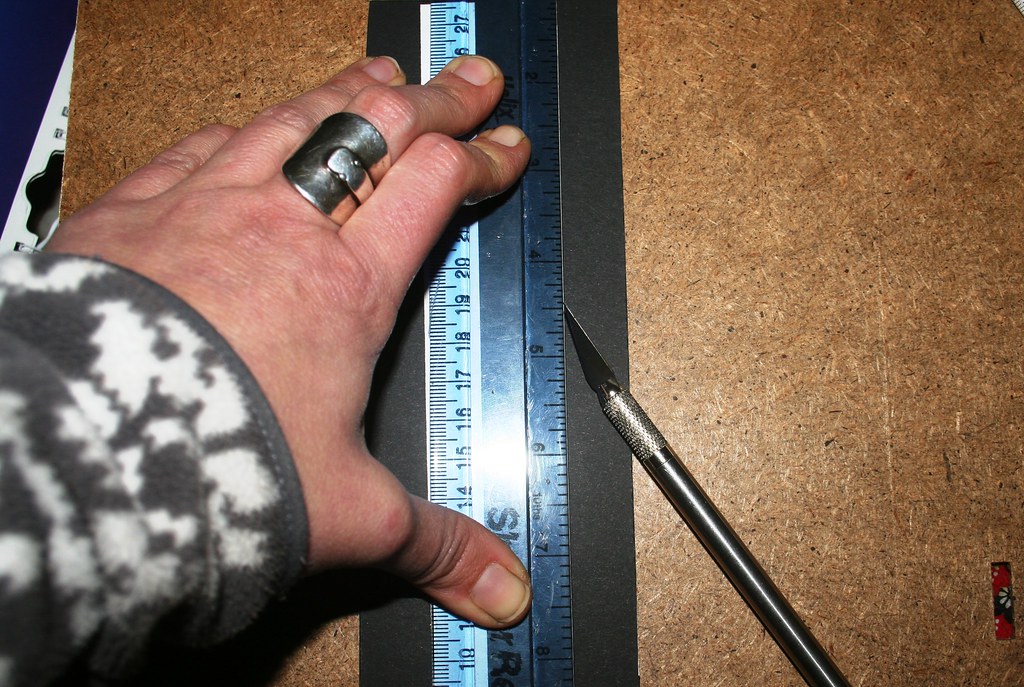
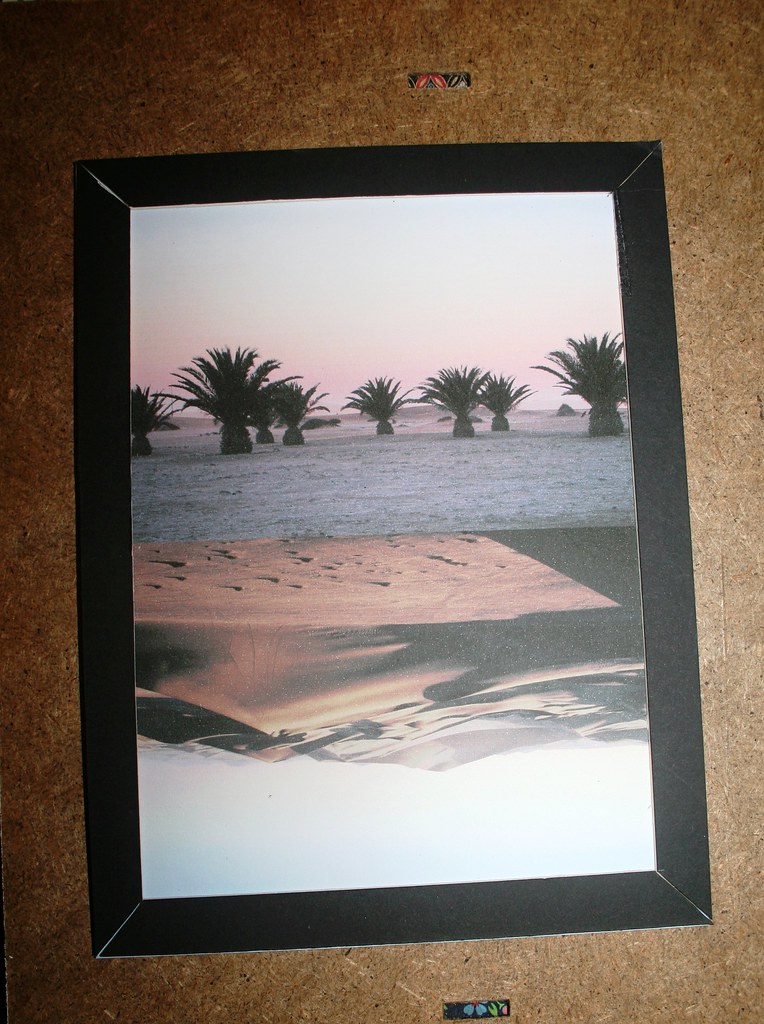
Back to project: So create a passepartout/mount for your picture, about 1cm wide. If you are lucky you may find a mount in a shop that is just the right size, but I had to make my own. Using a scalpel and a ruler, I marked the lines and cut out the mount. I actually went for four mitred pieces of cardboard rather than a simple mount with a rectangular piece cut out in the middle. That's what I would recommend you to do!!! Mitred edges are annoying!!! Trust me!


Glue your picture to the backboard of your frame. And then stick your mount onto your picture. Cut a thin strip of mount which will create a border in the middle of your picture and has two openings through which the sand can trickle. The size of the openings depends on the size of the sand grains - don't make them too big or the sand doesn't trickle but "rush"... Glue the thin strips onto the picture as a divider between the two images.


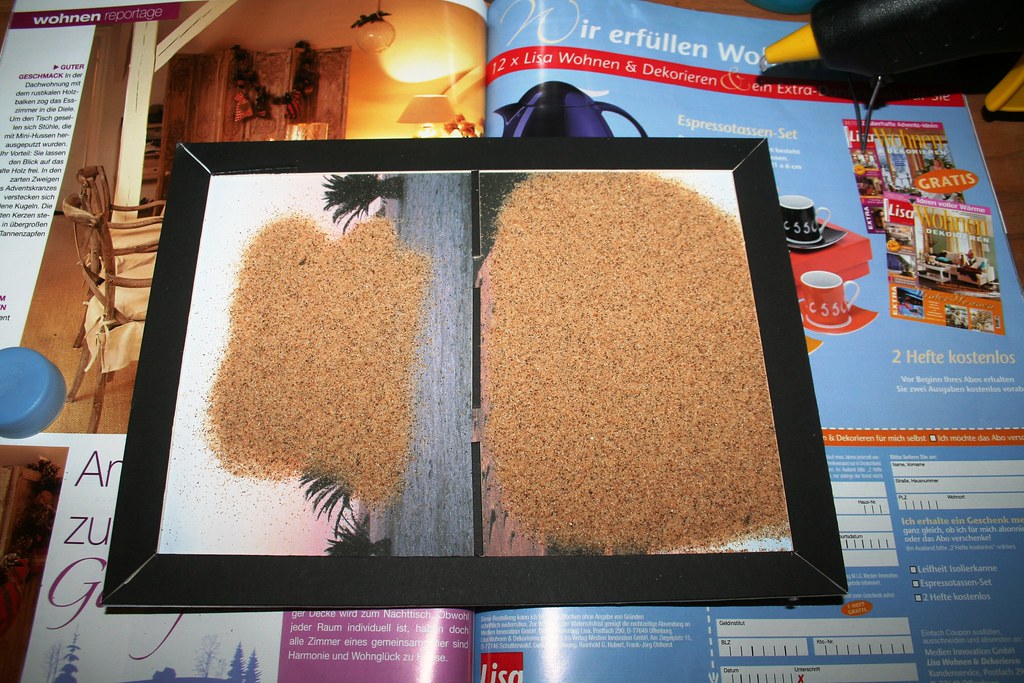
Now you fill the sand into your picture. Lay it flat and cover the image with sand. You probably need the sand to roughly cover one of the halves. It's difficult to tell but if you check by putting your sheet of glass on top you should be able to figure out how much sand you need.  


Now comes the tricky part. I used hot glue to stick the sheet of glass onto the picture/mount. You have to work quickly and tidyly here - which I didn't manage! Glue around the edges of the mount and on the dividing strips in the middle. Take care to get lots of glue on there so that the glass sits tightly on the mount. No gaps!!! I managed to both spill glue into the pic and leave gaps on the edges. Don't worry about the appearance - you'll cover the edges with another mount before you stick the picture back into the frame.  However, if necessary, make the frame sand-tight by glueing up the sides of the glass/mount/picture "sandwich". Check that no sand trickles out!


Are you still with me? Sorry it is such a convoluted post... really looks and sounds more difficult than it is. Complications all due to my own f*ck ups stupidity. Anyway, we are basically there. I lastly cut another mount ( this time from thin cardstock) and a dividing strip for middle, to disguise the ugly glue marks.  I stuck this directly onto the glass and then fitted the mount-glass-mount-pipcture sandwich (it keeps getting bigger and bigger, that sandwich) in the frame. Voila. Can you see the sand trickle on the left???


 So here is the finished trickle-picture, putting my desert souvenir into use:


That's the project finished - thank you for reading, if you are still here!!! Apart from displaying holiday shots this way, this would make a lovely present for a child if you substituted the sand with salt and made it a winter scene. Your kids could even draw their own winter pictures over which you could place the trickle frame!  


PS: I can't resist showing you where exactly I picked up my sand: in the Namib desert on the Namibian coast. The Namib desert meets the Atlantic here - and the cold Benguela current makes this a truly unique place. Despite being in the desert, we sported long trousers and fleece coats as the wind was very chilly. We were taken there on a private tour by landrover. Our guide drove us two hours into the desert. Then we left the car in the sand and ventured on by foot. What a wonderful memory! 


28 January: Linking to 

Tuesday, October 20, 2009

Pinhole Camera - for the Photo Junkies among you

Photography is - quite literally - "drawing with light". Nowadays we are using high-tech digital cameras and hardly think about the technology that makes image-creating. However, the principle on which photography works is a very simple one - and you can even build your own simple camera. So this is a slightly specialist crafts project. 

A pinhole camera is a simple device with which you can take photographs. It simplifies the photographic process and illustrates how a camera works: Essentially any camera is a black box with a hole through which the light will expose the light-sensitive material which is stretched at the back of the box. As light travels in straight lines, the reflected light from the object that the camera is pointed at, will fall through the hole and produce an upside down, left-to-right image. 


To make a camera, you need: 

  • a box, tin, carton or any other container with a lid
  • (masking) tape
  • tinfoil
  • cardboard
  • matt black spray, shoe polish or cardboard
  • scissors
  • a sewing needle


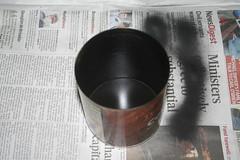
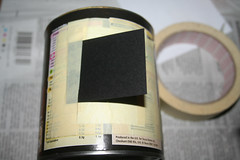
 1. Clean your container. The pinhole camera needs to be matt black inside in order to avoid the light reflecting and bouncing around in the inside of the camera. I sprayed the tin with some blackboard paint. 


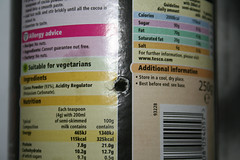
 2. A simple hole in the tin is the "eye" of the camera through which the light will fall into the box. It can be punched into the container with a screw. However, it will be too big and too frayed at the edges this way, so another step is needed to make a sufficient hole.


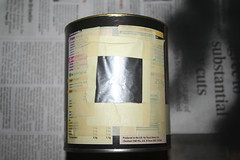
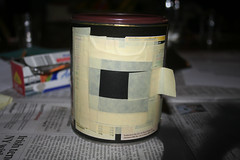
 3.  Tin foil won't let any light shine through, so you stretch a bit of tin foil over the hole and secure it in place with masking tape.


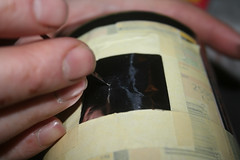
 4. Then I made a tiny little hole in it, using a sewing needle. The tin foil won't fray and therefore the light that will fall through this hole will not create a fuzzy image on the light sensitive material at the back of the tin.


5. As a "shutter" I cut a piece of black cardboard and secured it with masking tape. For easy "shutter release" I folded the tape over so it can easily removed and closed again once the image has been recorded on the paper. My camera is closed with the plastic lid that came with the tin. To make the camera light-tight, you need to stick it in place once you have loaded the camera with the paper or film.


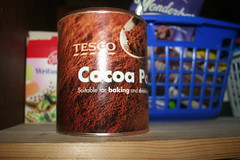
And that is it - from a cocoa tin to a pinhole camera in five simple steps.   


  >>>>> 


Now, to actually use your pinhole camera, you need light sensitive paper. It is available from brands like Ilford. However, to load your camera with the film, you have to operate in total darkness or under red light. So measure your container and make a template from which you can cut the light sensitive paper to size. In darkness or red light open your pinhole camera and insert the paper on the opposite side to the hole/lens. Secure it in place with blue tack. Shut the lid again and stick masking tape around the rim to make sure it is light-tight. Your camera is now ready for shooting. 

Working out the exposure time requires a maths degree - so experimenting is the way to go for those of us who can't get their head around numbers. I think it is going to take at least a couple of minutes for my camera. 


Once you have shot a picture with your camera, you can only retrieve the paper in dark or red light conditions and then develop it. Hehe, but you have to work that out yourself... There are plenty of sites on the web, though, that give you more information on this if you are intrigued. Mr Pinhole can help you work out your exposure times. Pinhole.cz has lots of info on pinhole cameras. 


Have a hole lotta fun!!!