Why, hello! What do I suddenly notice? I have gained two subscribers in the last day and now have 100 followers!!! Wow - that is a milestone for me. So let me take the opportunity and say hello to all the recent new followers who signed up for this blog - while I was absent and living it up... Sorry that I haven't said hi to all of you. I usually make an effort and visit my new followers' blogs to thank them for joining - and to check whether there are any new blogs out there that I need to add to my own blogroll. However, over the summer, when I was relaxing after a stressful end of term, I let it all rest. So be welcomed to my blog, all of you. Keep the comments coming - they motivate me to go on and they make my day.
As regards the future: I have just started my second year in my photography BA. Experience tells me that things will get hectic before Christmas. Well, I better get some projects in before that, then, because I intend to keep the blog up and running and not slip back into oblivion.
Ok, Christmas sweeties are already in the shops here. I know, nothing new, happens everywhere. And yet every year I am surprised when I bump into gingerbread stars, Christmas puddings and chocolate Santa Clauses at the end of September. Frankly, I think it is sick!
However, today I am appealing to you to do some of your Christmas shopping early. My excuse is that I want to highlight an extremely good cause. I have just come across the etsy Europe for Charity store.
There is a large variety of beautiful, hand-crafted, totally individual items for sale in this shop, that the talented crafters have donated for charity. All the proceeds from the sales go to the flood victims in Pakistan.
Just at first glance I saw some must-have items for sale there, for instance the beautifulporcelain button by Annemiek from TwoTreesBelgium (whom I incidentally happen to know personoally and who is making the most amazing, delicate, yet cute porcelain pieces. She also keeps a blog where you can learn more about how she creates her pieces of art: Two Trees.) Or theselovely spherical earrings which would cheer up my day every time I put them on. Or the most stylish sewing kit EVER. Seriously, you can get your Christmas shopping done in a matter of seconds AND you are supporting a fantastic cause.
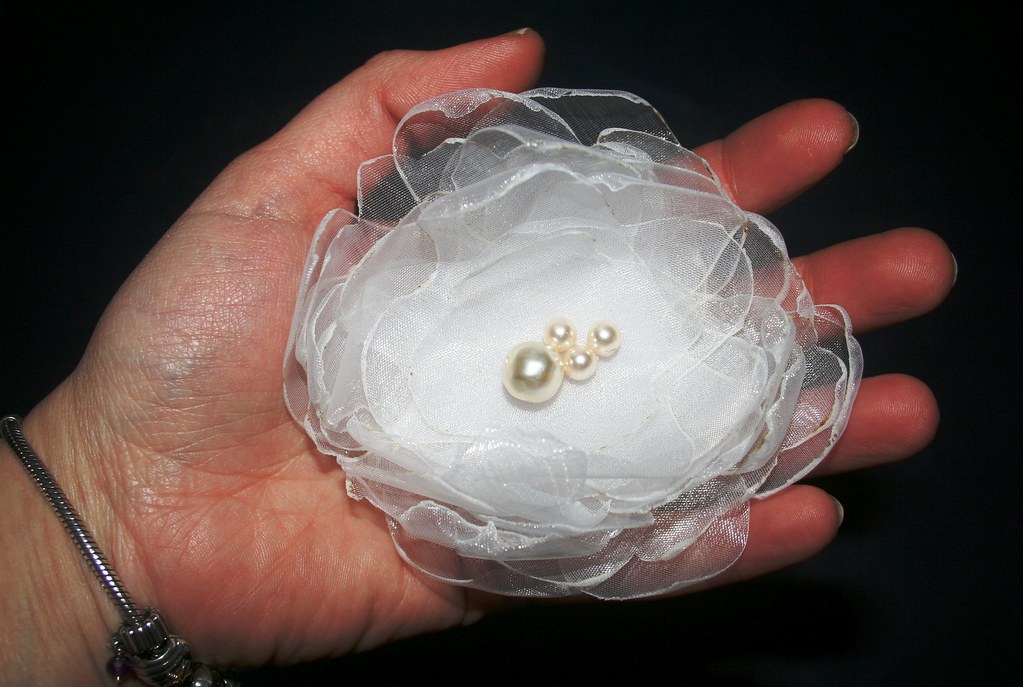
Also: There is another way of doing good. Chances are that you, dear readers, are gifted crafters, too. Have you thought about donating a piece of your work to the charity initiatives on etsy? It had passed me by that this was happening now, but a few months ago I took part in the Craft Hope for Haiti charity sale and within hours my flower corsage was sold.
Maybe I'll find something hand-made which I can contribute to the sale. Otherwise: Go buy and help!
Oh, and if any of you readers decide to put something up for sale in the Charity shops - please let me know. I would love to highlight the cause, the shop and of course you and your blog!
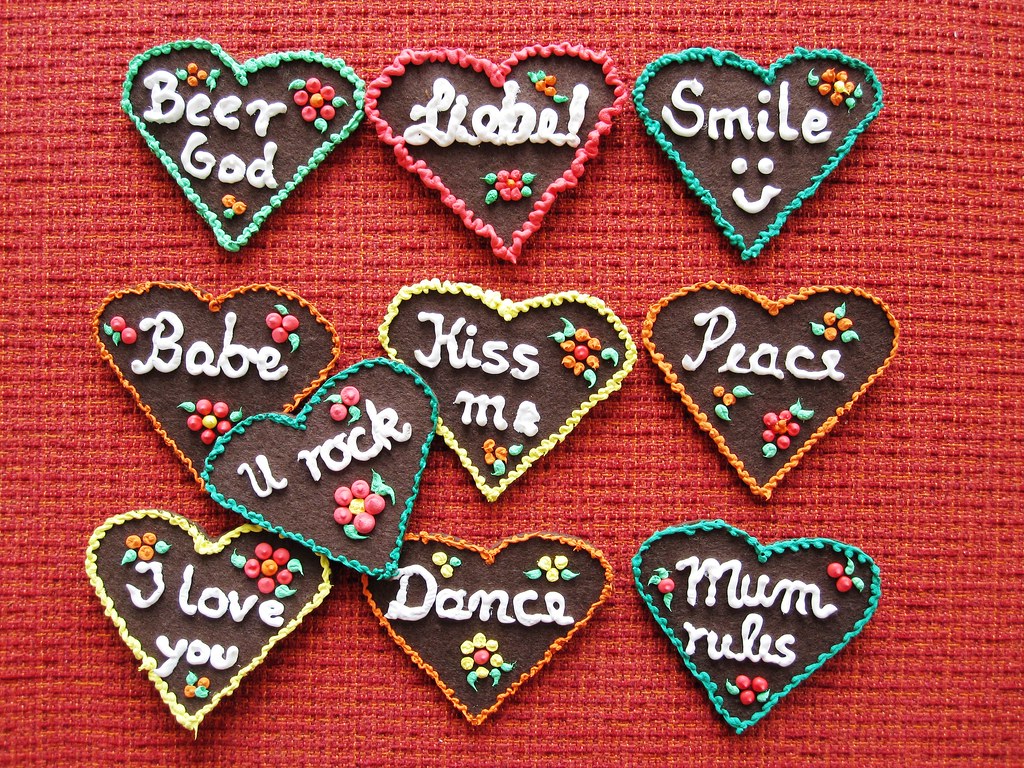
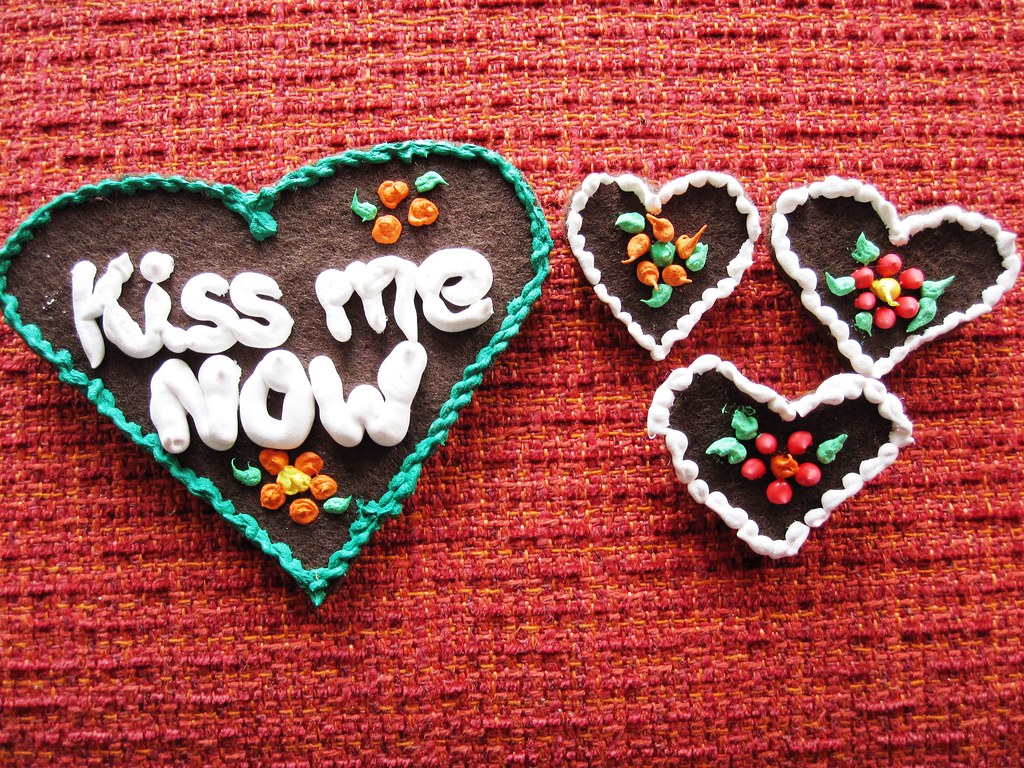
While I am practicing a bit of absenteeism from my blog, I have nonetheless been quite industrious. Making those gingerbread hearts has become a bit of an obsession, and over the last week I have made about 50 of them.
To see how they are made, click HERE. The more you make, the better you get at writing with that awkward bottle of puffy paint.
And finally I have also got my hands on a real gingerbread heart. I received a parcel today from my colleagues who are based in Munich, home of the Oktoberfest. As I am missing the mess fun that is the beerfest, they put a gingerbread heart and some yummy chocolates in a box to lighten up my beerfest-free autumn in Ireland. So you can see, my little brooches are a fair enough-copy of the real thing. (Disregard what it says on the heart - this one is actually an advertising gimmick, handed out by a company. It says "Dialogue connects" - *umm*, well...)
I will hopefully sell some of these through a friend who has a stall on the Dublin Oktoberfest. As my gingerbread hearts are quite large, I made a few small ones as well - too small to write a witty slogan on it, but big enough for a cute flower. Sorry, bad picture quality - here I am sporting one of my hearts.
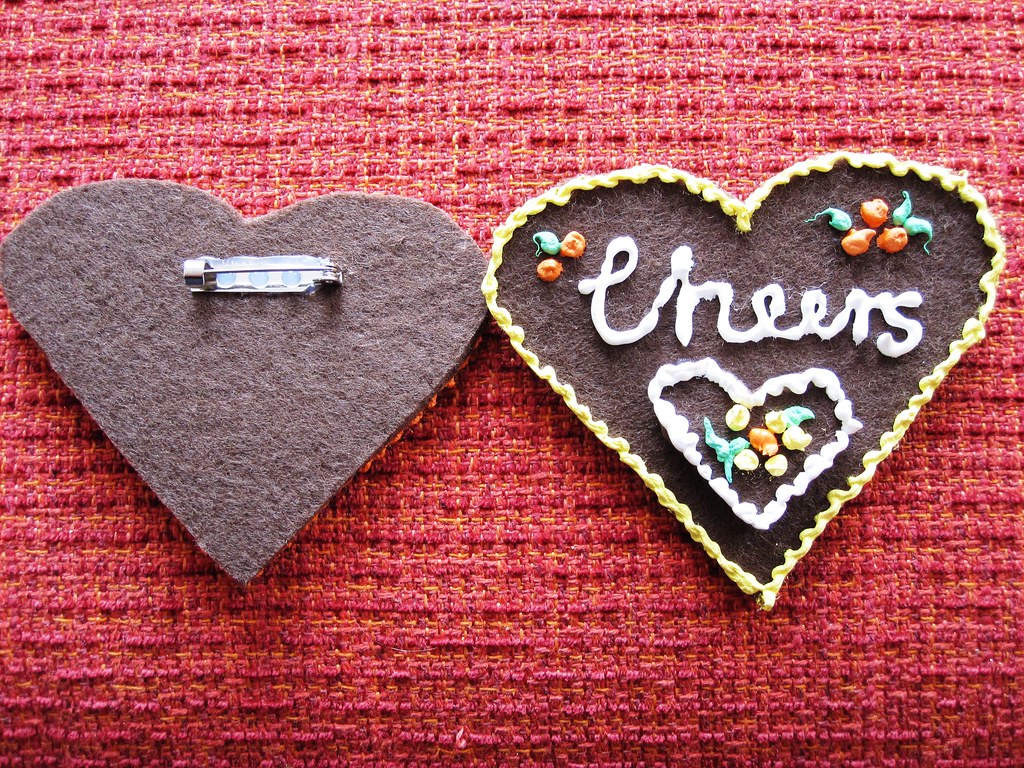
As a post-scriptum I have taken a picture of the back of the brooches - I simply hot-glued the needles onto the felt and they are attached firmly.
Anyway - I had a couple of comments on my brooch yesterday and continue wearing it. If nothing sells, my daughter and her friends will be very happy :-).
I leave you with the thought of the day:
Best,
Linking to "Get your Craft on" at TODAY'S CREATIVE BLOG and...
I know, it is still September, but right now the well-known annual beerfest in Munich is on again. In German it is called "Oktoberfest" - despite always happening in the month of September. Very unlike the usually pedantically correct Germans to misnome their festivals... (There is an explanation for that, of course - the first Oktoberfest occurred on the 12th October 1810 on the occasion of the wedding of King Ludwig I. of Bavaria to his wife Theresia. It became an annual event - which was eventually moved into September because the weather is nicer then. If you want more info on it, check this site: Oktoberfest.de/)
Anyhow, no German fun fair without the traditional gingerbread hearts. They come in all sizes - depending on how much you love the person you intend to buy it for. And they usually have corny slogans written on them, such as "Darling" or "Kiss me" or "Beer God". You can eat them, too, but they are mass-produced, cheap gingerbread decorated with sickly sweet icing - I usually let them collect dust for a while put them on display, and then discreetly dispose of them uneaten.
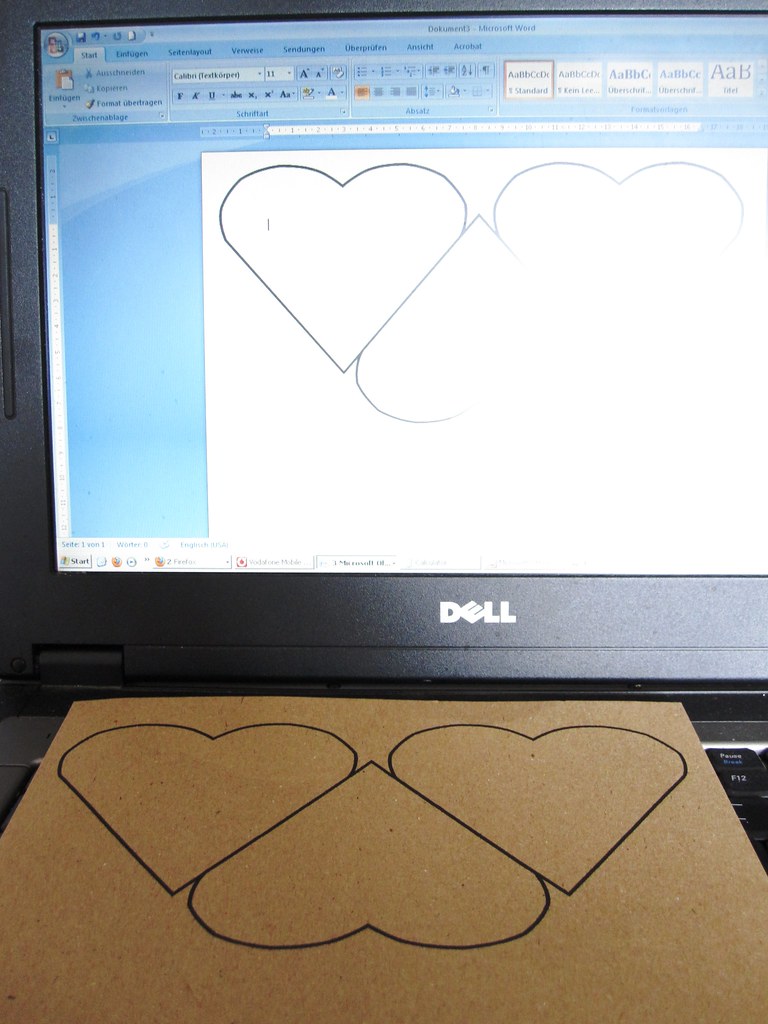
They are kind of sweet, though, and to make them last longer, here is a little crafty idea: With a little bit of felt and some puff paint, you can make them yourself. Nice decoration - and no calories *grins*. I started out by creating a heart template in Word. You can download it here in Scribd, if you want it. Hearts Template
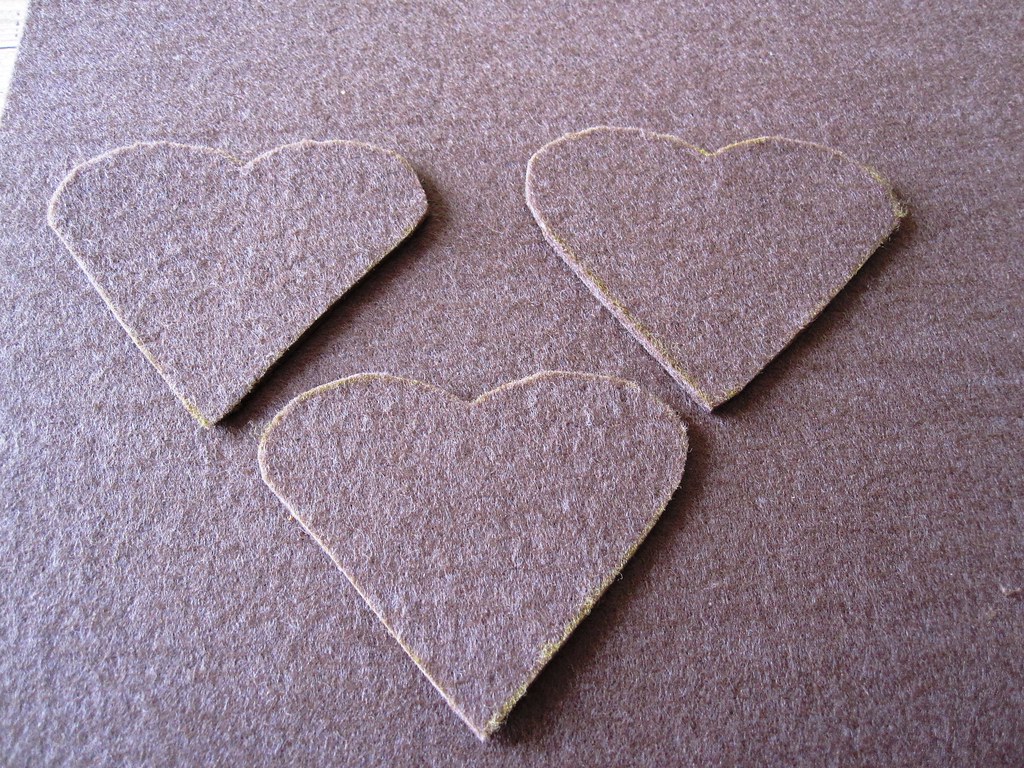
Having printed my template on a piece of card and then cut it out, I traced around it on my background material. The material is 3mm thick felt - nice and sturdy, just the right colour for gingerbread. I used a golden gel pen to trace onto the felt - it came out very faint, which makes it hard to cut around it later. White pencil works better, I found out later. You need a good, sturdy pair of scissors to cut through the thick material! (My index finger still feels numb after cutting out 20 hearts last night... *ouch*)
Now for the fun bit. I had ordered some puffy paint for this project. This is the first time I have used the paint - and it is not quite as easy as eating a gingerbread heart. Ok, the paints come in a nozzled bottle with which you directly paint or write on the surface. But the difficulty is that you have to squeeze the bottle while writing - resulting in rather squiggly lines. Ah well, first try.
Once you are happy with your design, you let the paint dry for at least six hours. After that you puff up the paint by placing the hearts in the oven at 150°C. The instructions say that the paint only needs 10 to 60 seconds to puff up, however, I found with my gas-oven, that it needed much longer than that. But well, that could be my temperamental oven... You can also use a hairdryer and fluff the paint with that.
I didn't take any pictures of the last step - hot glue a brooch needle onto the back of the heart, and off you go, celebrating Oktoberfest.
I'll be making many more of these in the next few days as I have been asked to supply some crafts for a stall at the local Oktoberfest. Hopefully I will master the art of squeezing the bottle and create a few sleeker hearts.
Mid-September and I see many blogs already busy with Halloween decorating. *umph* not really my type of thing, I have to admit, even though the whole Halloween thing-a-ma-jig originates in my host country, Ireland. But well, my latest project happens to fit the season pretty well...
If you are a regular reader, you know by now that I am quite concernedobsessed with recycling. That is partly due to the fact that I once had a summer job working on a rubbish dump. (Don't ask!) The amount of trash that goes into landfill is just mindblowing! I won't bore you with statistics, but I can see from our household alone that 21st century human beings generate more rubbish than ever. While we recycle as much rubbish as possible, it still bugs me that there is so much plastic material being thrown away. Hence my interest in reusing packaging materials.
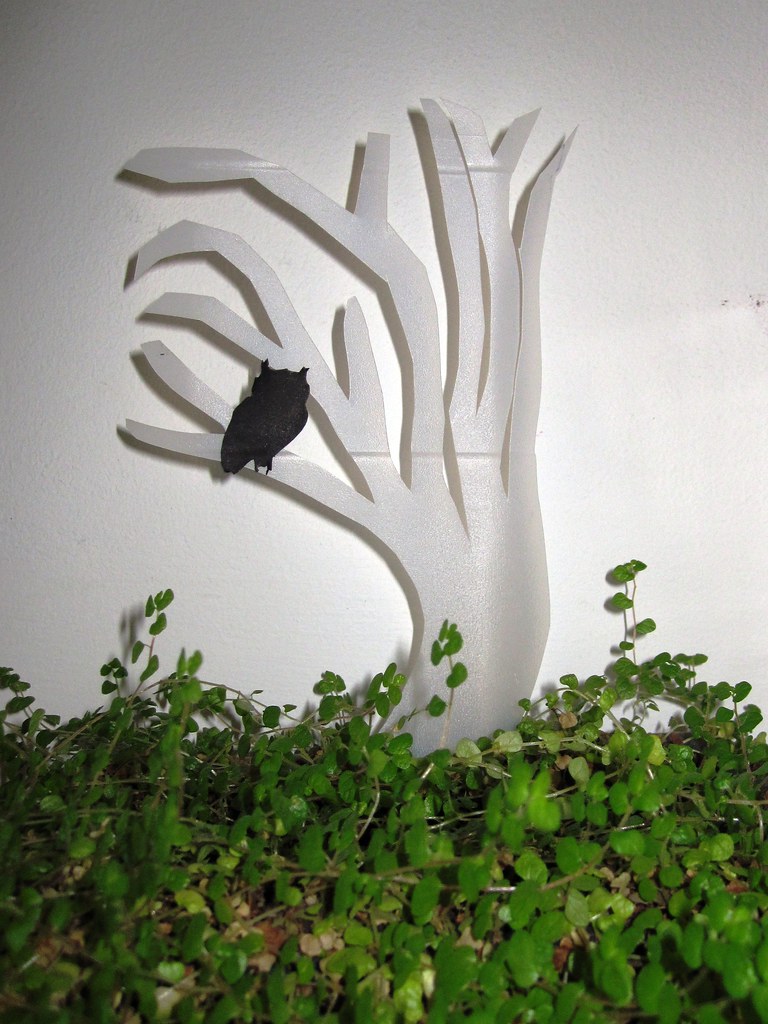
With one two-litre-bottle of milk every day, I had built up quite a stash of plastic to work with. I had great plans for a project - which unfortunately didn't turn out the way I wanted it to. I had to find a way of using the cut up pieces of plastic - and this is what I came up with: a simple spooky silhouette to stick into your flower pots.
Here's what I did: First of all I cut my milk bottle to get a flat piece of plastic.
Catering for the Halloween theme, I decided on a spooky tree shape. A tree is pretty easy to cut, so I basically free-handed it. But you could always print out a tree shape from cliparts, transfer it to the plastic and then cut it out.
Note that I cut a zigzag at the bottom of the tree - that's for easier sticking the silhouette into the flower pot.
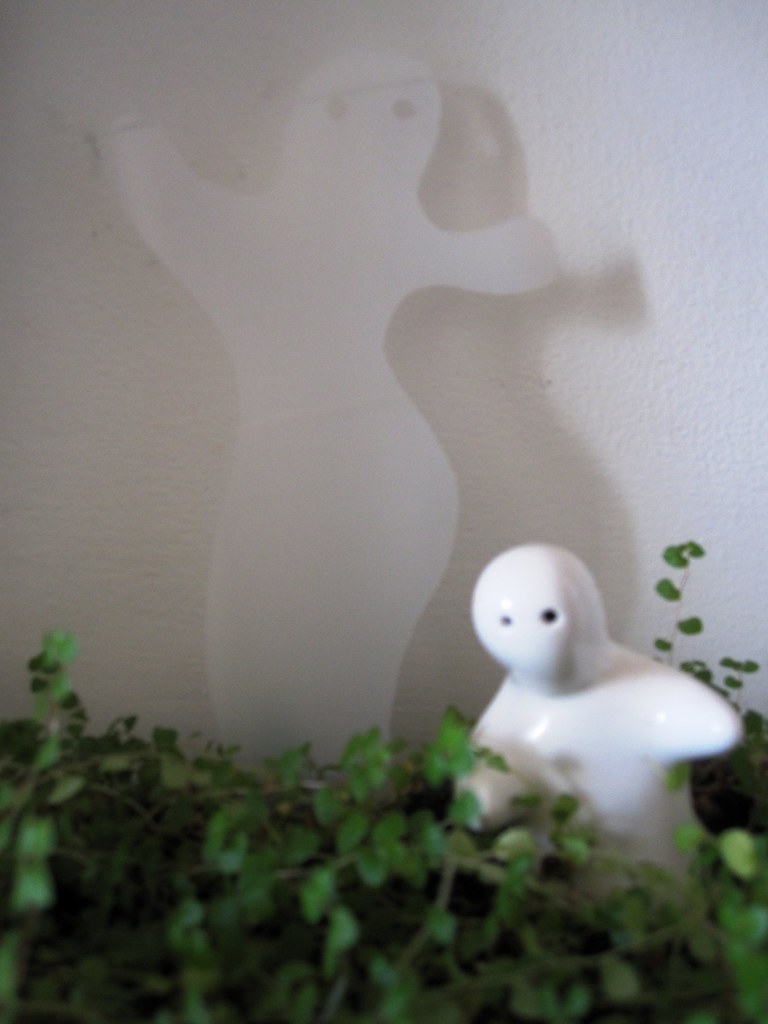
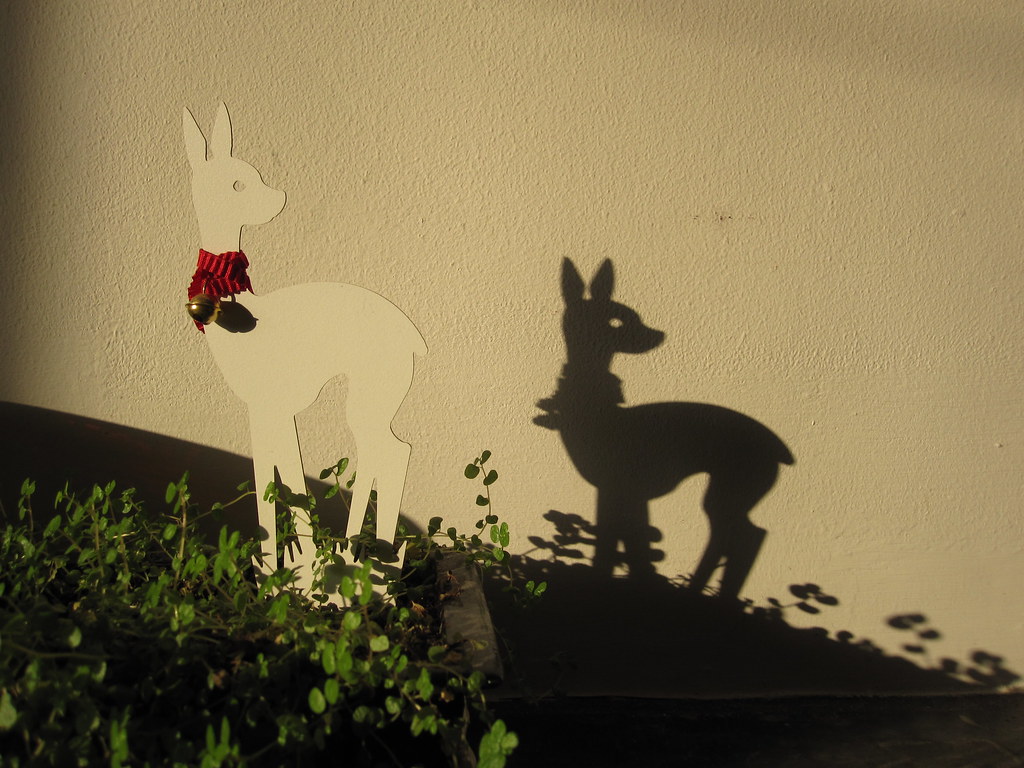
I actually quite like the silhouettes white and without further decoration. I have a beautiful shop-bought one of a little fawn that creates a beautiful shadow on the chimneybreast when the sunlight catches it on my kitchen mantlepiece. The silhouette itself pretty much blends into the white background, but the shadow it creates against the wall is really surprising and lovely.
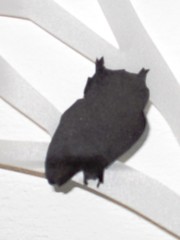
But to make it a bit more fun and stand out a bit more for illustration purposes, I cut out an owl from black paper and stuck him onto the tree.
I also tried my hand at a ghost. Whoa, this looks like a curvy bombshell of a she-ghost *lol*. Dancing lambada or something... Ola!!! Again, I cut her free-hand and then used a punch to make her eyes.
Sorry, there was no bright sunlight in my kitchen this afternoon, so the silhouette and shadow do not stand out as much as they should. I guess you could always give the silhouettes a coat of black spray paint to make it fit the dark and spooky Halloween theme. But anyway, there you are - using rubbish to prettify scarify your home.
While making over my blog the other day, somehow the new template I used ignored my previous geeky additions. And so I discovered with dismay, that my pride and joy- the favicon - had vanished. Oh no! So I had to do a bit of housekeeping and re-launch my little badge of geekiness. Took me a little bit of time and effort to restore the scissors into the code, but I managed - not least with the help of my own post on the topic *haha*. Click HERE if you want to learn how to distinguish your blog with a favicon.
And while I am at it, there is another little housekeeping item. I am happy to announce that my modest little project on lavender wardrobe fresheners was featured on Stephanie's Under the Table and Dreaming blog. *yay* Another button for my list on the left proudly displayed.
If you haven't yet discovered Under the Table and Dreaming, then take the opportunity and check the blog now. Stephanie hosts a blog linking party every Sunday - a treasure trove of cute and original ideas.
I really don't want to let go of summer. But slowly autumn is creeping in... The days are so much shorter already. When I get up at 6 am, it is dark outside. And by 8 pm it is night again. Although we have had some sunshine recently, temperatures have dropped to 15 to 18°C. And the virginia creeper on the terrace of houses next to us has already turned dark red. So it is time to face the facts - autumn is upon us.
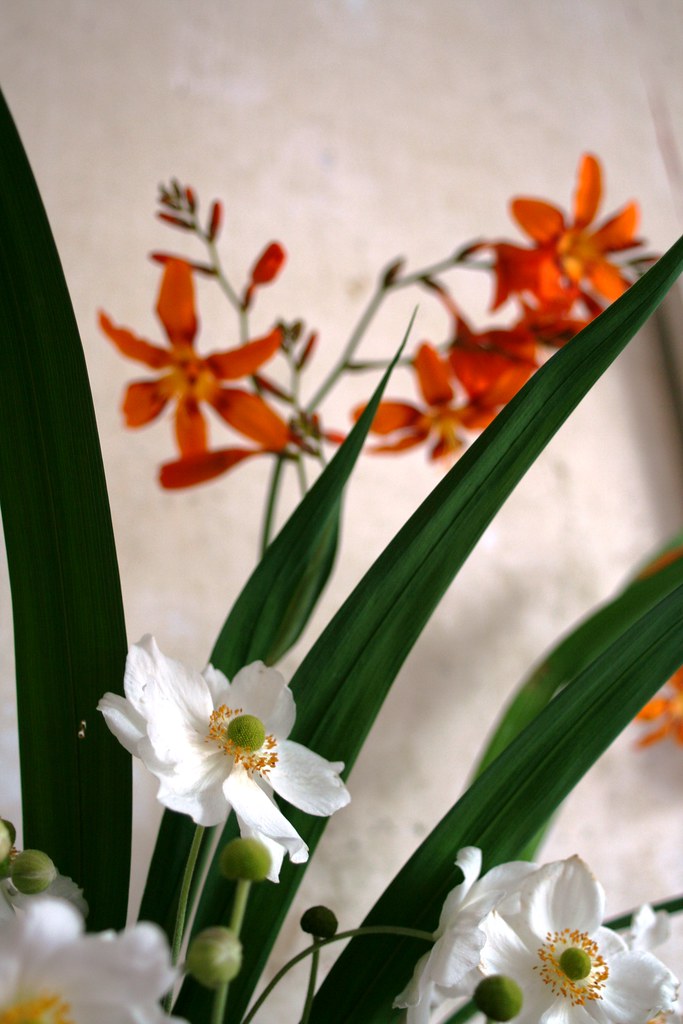
Today I picked the last flowers from the garden. And they seemed to have put their last bit of energy into their blooms. The mombretias were bigger than ever.
I cut a few of them and teamed them with those lovely Japanese daisies.
(A little exercise with shallow dof - can't resist photo experiments, sorry...).
Not only did I ignore my blog for a few months, it also passed me by that I had my one-year blogoversary in June!!! I started this platform for showing off sharing craft and recycling ideas on the 15th of June 2009, not realising that I would get sucked into a whole new world that I had no idea it existed. My first post was a modest little button number (Click HERE to go back down memory lane with me...) Sweet. While I only posted intermittently at the beginning, quickly my ambition got piqued and I began to post on a regular basis.
Ok, so I missed the blogoversary. Nonetheless today I spontaneously felt that it was time for a blog make-over. Somehow the black background of the old Craft-Werk might have played a part in not attracting me back to my blog. So out with the old and in with the new!
This was then:
But this is now!
Ahhhhhhhhhh, feeling a revived interest already. I hope you like the fresher, friendlier, lighter look of Craft-Werk and will get used to it. By the way - the header image is a close-up of one of my earlier creations. Decorative, practical - yet total superfluous *hahaha*. Check my little pins from July 2009...
While I was at it, I also updated the "featured" buttons to their current versions. Looks like other blog owners are much better at re-designing and refreshening their looks. I will have to scan blogland and see what else is now the tech-wise must-have.
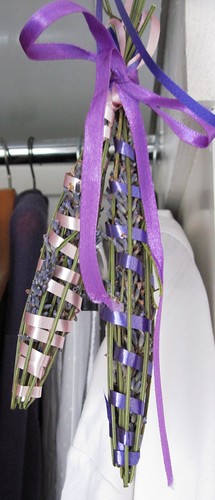
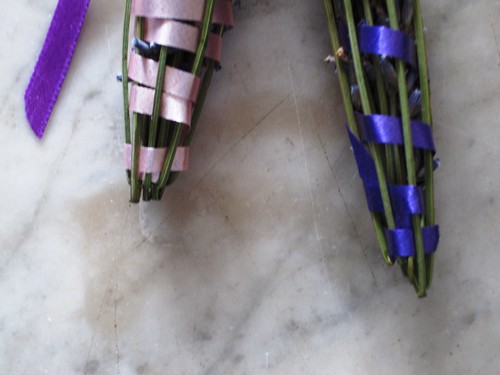
If I haven't been very crafty recently, then at least my daughter - the princess of crafts ;-) - has kept up the spirit. She recently came home with a little pressie for me that was incredibly simple, but decorative - and practical. She had picked some fresh lavender and then turned them into wardrobe fresheners. I wish I could somehow transmit the lovely scent the lavender passes on... Ahhhh, the last scent of summer... If it isn't too late for fresh lavender, you might want to try this, too.
I haven't got a proper how-to for this project, but it is pretty self-explanatory when you look at the pictures. All you need is a handful of lavender (with stalks) and some ribbon.
Make sure you pick long stalks. Bunch them up in your hand, arranging them in such a way that you get about 14 cm/6 inches of lavender buds at the top. Then simply bend the stalks back underneath the lowest of your lavender buds. The stalks should form a little "cage" around the buds.
Take some thin ribbon again about 14 cm/ 6" in length, and tie it with a simple knot on the break point of one of the lavender stalks. Now weave the ribbon in and out of the stalk "cage", spiralling up to the ends of the stalks. Tie them at the top. Fasten a nice little bow and a piece of ribbon, from which to hang you lavender bunch, to the top. Presto.
I think this is really cute and it certainly freshens up my wardrobe. If I had more of them, I would display a whole bunch of them somewhere. They would look nice in a rustic kitchen, or even bunched together in an apothecary jar...


