... where people connect across borders, different languages and topics. Most of the blogs that I follow are craft blogs - and they are the ones that are displayed in my blog list on the left. Check them out, there are really cool sites there.
I was particularly chuffed, however, to get a mention on a non-craft blog the other day. Notizblog is a blog by Tanja who showcases her fine journalism. Not only do I love the pun in the name of the blog (Notizblog plays on the German word "Notizblock", which means notepad - and is the journalists' tool of the trade), but what is really interesting here is that she writes about the things that do not make it into the usual journalistic articles. The funny situations and what is alluded to between the official lines... It's written in German and its main focus is the world of e-commerce and online news. Here's her blog post on Craft-Werk.
Bloggers of the world unite!
Tuesday, December 29, 2009
Thursday, December 24, 2009
Instant Christmas Centrepiece
When I started reading English-language decorating and interior design magazines, I could never get the whole fuss around the "Centrepiece". For each and every dinner occasion, the lady of the house would need a thematically suited "arrangement" - flowers or candles or whatever. Geeez, Germans are so straightforward - none of that fuss for us. Sit down and have your meal!
However, I have come to like that kind of careful decorating - even though I never really bother to do it myself. (Although that is due to lack of occasion *excuses*...) Here is an idea for a last-minute Christmas centrepiece. Not original, I guess, but it's a show-and-tell of my own Christmas centrepiece.

I actually came upon the idea when sorting through my Christmas ornaments in order to organise my tree decorations. About ten years ago I was given some antique, silver-coloured Christmas baubles. According to family lore they were bought by my great-grandparents when my granny was born in 1918. My granny passed them on to me when I moved to Ireland. They are very precious to me and for that reason have not been used on my Christmas trees very often.

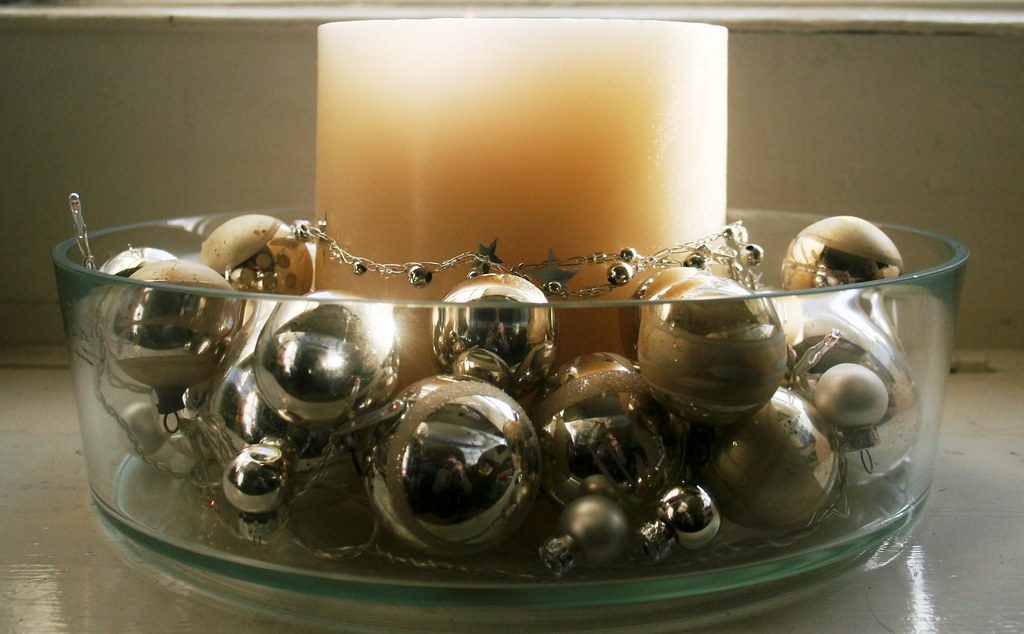
However, when I saw them I thought that they should really be put on display. Safely. So I grabbed a simple Ikea glass bowl and a block candle. I put the candle into the centre of the bowl and placed the baubles all around it. There were also battery-run, white Christmas tree lights which I wound around the candle, too. Instant centrepiece. I think it is very festive, very simple, very ornate and very nice...

Well, I am off to celebrate Christmas now. Frohe Weihnachten everyone! Happy Christmas!
However, I have come to like that kind of careful decorating - even though I never really bother to do it myself. (Although that is due to lack of occasion *excuses*...) Here is an idea for a last-minute Christmas centrepiece. Not original, I guess, but it's a show-and-tell of my own Christmas centrepiece.

I actually came upon the idea when sorting through my Christmas ornaments in order to organise my tree decorations. About ten years ago I was given some antique, silver-coloured Christmas baubles. According to family lore they were bought by my great-grandparents when my granny was born in 1918. My granny passed them on to me when I moved to Ireland. They are very precious to me and for that reason have not been used on my Christmas trees very often.

However, when I saw them I thought that they should really be put on display. Safely. So I grabbed a simple Ikea glass bowl and a block candle. I put the candle into the centre of the bowl and placed the baubles all around it. There were also battery-run, white Christmas tree lights which I wound around the candle, too. Instant centrepiece. I think it is very festive, very simple, very ornate and very nice...
Well, I am off to celebrate Christmas now. Frohe Weihnachten everyone! Happy Christmas!
Wednesday, December 23, 2009
Recycled Ornaments - Nightlight Stars
It's the day before Christmas. (Well, technically Christmas is the 25th of December, but as a child German, the most important day for me is Christmas Eve when we exchange presents.) And I can't believe that I actually have the time to craft something and to post it in my blog... Am I organised or have I forgotten something??? No, presents are bought, sitting room is decorated and presents are wrapped.
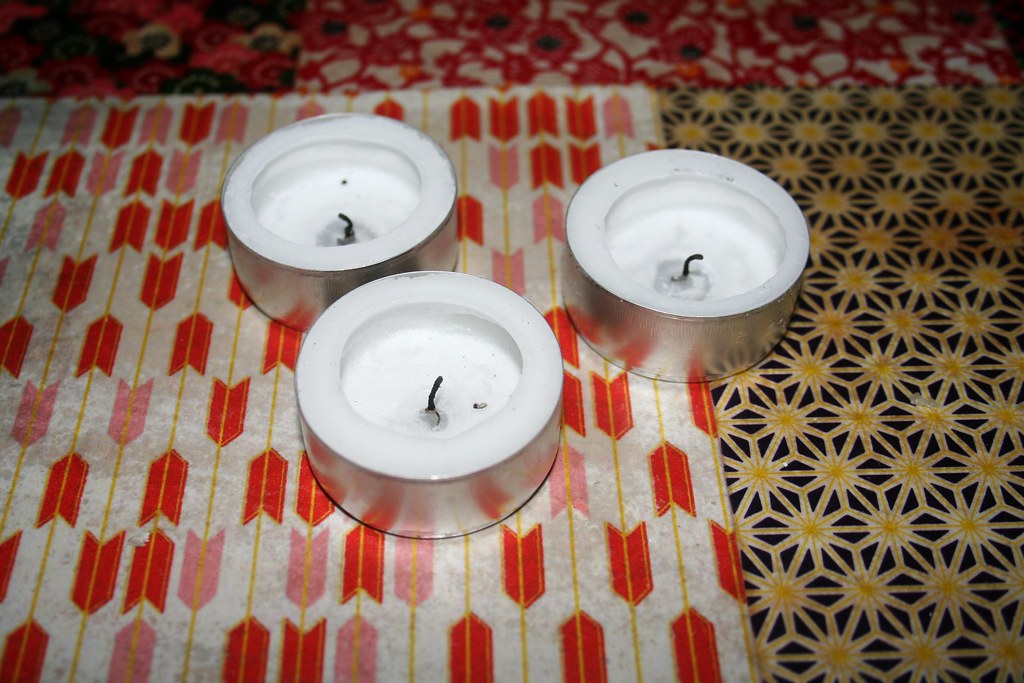
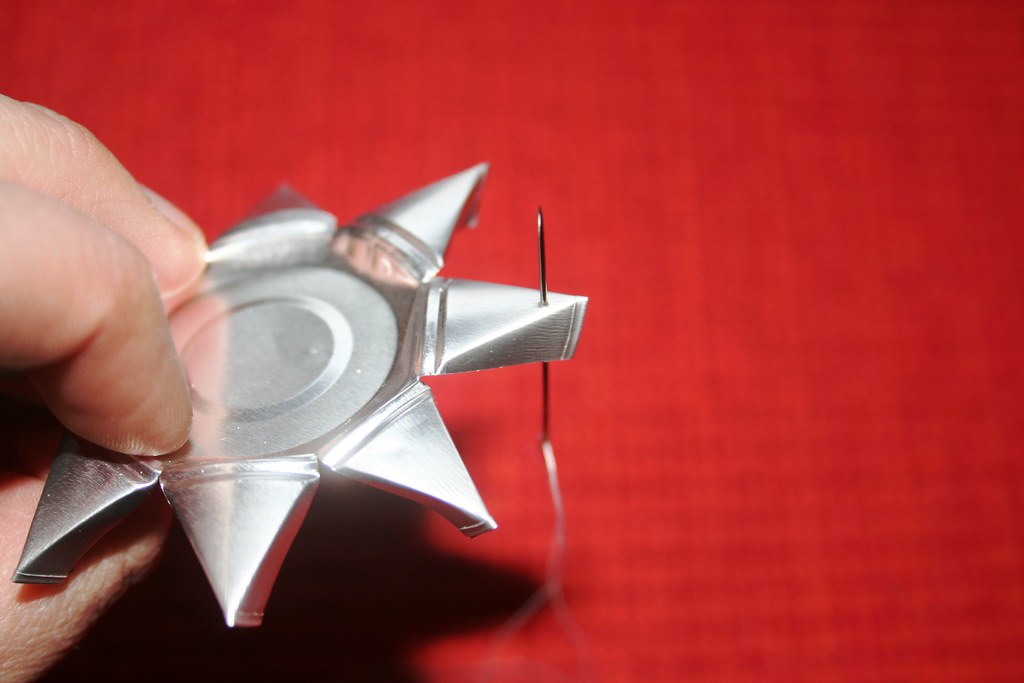
 Well, my project is a small one and a quick one. I just made a few nightlight stars. You know those little metal cups that nightlights come in? I have been going through loooooooooooooooads of them recently, as my kitchen advent wreath is decorated with four nightlights. They are lit every time we sit down for a meal, and so we go through a lot of candles. Apart from the fact that my nightlights are not very efficient - they seem to burn out in the middle, leaving a lot of wax behind - it has irked me that I always have to throw out the left-over wax and the metal bits, too. So I came up with a way of turning them into Christmas ornaments.

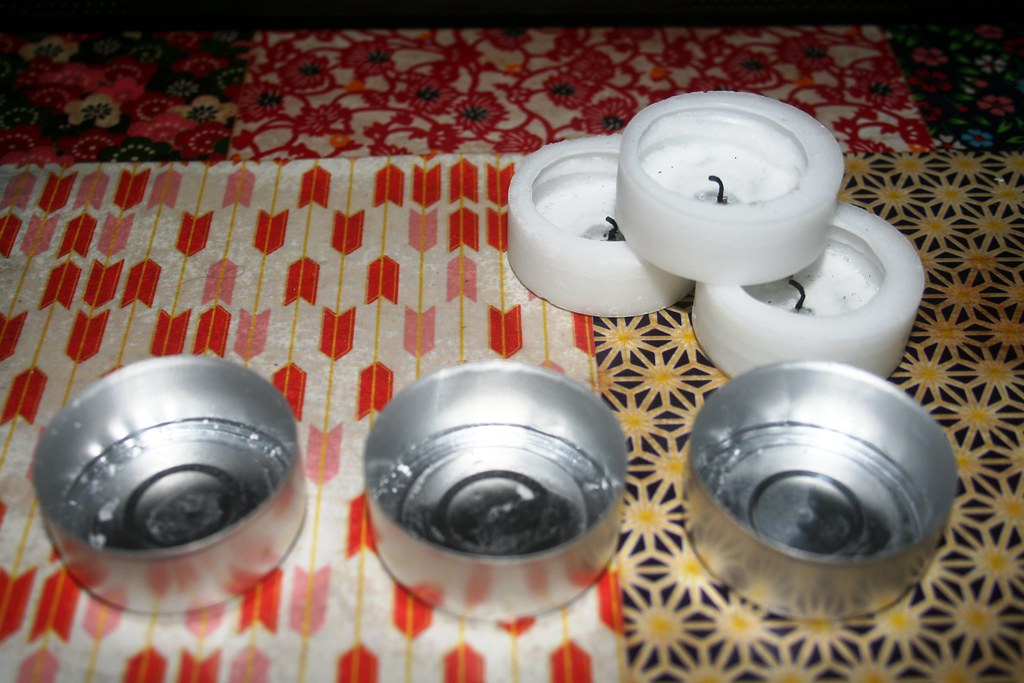
 Take out the left-over wax from the metal holder. If the wax hasn't melted too much, it should be easy to get the candle out and you won't have to clean the holder much.

With ordinary scissors cut into the rim of the holder. It is easiest if you start with two cuts opposite each other and then cut three more times, creating eight evenly spaced strips.

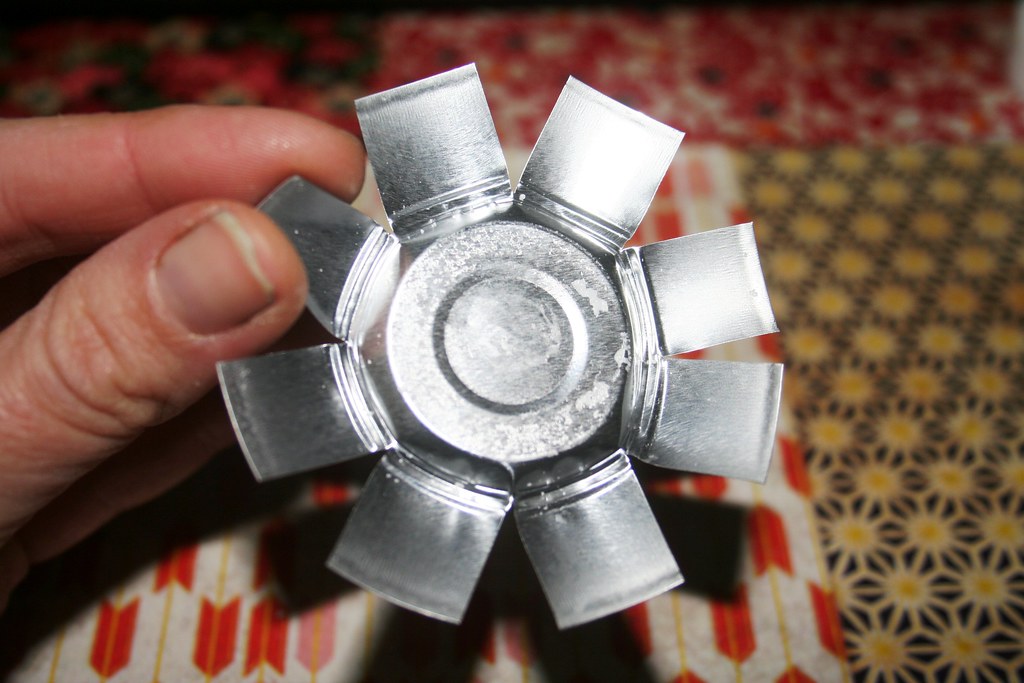
Flatten out the holder carefully. You now have a vague sun-shape.

Now take one of the strips between thumb and index finger and carefully squeeze in order to fold up the two corners of the strip. Do it with all eight strips. And you are basically done.

With a needle and thread you can attach a piece of string for hanging the ornament. It pushes through the thin metal fairly easily.
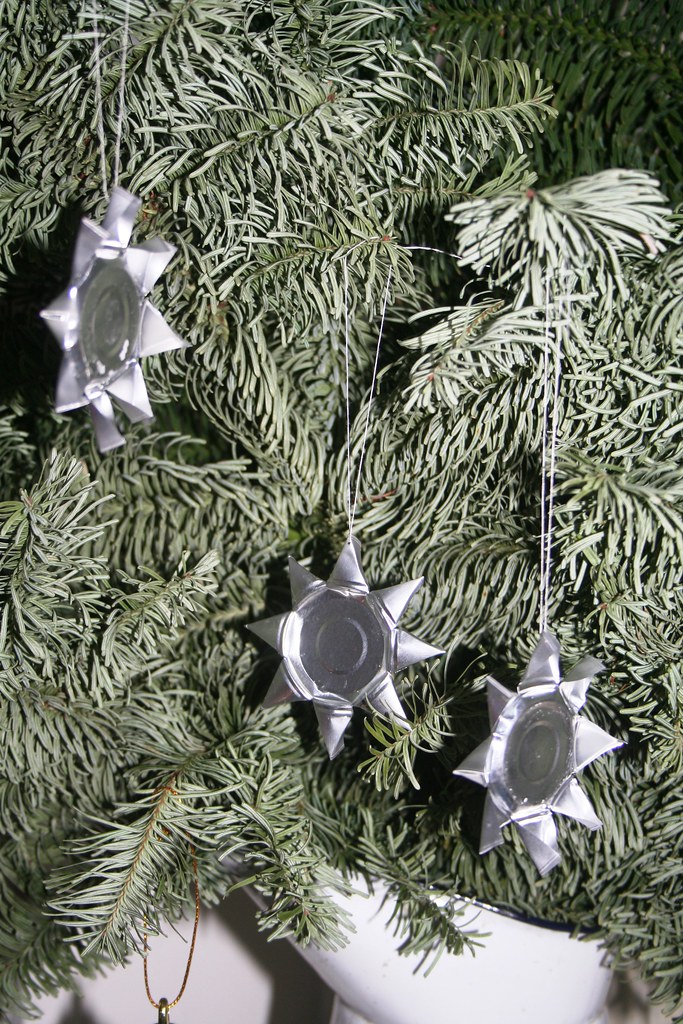
These stars are really simple. And I actually like the three-dimensionality of it. When you hang a few of them together, the produce a faint little "chink" when they touch... almost like the distant bells of Santa's sleigh approaching. (Or that is what I tell my daughter...) Best of all - they are completely free and making use of recyclable material.

 Well, my project is a small one and a quick one. I just made a few nightlight stars. You know those little metal cups that nightlights come in? I have been going through loooooooooooooooads of them recently, as my kitchen advent wreath is decorated with four nightlights. They are lit every time we sit down for a meal, and so we go through a lot of candles. Apart from the fact that my nightlights are not very efficient - they seem to burn out in the middle, leaving a lot of wax behind - it has irked me that I always have to throw out the left-over wax and the metal bits, too. So I came up with a way of turning them into Christmas ornaments.
 Take out the left-over wax from the metal holder. If the wax hasn't melted too much, it should be easy to get the candle out and you won't have to clean the holder much.

Flatten out the holder carefully. You now have a vague sun-shape.
These stars are really simple. And I actually like the three-dimensionality of it. When you hang a few of them together, the produce a faint little "chink" when they touch... almost like the distant bells of Santa's sleigh approaching. (Or that is what I tell my daughter...) Best of all - they are completely free and making use of recyclable material.
Last-Minute and Recession-Buster Gift Wrap
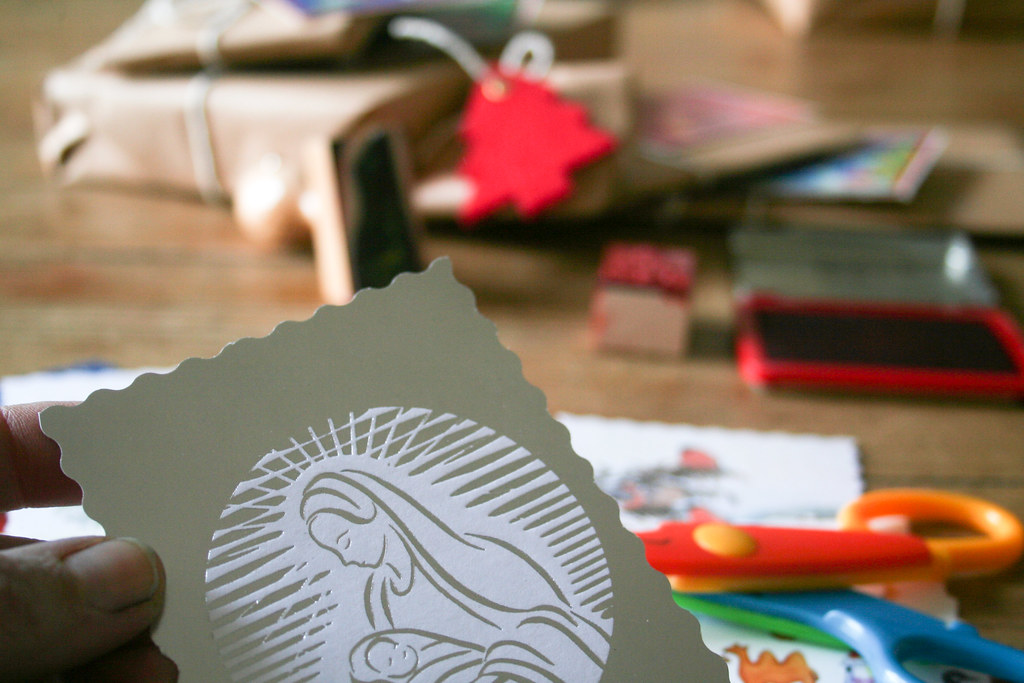
The countdown to Christmas is nearly there. Christmas tree chosen? *ticks* Last big shop done? *ticks* Money spent on presents? *ticks* All presents wrapped? *ti... eeeeeeeeeek* It's the day before Christmas and you haven't got any gift wrap in the house. No need to worry, there are other ways of wrapping the gifts nicely. And chances are that you have all the "trimmings" for it at home, anyway.
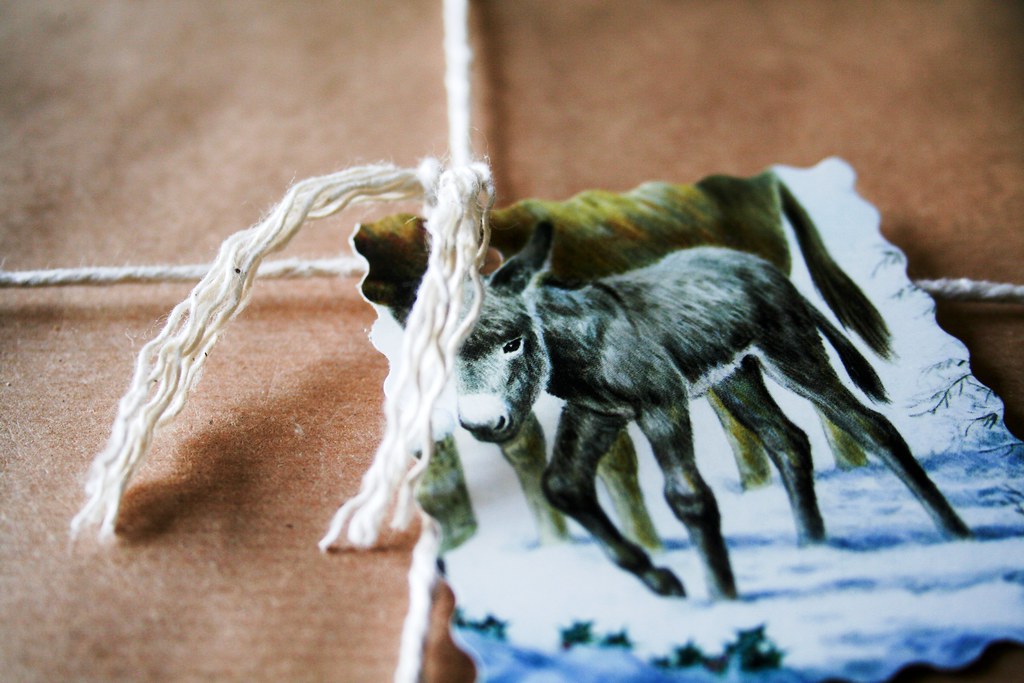
I am well in time with my gift wrapping. All done, actually. And technically I was not trying to beat the recession by choosing cheap gift wrap. It's more of a style statement than a financial decision. I just find that brown packing paper is the new burlap *grins*. Seriously - brown paper can look so nice. And it leaves you lots of scope to decorate with string, stickers, stamps, bows and whatever you have at hand.Here is a sneak preview of the 2009 Christmas wrapping style in the Royal household:
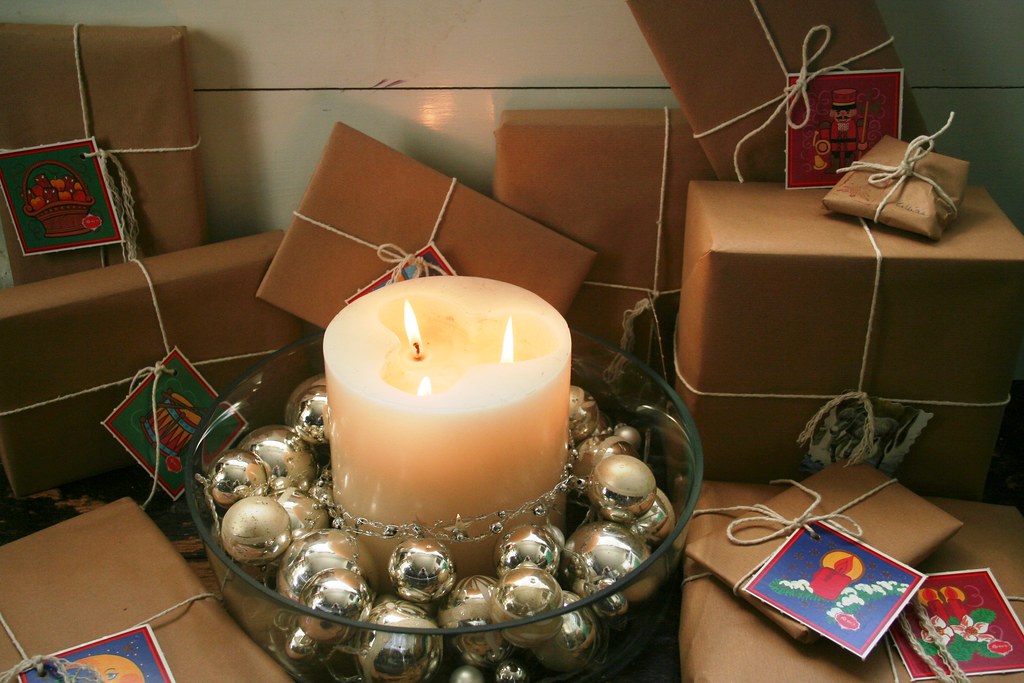
I bought a roll of packing paper for € 3.98 and some cotton twine for € 1.98. I wrapped all presents in it and put the twine around them for a rather simple, traditional, almost post-y look. The sparkle and the glamour is added by the gift tags.
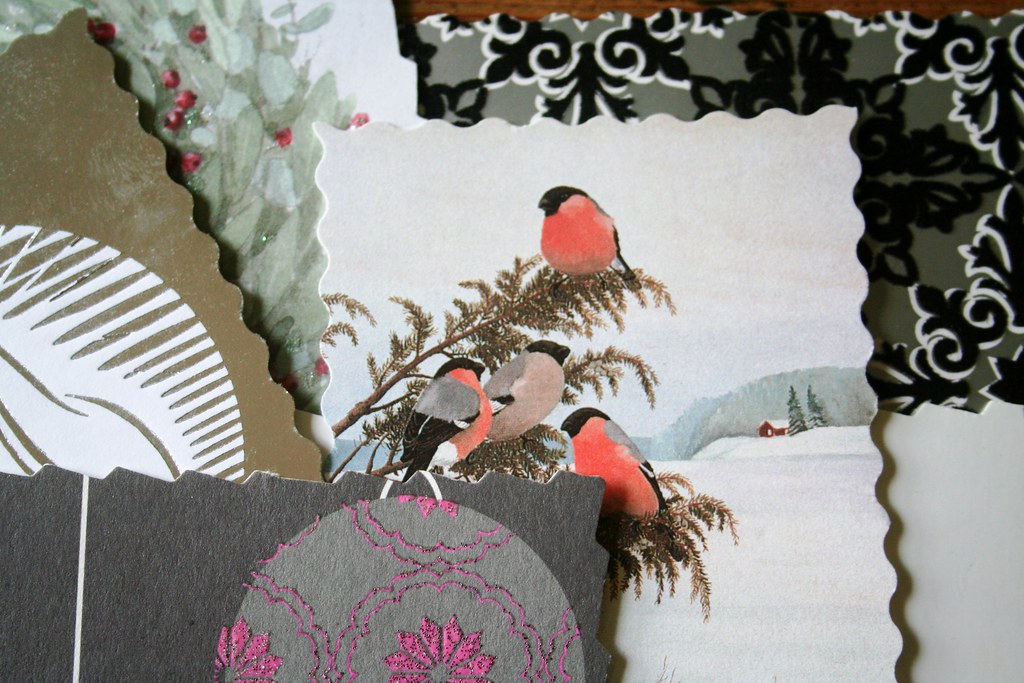
How many pressies did I wrap *thinks*. Not sure - maybe 40? It only cost me € 5.00 - and I still have lots of brown paper left to wrap parcels.
I was featured on Remodelaholic
I was just checking my blog before going to bed and realized, that one of my projects was featured on another blog. And what a nice blog it is... I am very happy to recommend everyone to check out the talented Cassity's blog REMODELAHOLIC

Recycling - reusing - remodeling - all right up my street. For the past while Cassity has been trying out lots of paper Christmas projects. My paper stars fitted right into that and she has given a blog post over to it. Check it here.
I am particularly taken by her first project in the series, but I also spent a long time reading up on her remodeling posts.
Thanks, Cassity!

I am particularly taken by her first project in the series, but I also spent a long time reading up on her remodeling posts.
Thanks, Cassity!

Tuesday, December 22, 2009
Christmas Window Decoration - Kid Proof
I really had to step away from the internet this weekend - and finally enjoy Christmas time after handing in all my assignments. So I never got round to updating the blog with the post that I uploaded some pictures for on Friday. Here we go - not too late yet for some Christmassy decorating. And you can even involve the kids in this, as it is easy-peasy.

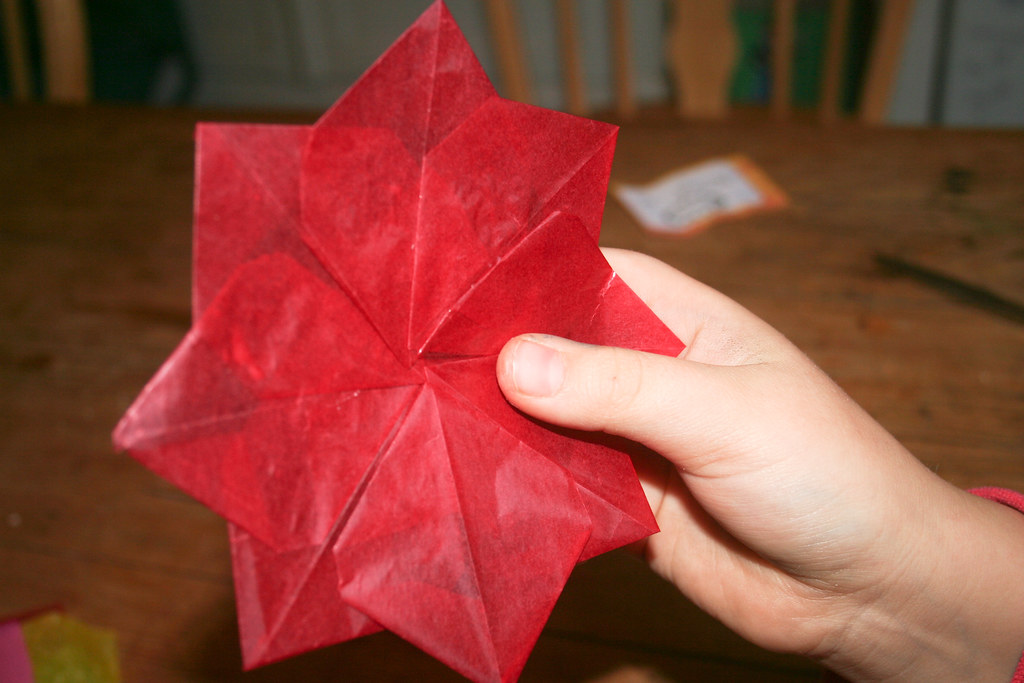
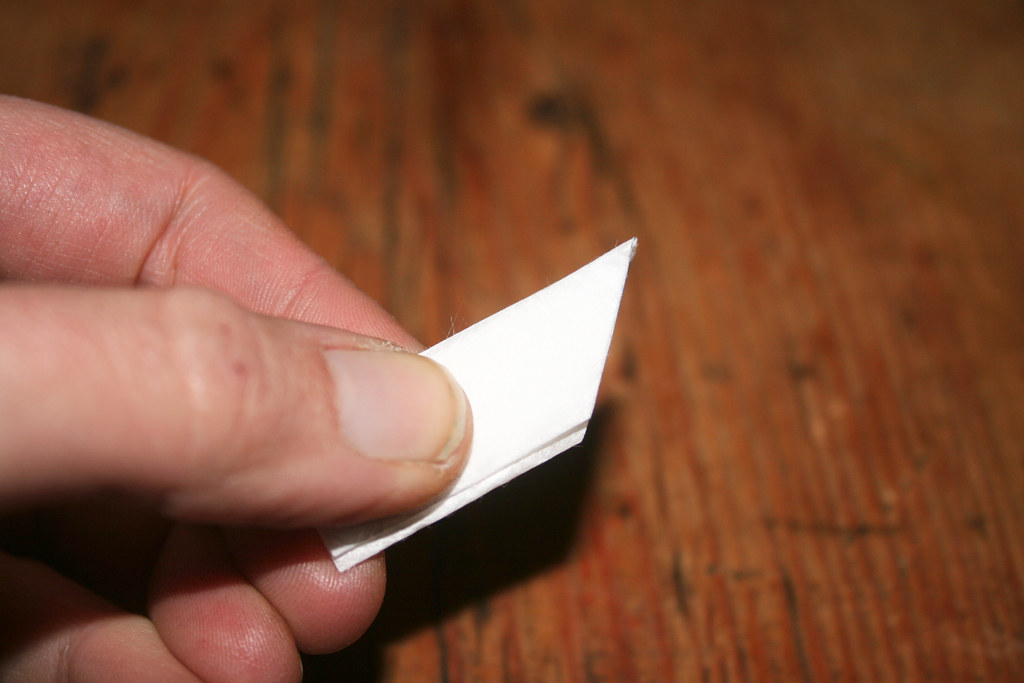
It was actually my 8-year-old daughter who showed me how to do this. She took some translucent paper and cut it into eight rectangular pieces. (If you want to, you can be all exact and tidy with this - she wasn't and the result was still nice - or is that just Mama's forgiving and proud eye???)

Then she folded them down over to find the middle of the paper.
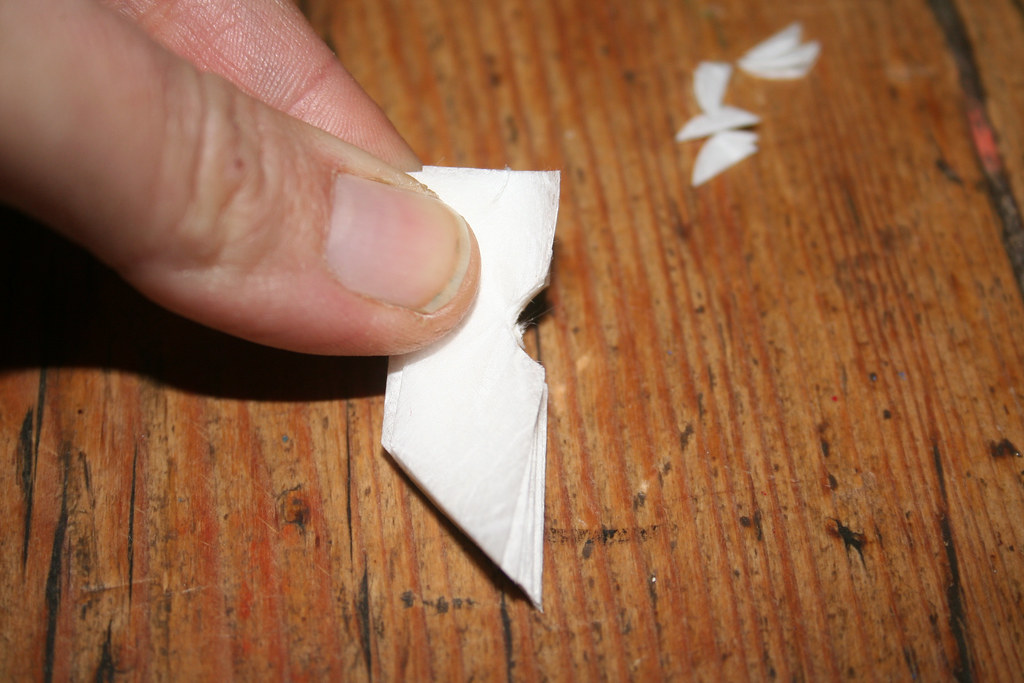
 Using the fold line as a guide, she then made pointy bits. Never mind if it looks like in the picture left - the finished project still looks like a star! Fold all eight pieces of paper like this.

 Again using the first, middle fold as a reference point, stick one star piece onto another. A glue stick will work fine. Do this with all eight pieces!
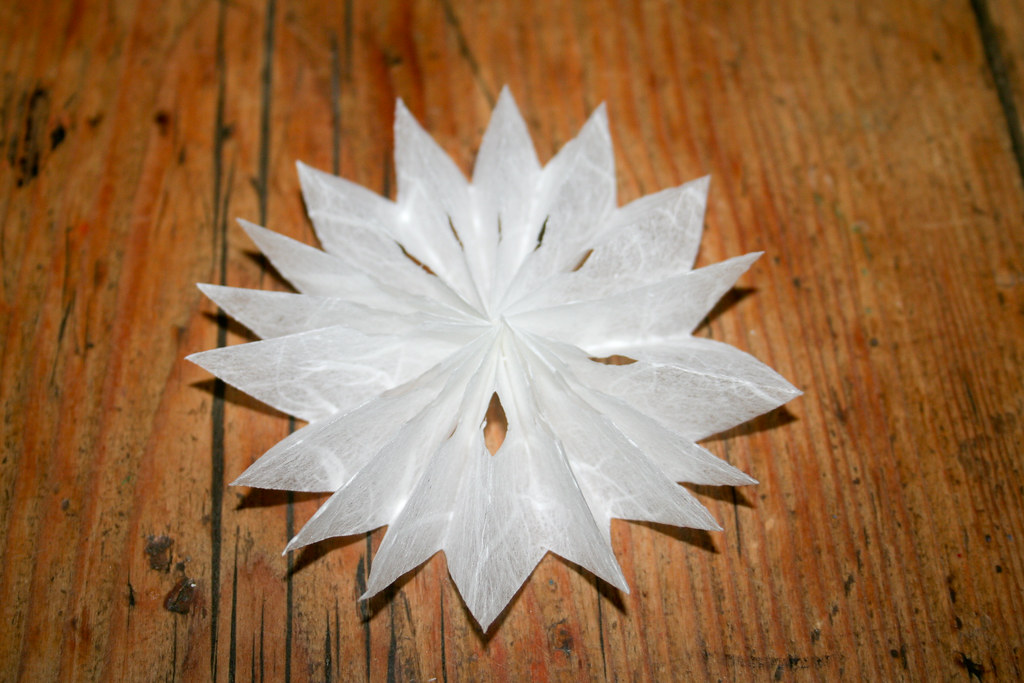
In the end you have an eight-pointed star like this:

While it looks a bit irregular, once you have stuck it against the window, it is quite pretty and the overlapping bits of translucent paper create a nice, regular pattern.
Happy Christmas, everyone!


It was actually my 8-year-old daughter who showed me how to do this. She took some translucent paper and cut it into eight rectangular pieces. (If you want to, you can be all exact and tidy with this - she wasn't and the result was still nice - or is that just Mama's forgiving and proud eye???)

 Using the fold line as a guide, she then made pointy bits. Never mind if it looks like in the picture left - the finished project still looks like a star! Fold all eight pieces of paper like this.
 Again using the first, middle fold as a reference point, stick one star piece onto another. A glue stick will work fine. Do this with all eight pieces!
In the end you have an eight-pointed star like this:
While it looks a bit irregular, once you have stuck it against the window, it is quite pretty and the overlapping bits of translucent paper create a nice, regular pattern.
Happy Christmas, everyone!

Friday, December 18, 2009
Recommended: Ikea Hacker
Whoa - finally I can relax and enjoy Christmas. My first semester is over and all projects and assignments have been handed in as of yesterday. So time to update the blog a bit because Craft-Werk has suffered badly in the last while.
 While I am uploading pictures of a little project on flickr, let me give you a recommendation here today. One of my regular blog stops is this fantastic blog called Ikeahacker. Well, it does what it says on the tin: It shows crafty re-purpusing of Ikea items. These can be big projects like a cat litter in a cupboard or just a simple advent calendar made from a tab-top curtain. Yep - that sounds familiar, because yours truly has submitted her project for fellow Ikea hackers.
Go on, check the site - it's really cool what people come up with. Ikea is just fantastic. Not only has it good design at great prices, but the items there can be used in such versatile ways...
Friday, December 11, 2009
Delicate Paper Stars


You need strips of thin paper, scissors, needle and thread, a glue stick, and a punch. My strips of paper were about 3 cm wide and about 40 cm long, but you could theoretically use any width of paper.
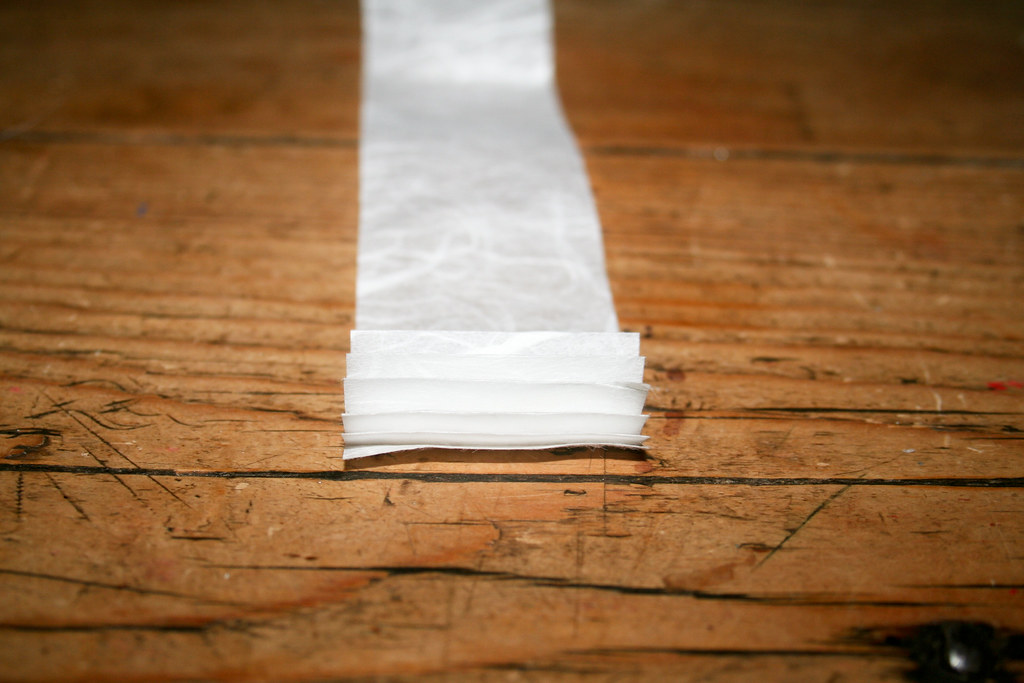

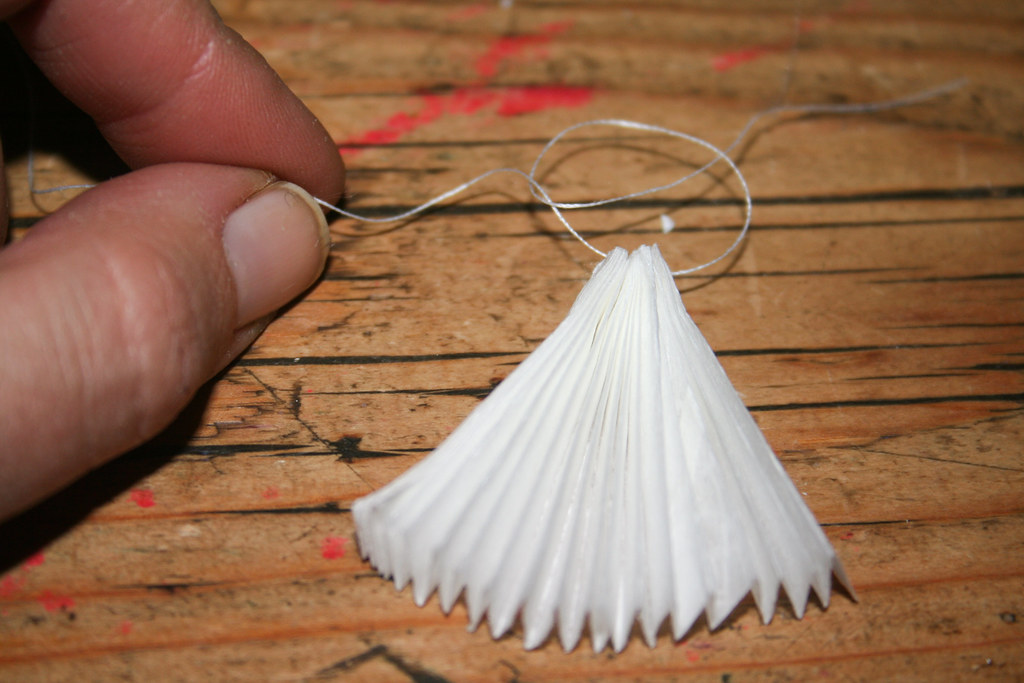
Now you are ready to open up the concertina and form it into a circle. (This is why it was important not to knot too tightly - otherwise the paper hasn't got enough space to open up.) Fix the two end bits together with a bit of glue.
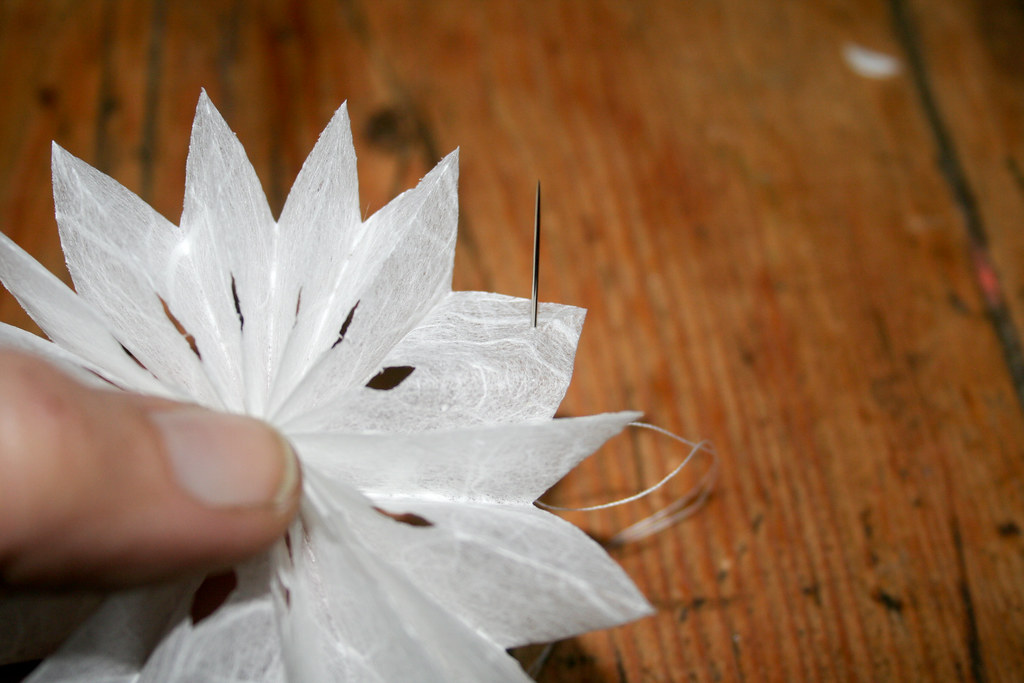
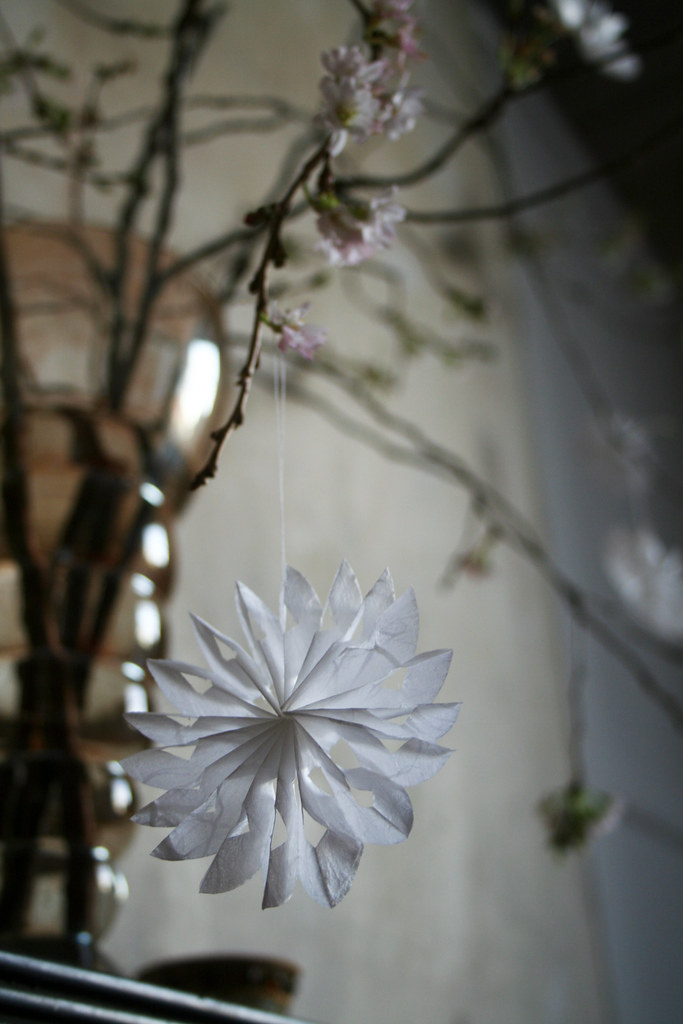 Now to get back to my introduction about the Barbara branches: I thought the delicate cherry petals would be overpowered by traditional Christmas ornaments. So I hung the branches with my Christmas stars. The translucent, delicate paper matches the frail blossoms very nicely. They create a bit of white winter, Christmas cheer on a simple flower display.
Of course you could do these also with coloured paper and in all sizes. I would love to make a really large one to hang in my window, but I doubt I can get paper 1,50 m in length... Anyone got some old fax machine paper???

Friday, December 4, 2009
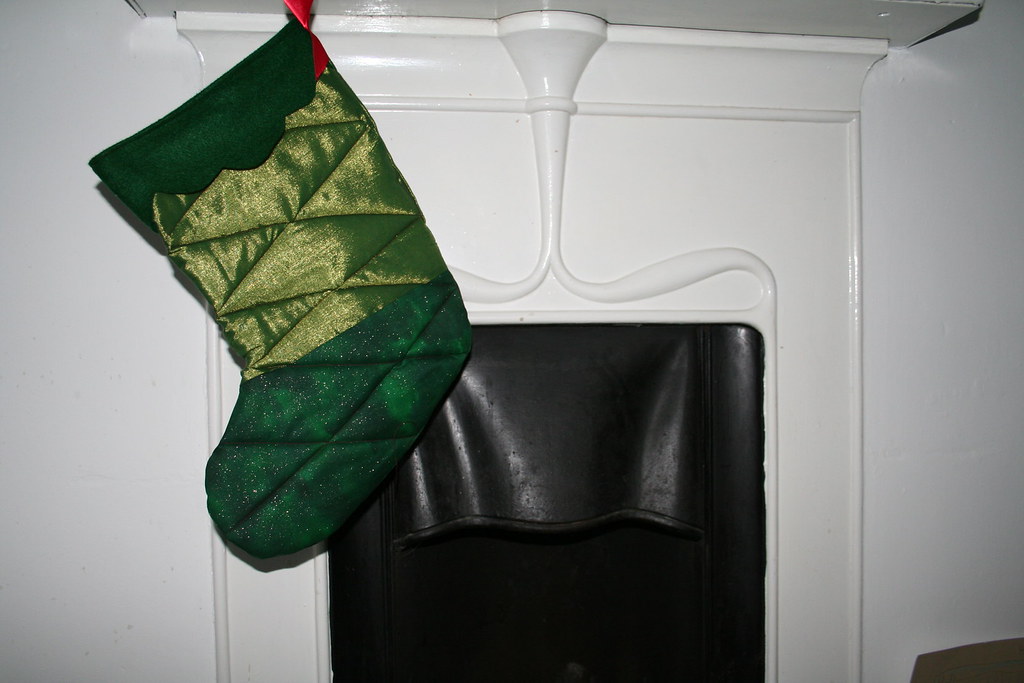
A Stocking for "Nikolaus"
The 6th of December is actually the Saint day of St. Nicholas, or Nikolaus, as we call him in German, aka Santa Claus. Traditionally in Germany children are given sweets and presents on that day - it's like "little Christmas". Children put their polished boots outside their doors on the evening of the 5th. Nikolaus visits them over night - and leaves treats in the boots. In my day, there were these hideous red, plastic miniature boots that came filled with cheap sweets *yuch* - although I can't complain; my mother was always a generous "Nikola"...

I am keeping up the tradition with my children while also trying to live the traditions of my adopted country, their home, Ireland. And something I have always loved were the Christmas stockings which are traditionally filled with the Christmas presents for Christmas day. Now, we do Christmas the German way, i.e. the big present-presentation happens on Christmas Eve. So we do not really have any use for Christmas stockings... Except - yes - they would do really nicely for the Nikolaus treats.
Anyway, even though I am not a very good seamstress, I decided to attempt sewing my own Christmas stockings. I had picked up a so-called "dolly bag" from a local haberdasher's which was full of red and green fabric remnants, perfect for Christmas.
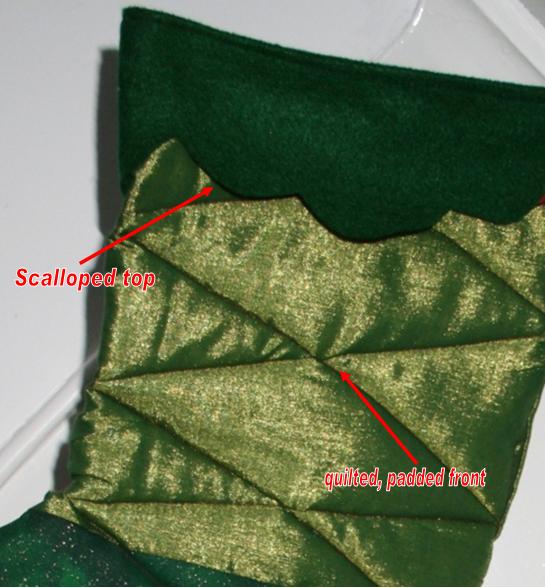
 I drew my own template of a large, roundy boot on newspaper first, cut it out, pinned it onto the fabric and then cut the fabric the right shape - three times per stocking. I first created a padded "side" for the stocking by sandwiching some flat quilt wadding between two fabric layers. For a quilted effect I sewed a criss-cross pattern onto the fabric. Then I sewed around the boot shape. The dolly bag also contained some remnant felt which had been cut out in a scalloped shape. I sewed that to the top of the boot so it looks as if its top is rolled down.
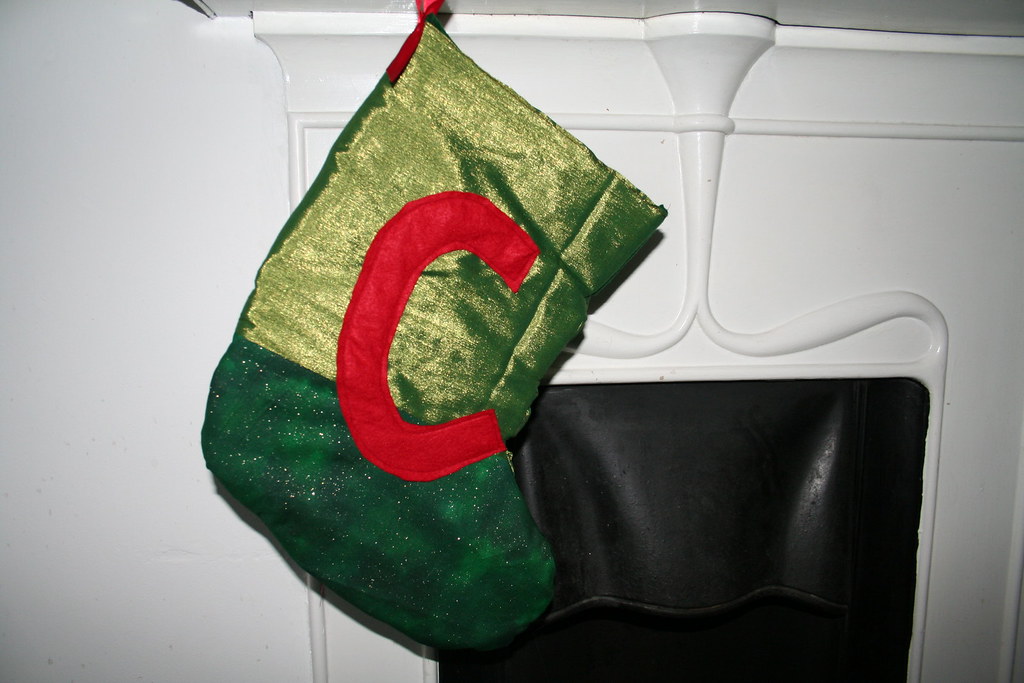
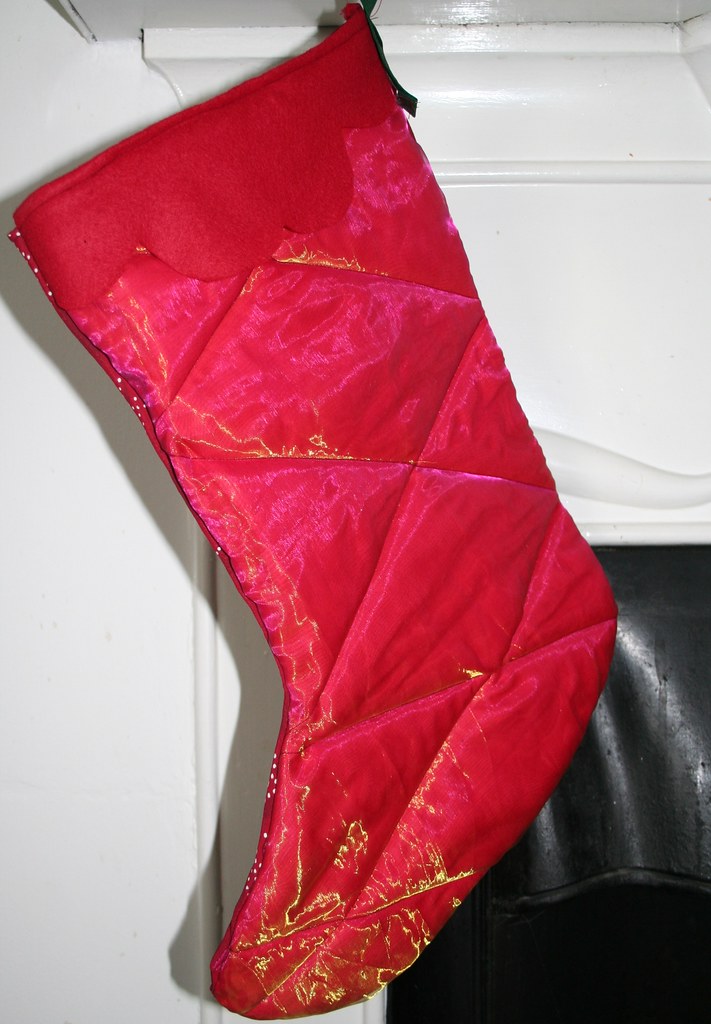
I wanted to have a two-sided stocking, so I used the remaining cutout as a background for a giant, red C to personalize the stocking.
Then I put the padded front part of the stocking right-on-right with the personalised cut-out boot shape and sewed around it, leaving the top open, of course. Then I simply turned it inside out. Last thing I took a short bit of red silk ribbon and sewed it on as a hanger to suspend the stocking from.

I created another one for my daughter, this time in red, but essentially the same design. The kids love their stockings and use them every year now...
I am keeping up the tradition with my children while also trying to live the traditions of my adopted country, their home, Ireland. And something I have always loved were the Christmas stockings which are traditionally filled with the Christmas presents for Christmas day. Now, we do Christmas the German way, i.e. the big present-presentation happens on Christmas Eve. So we do not really have any use for Christmas stockings... Except - yes - they would do really nicely for the Nikolaus treats.
Anyway, even though I am not a very good seamstress, I decided to attempt sewing my own Christmas stockings. I had picked up a so-called "dolly bag" from a local haberdasher's which was full of red and green fabric remnants, perfect for Christmas.
 I drew my own template of a large, roundy boot on newspaper first, cut it out, pinned it onto the fabric and then cut the fabric the right shape - three times per stocking. I first created a padded "side" for the stocking by sandwiching some flat quilt wadding between two fabric layers. For a quilted effect I sewed a criss-cross pattern onto the fabric. Then I sewed around the boot shape. The dolly bag also contained some remnant felt which had been cut out in a scalloped shape. I sewed that to the top of the boot so it looks as if its top is rolled down.
I wanted to have a two-sided stocking, so I used the remaining cutout as a background for a giant, red C to personalize the stocking.
Then I put the padded front part of the stocking right-on-right with the personalised cut-out boot shape and sewed around it, leaving the top open, of course. Then I simply turned it inside out. Last thing I took a short bit of red silk ribbon and sewed it on as a hanger to suspend the stocking from.
I created another one for my daughter, this time in red, but essentially the same design. The kids love their stockings and use them every year now...

Tuesday, December 1, 2009
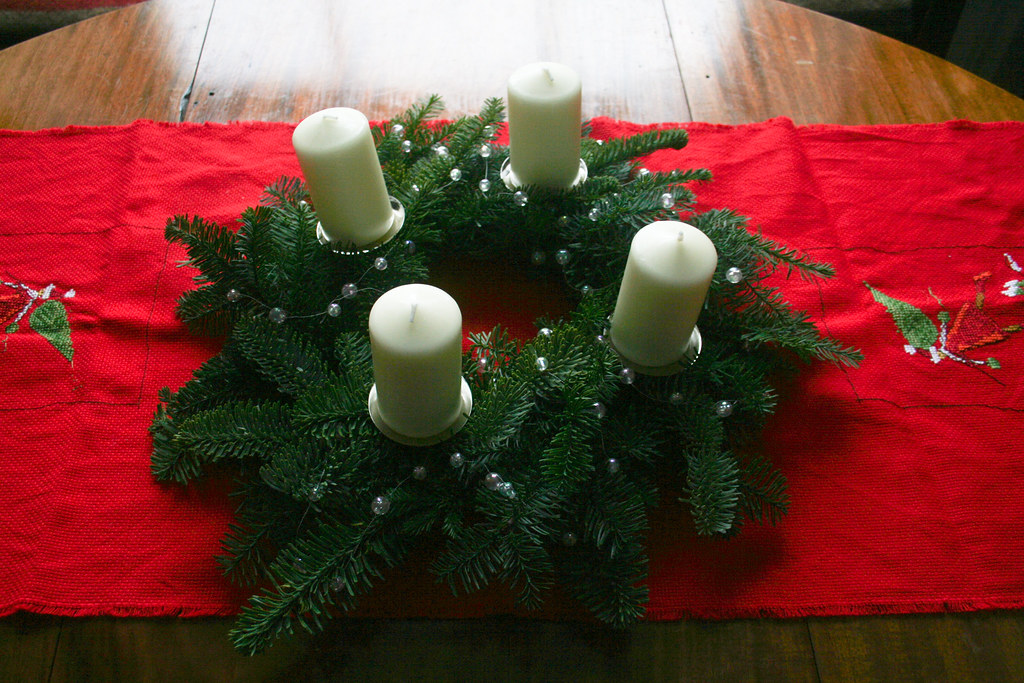
Advent Wreath
A bit late for the first of Advent, I admit. But let me still show you what this year's advent wreath looks like in the Royal Household:
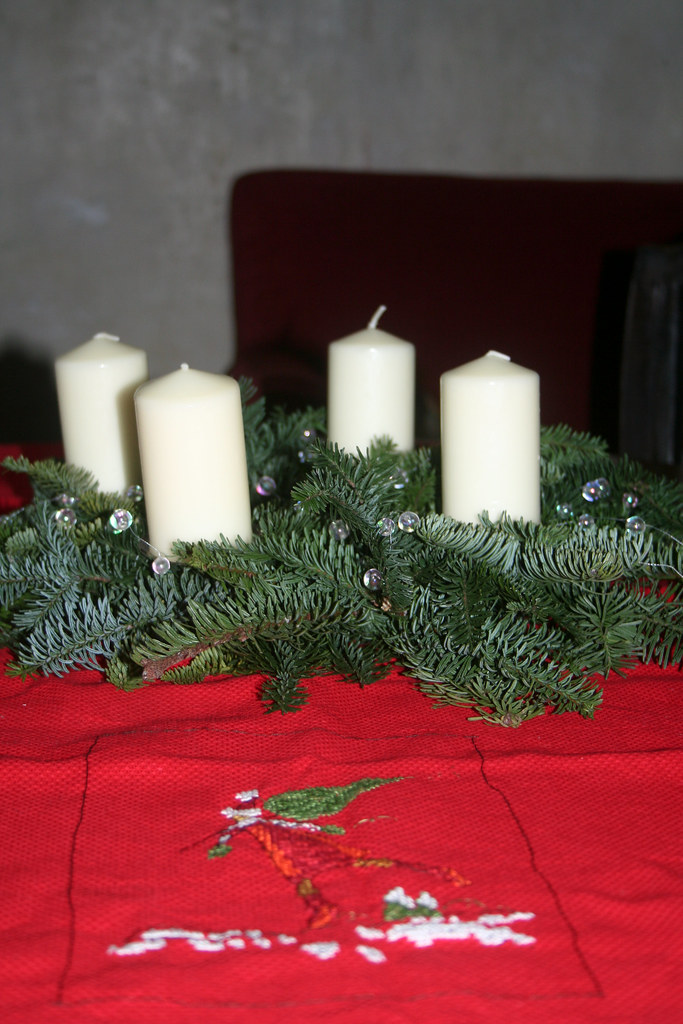
It's all very simple, not much decor. Because I believe that the warm candle glow and the beautiful fir are pretty just by themselves. Add too much to that and you risk the Tack Factor...
So my wreath - homemade, by the way, on a wire circle, with little bundles of fir and fastened on with green gardening string - is decorated with a few white beads on a silver wire. The four candles - one for each of the four Sundays before Christmas - sit on silver candle plates which have a spike underneath for poking into the wreath. That's all there is - and it is quite enough, I think.
I would love to see my subjects' readers' creations... Drop me a comment with a link to your pics!
Subscribe to:
Posts (Atom)