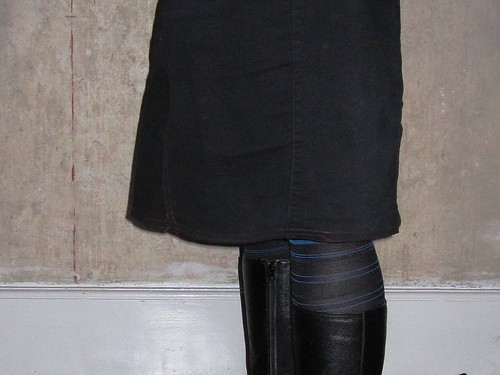
FYI


Monday, October 17, 2011

She *Do* Use Jelly

In fact, jelly is the only fruit spread she likes. No pips for me, please, I want it pure and clear. And on the spur of the moment I decided yesterday to get down to it and make some raspberry jelly.


Jam making is one of the easiest tasks in the kitchen. Now, I am a self-confessed non-cook. I really do not enjoy cooking at all (I am a baking queen, however!). But this is the one thing involving pots and pans that I *do* like doing. Once you have made your own jelly for the first time, you will never go back to mass produced, shop bought jams, I promise you!

I know, it is a little bit too late for jam making. Raspberry harvest is long over. But I cheated and bought some frozen raspberries in the supermarket. They work just as well as the hand-picked ones from your own garden. So here is what you do:

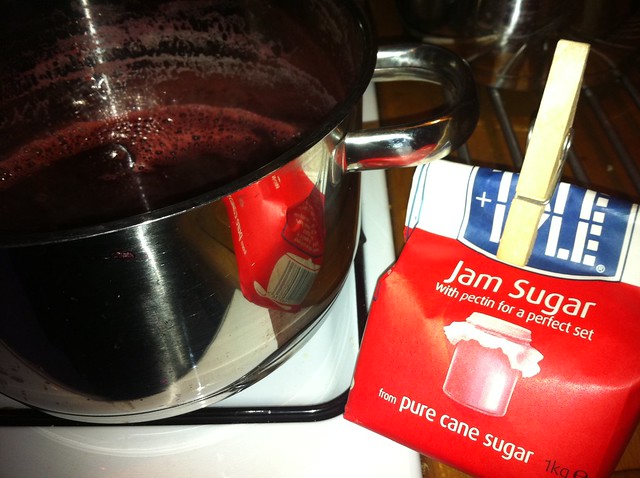
Making jelly involves one more step than jam making. You need to turn your raspberries (or any other fruit) into juice in order to get a clear, pip-less jelly in the end. So put your berries (or other fruit) into a pan and boil them up until the berries become mushy and disolve.

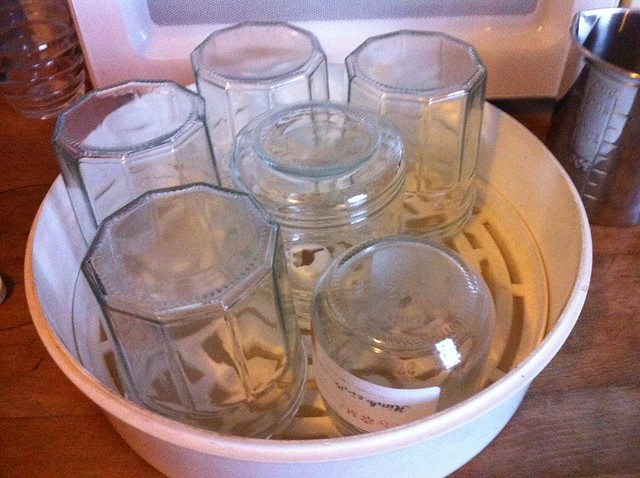
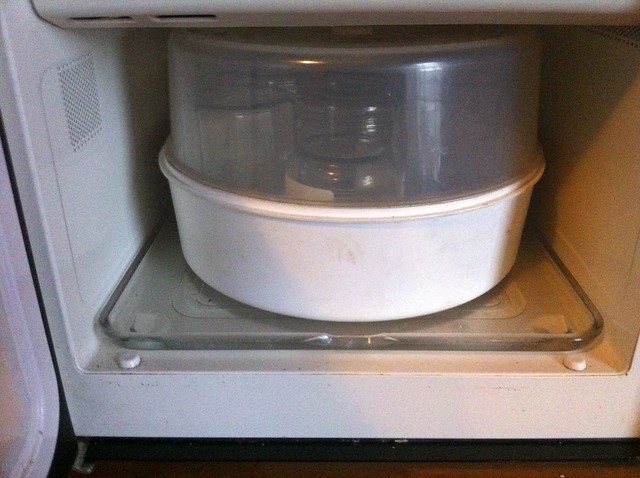
Hygiene is imperative when jam-making. So while your berries are bubbling away to make juice, sterilize your jam jars. I steam sterilize mine with a handy little gizmo that is still around from my kids' baby days: a microwave bottle sterilizer. You simply pour a bit of water into it, put the jars into it and the lid on and pop it for 12 minutes into the microwave.

Handy and easy - but extremely hot when coming out of the microwave, so do take care.

The best way of sterilizing the lids, by the way, is simply by boiling them in a pan. 5 minutes will do the trick nicely!
While the berries are boiling and the jars are steaming up, squeeze the juice from 2 lemons or limes. The acid of the lemons will add a nice little edge to the sweetness of the jelly! (Aside: Do you like my juicer? That head is supposed to be German chancellor/head of state Angela Merkel, a woman who is known for her cheerful countenance... ehm... I couldn't resist this wonderful kitchen implement on a trip to Berlin last year where I bought it in a shop right behind the Reichstag, Merkel's place of work... )

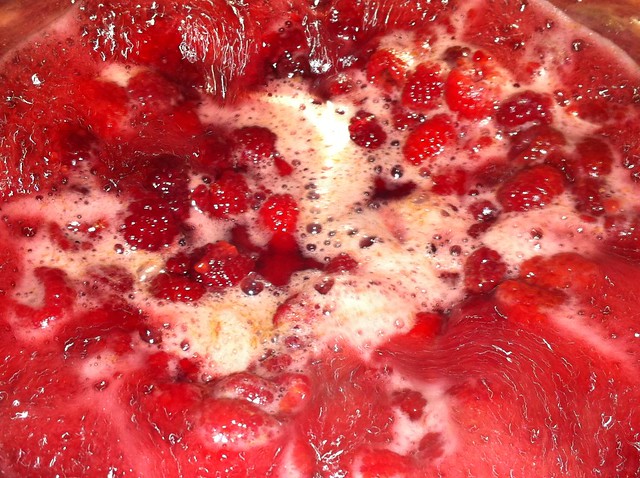
So here are your berries, boiling away:


Sorry, couldn't resist including this photo. Aren't the colours just gorgrous? I wish I could've recorded the smell for you *mhhhhhhh*.

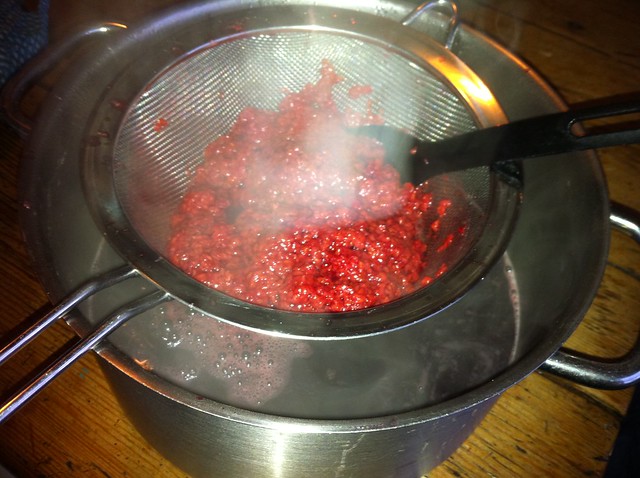
Now it's time to make the juice: Take the pan off the hob and pour the whole lot through a sieve into another pan in order to separate the pips from the juice. (I know that a muslin is recommended for straining the juice, but I find a fine kitchen sieve will suffice!)

In order to make jelly, you need as much jam sugar in weight as you have juice. I only had half a packet of jam sugar left.

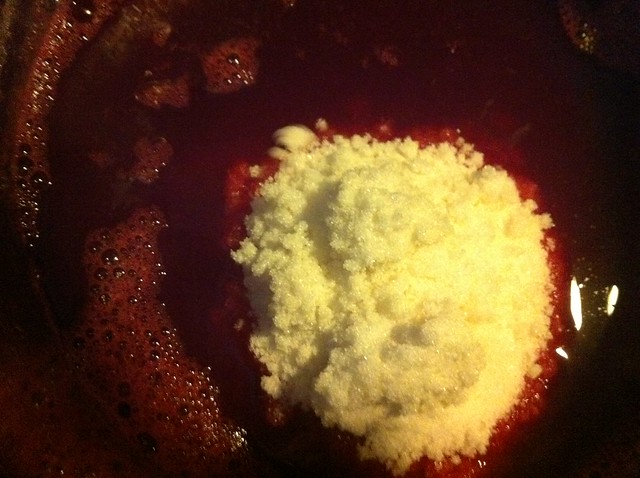
I carefully measured 400ml of raspberry juice and added my 400g of jam sugar to that.


Now bring this to the boil, carefully stirring all the sugar in so that there are no visible lumps of it anywhere. (Note: Deliberately artsy-fartsy blurry illustration - I just loooove how the highlights are leaving burnt out trails...)
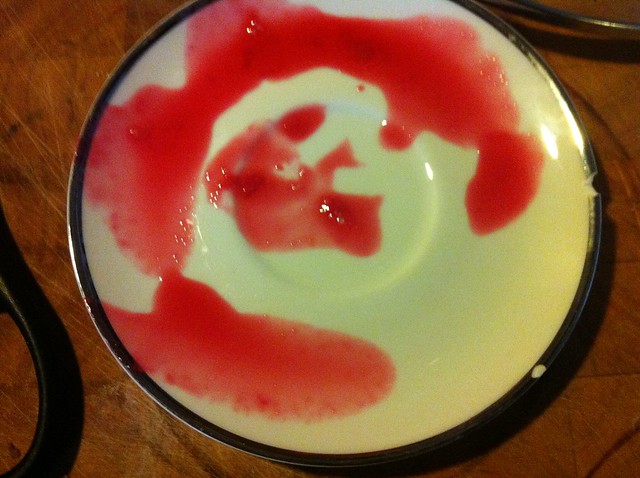
Right, now comes the only tricky part: The juice and sugar have to boil for exactly 6 minutes (at least according to my sugar factory advice). Let it bubble vigourously for whichever amount of time it says on your packet of sugar. Then test whether the jelly is ready to set by putting a few drops of the liquid onto a clean, cold saucer. Let it sit and cool for a few seconds, then push it with your finger. If it "wrinkles", your jelly is ready to take off the hob.


I put the sterile jars on a plastic try for the next step - pouring the jelly into the jars. Do this swiftly and up to the brim. You may have to top up the jar before you put the lid on. The more jelly you get into the jar, the better the chance that it won't get mouldy of the storage time!

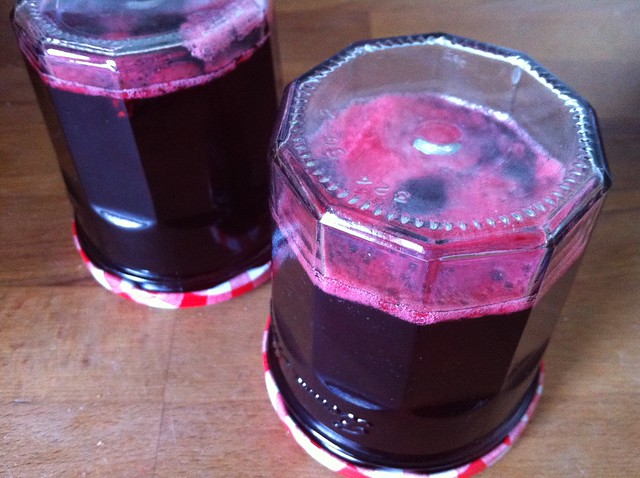
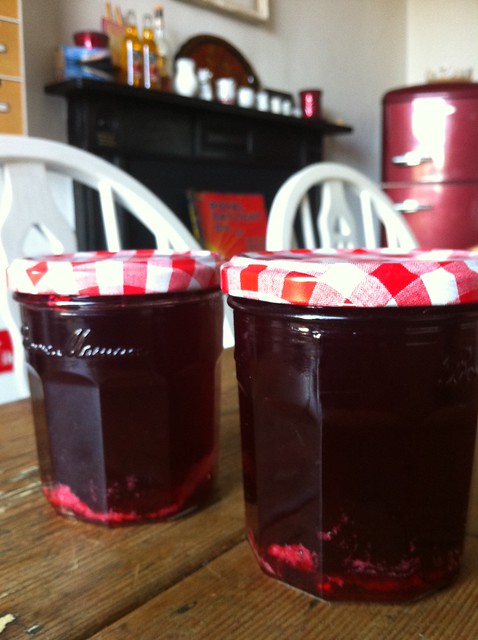
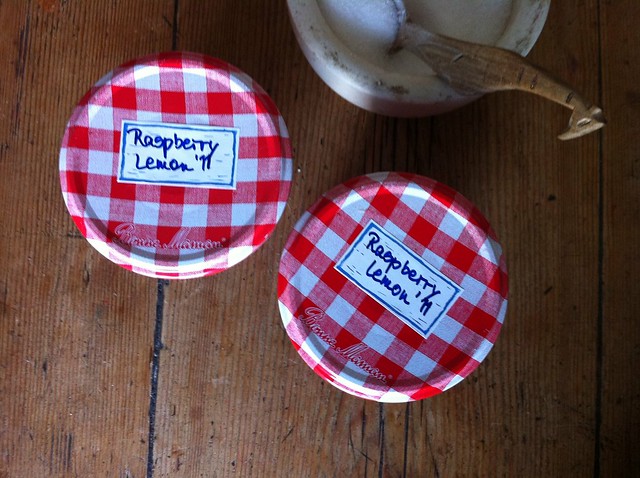
Make sure you get your jar airtight by turning the jar upside down after filling. Leave to set until the jar is cold enough to handle. (As I said, I didn't have much jam sugar, so I didn't produce enough jelly to fill two jars :-(  )

But that's it. Your jelly is basically ready for consumption right away. The whole procedure takes less than an hour. Tastes best on freshly baked, white bread. Accompanied by a cup of milky tea. And the Sunday newspapers. In bed :-)


Best,

Wednesday, September 7, 2011

Happy Campers

I have just packed up my tent for the winter. Yes. Outdoor season has officially ended this weekend. At least the season for sleeping outdoors (every other outdoor activity you can pretty much do any time of year in Ireland - this poor deprived country only has one season all year 'round, anyway.) My end of season marker is the great big open air music festival Electric Picnic which is on in the Irish sticks on a country estate in the Irish countryside the first weekend of September every year. It's a weekend of music, music, music, some art and literature, and camping. (Oh, and some MAJOR drinking for most the revellers there. Yours truly would love to, but is a responsible parent, so doesn't.)

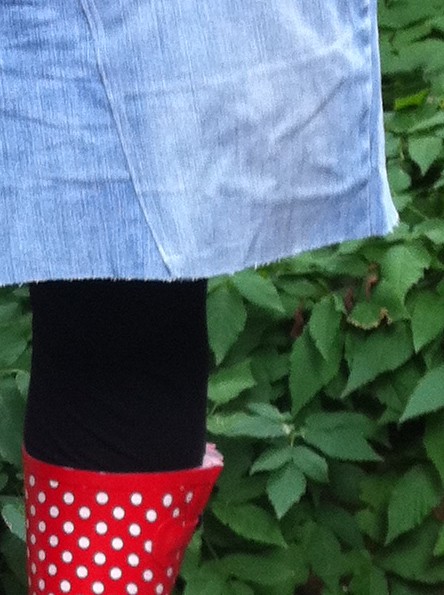
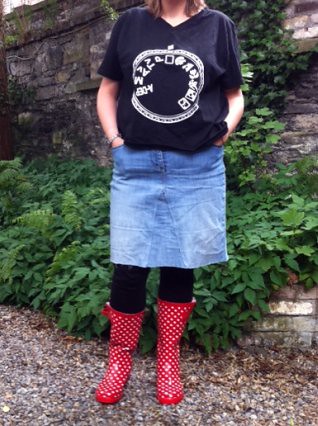
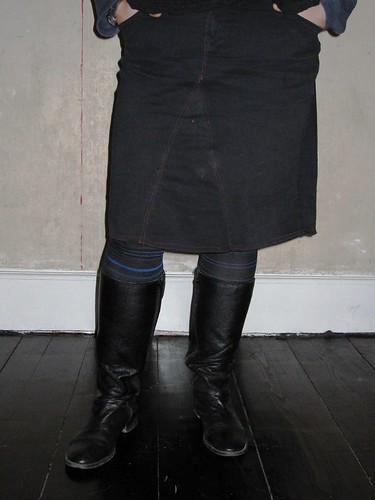
You may remember that I mentioned the festival the other day when I showed you my rock chic outfit. It has become one if my favourite garments which I wear even when not at a festival. Hey, that's because life rocks, anyway. Especially now that it has been washed a good few times and the hem is nicely frayed. So I must say, it really rocked. Here is the reminder (right):
There were plenty of faded denim skirts out there. But none in combination with cute polka dotted wellies ;-). At some point a woman approached me and said "Hey, we are wellie twins!" Ha, wellie quintuplets, more like - I saw at least three other girls with the same wellies, but I did not have the heart to tell your woman after I had already shocked her by saying we were wellie cheapskates - considering that they were bought for € 20 at an Irish chainstore.

Anyhow, you have to bear with me today, I am still in full swing - literally - after the musical delights of the festival. I have been dancing the morning away. No kidding, dusting off the old hips in my study and rocking away to Foster the People's "Call it what you want". Click the vid and get an instant boost of energy and good mood!)


Bear with me, I am recording this for posterity. Skip the red part if you couldn't be bothered with this music stuff. We watched 22 shows. I measure their success in a) how much I danced and b) how much I remember of the gig at all. So in order:
  
  • Sinead O'Connor (grande dame of Irish rock - bit lame, actually)
  • Foster the People (full tent and some serious rocking go on)
  • Santigold (nice soulfull voice, but didn't quite hold my attention)
  • PJ Harvey (can only remember her odd headpiece and the rain. Gig can't have been outstanding)
  • Interpol (rain. Some dancing. I guess I was only just getting into it)
  • Bitches with Wolves (prize for the worst stage outfits - all of them. music was actually not bad)
  • Codes (ehm, no recollection, sorry guys)
  • Undertones (classic punk, really well done even without Feargal Sharkey)
  • Jape (hands of fire got me dancing)
  • Lykke Li (hm, lame - must be the stage: main stage is outside, not much of a spark)
  • Death in Vegas (rrrrrrrrrrrocked!! Serious dancing going on. Even converted the GG)
  • Arcade Fire (good show - but that almost distracted from the music, so not the full marks from me)
  • Trentemöller (like him better when not live - the singers were not my thing... good dancing, though)
  • Chemical Bros (punctuality, guys! great gig, but again the outdoor thing doesn't work for me)
  • The Minutes (ehm???)
  • Oh Land (just 15 minutes of this Danish band, nice, smooth, but banal sound)
  • Gemma Hayes (my surprise gig - really good, some swinging along, have to check her)
  • James Vincent McMorrow (packed tent, we stayed outside. as good as expected, some seriously off-key background singer though)
  • The Japanese Popstars (yay - fantastic, would love to see these guys playing a smaller venue, dance central!!)
  • Big Audio Dynamite (surprisingly good - even without much previous knowledge)
  • The Drums (didn't really spark for me - maybe because we stayed outside the tent and I was freezing)
  • White Lies (my top gig of the weekend - unexpectedly. Their rendition of Death had the packed out tent dancing and jumping in unison. a seminal gig? certainly for me!)

Will she ever get to the craft bit? Yes, she will now. My point of all this preliminary talk (apart from looooooooooving to see my own writing *hahaha*) is, that there was camping involved in the weekend. And at the beginning of the summer I sewed some handy sheetbags (guys, no joking here, I have heard them all before, really! I AM familiar with Irish slang and foreign accents...). Ok, I know, camping season has just finished - unless you are in the Southern Hemisphere. Any readers in Australia? New Zealand? Well, Fiji, anyone? Ok, maybe you don't need sheetbags there, considering the climate... But here we go, this is it:

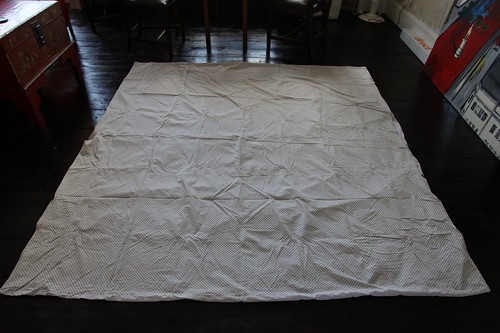
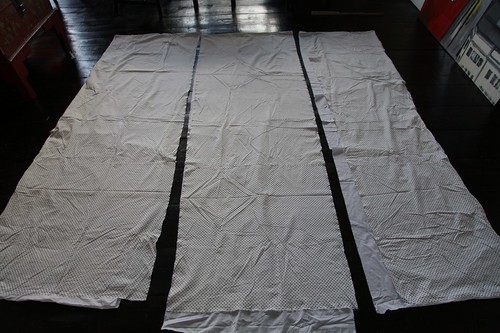
I started off with a kingsize duvet cover.

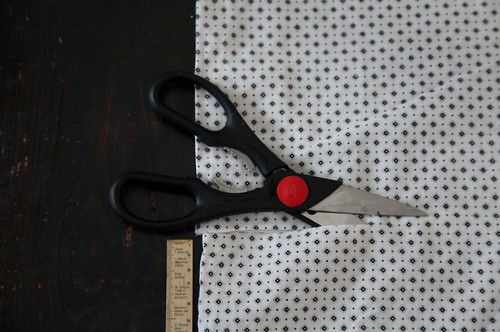
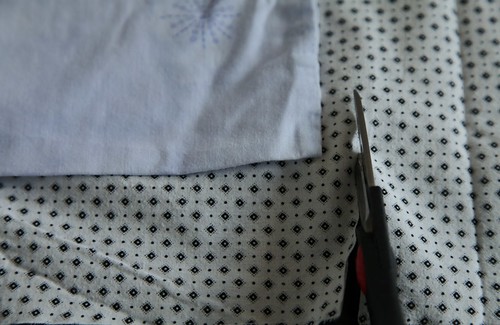
I measured it carefully and then cut it into three parts.

Well, obviously not carefully enough, because I was unfortunately left with one rather narrow strip of material that was too small even for a skinny ten-year-old.

I took one of the strips and laid it out on a flat surface. The fact that it was one of the side bits of the duvet cover meant, I only had to sew down one side of the material to create a sheet bag.

To determine the size of the pillow I used a regular pillow case as a pattern and cut along it across one half of the material strip, leaving an inch extra for hemming in.

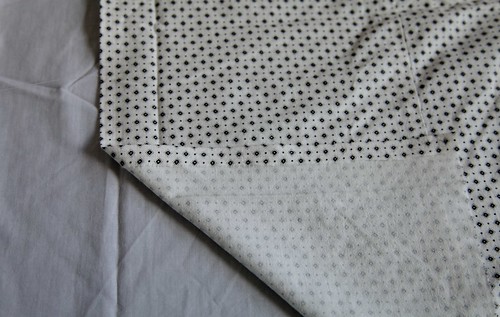
I first hemmed what was going to be the opening of the pillow case. Then I sewed the pillow case onto the back of the sheet.

Next I sewed another hem along the blankety bit of the sheetbag.

Lastly, I made the sheetbag by sewing down along the long side, leaving a bit of a slit at the top so that you can fold it down and wriggle yourself into the sheetbag.


These instructions are not very detailed, I know, but it is all rather self-explanatory and logical once you make this. We put them to the test on our summer holiday in the South of France - and they worked beautifully. The pillows were snug in the casing of the sheetbag and the bag itself big enough to hold an average sized adult. Apparently I have no evidence that I ever finished this project - no images do exist. And the sheetbags have already been stored away with the tents. So you'll have to do without it and believe me.


Best,


Tuesday, August 2, 2011

Shake it, Baby

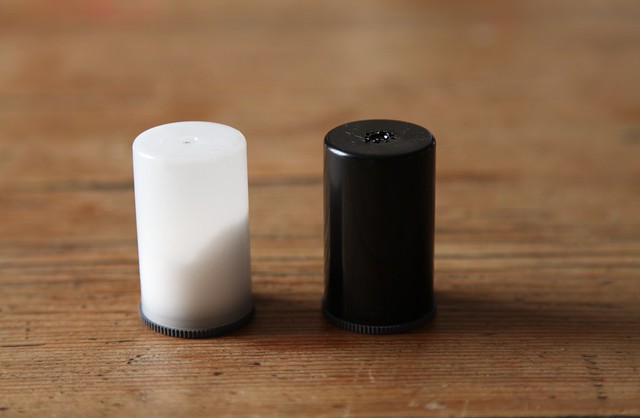
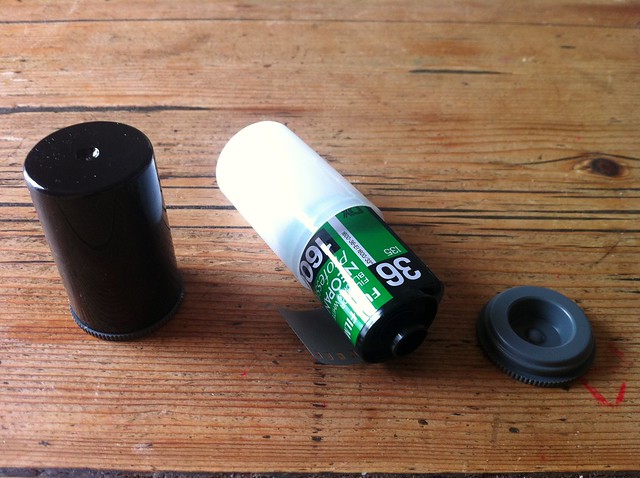
My regular readers know that I am big into photography. So much so, that I have lately channelled most of my creativity into photography and been neglecting Craft-Werk. It takes a photography-related project to get me posting again. And here it comes: salt and pepper shakers for photography enthusiasts. Check this:


Now, if you were born after 1990, chances are you have no idea what this is (apart from salt and pepper shakers, obviously). Well, sit down kids, and let Auntie Sonja tell you: Long ago, in the days before everything turned digital and swish and instant, those of us who liked to photograph had to insert a spool of light-sensitive material into a recess behind the lens of a camera. It was on that material, that the light would record what the lens caught in that split-second glimpse at the world. And those two cannisters, well, that is what the light-sensitive material, also known as "film", came in.

Ok, joking aside - chances are that you have long left your film days behind you. So have I - except I have reconnected with analog photography through college and keep a whole big stash of films in my fridge. And I have a heap of those film cannisters. I cannot believe it was only today that it occurred to me to use them as salt and pepper cellars, though. And I can believe even less that I have never seen anything like this before - neither on all my favourite photo sites, craft blogs or in novelty shops. Maybe I should have this patented...

Anyhow, here's what you do: First of all make sure you clean out your film containers thoroughly. No kidding, people. We are talking silver halides here - not something you would want on your food, photography-enthusiast or not. I put mine in the dishwasher, to be sure.

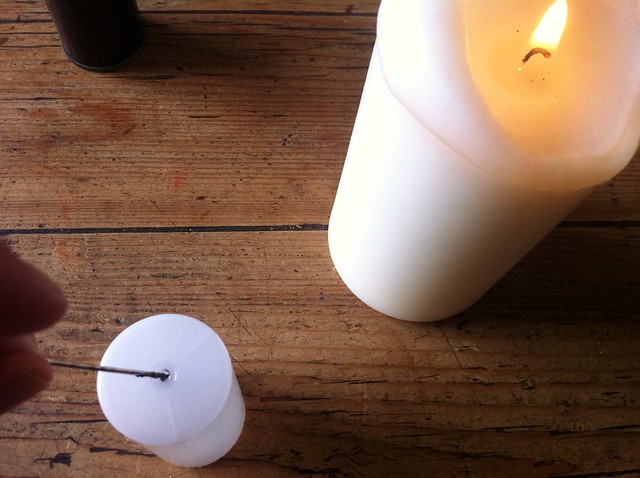
Then grab a candle and a thick sewing needle. Heat the tip of the needle in the candlelight and then push holes into the plastic cannisters. Over here in Ireland, the salt cellar has one big hole and the pepper shaker has many small ones. So I had to move the hot needle in that hole a few times to get a suitably large hole.


And there you are! This has got to be the quickest and easiest craft project I have ever done. So fast, actually, that I am not sure it qualifies as crafts at all. It took me all of five minutes to make this. And yet I am chuffed-er than chuffed about this teeny-weeny little, jokey project of mine. I am sure you well-endowed ... ooops... -equipped crafters out there probably also have a silhouette machine that would cut out some swirly, fancy P or S to stick on the little shakers. I quite like them simple and unadorned as they are.


A word of warning, though: This project will get your needles dirty! Check the image on the right: Dirty or what?

So no sharing of needles!!


This could be an easy-peasy pressie for the photo-enthusiast in your life. Anyway, get shaking, baby - let's put a bit of salt in the soup of our lives.

ArLt2b on Make A Gif, Animated Gifs
make animated gifs like this at MakeAGif

Best,

Monday, July 11, 2011

Rock Chic(k)

Festival season is upon us! I love the summer with all its outdoor events. The highlight of my festival season is always Ireland's "Electric Picnic", a so-called "boutique music festival" that has grown to such size over the years that it is not so "boutique" anymore. This year will be the fourth time in a row that I am attending it - tent and sleeping bags in tow - revelling in music from the likes of Arcade Fire, Pulp, The Chemical Bros, Mogwai, Death in Vegas, Big Audio Dynamite and and and...

I am so much looking forward to it all, that I am already in the middle of preparing for it. Yesterday I sewed myself my "Ready to Rock-Rock" - (sorry, the pun is only funny for anyone who can speak German. "Rock" is the German word for "skirt").


Right, I admit, it's not new. It is old. It is made from an old pair of denims of mine that have been sitting at the bottom of my wardrobe for the past two years after a worn-through patch made them too embarrassing to wear. But they are just the right kind of worn, washed out denims to be worn at a festival where you might end up in a mud-bath, anyway.

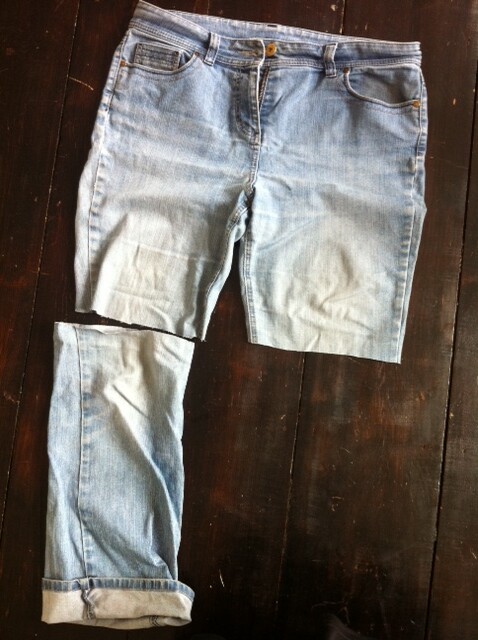
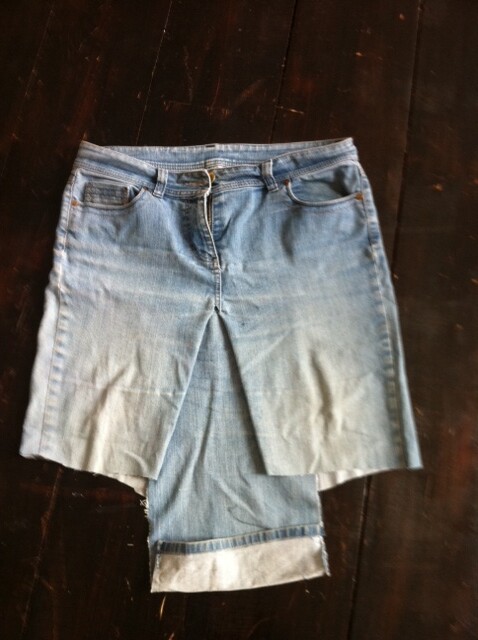
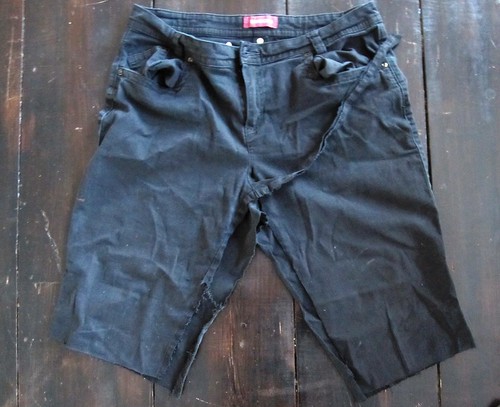
So I took the scissors to my jeans and cut off the legs at knee-height. Instead of discarding the cut offs, I cut them open at the seams. Likewise, I cut the top half of the jeans open at the seams, carefully cutting out the seam nearly all the way up to the zip.

Then I placed a piece of denim from the off-cuts into the open triangle under the bit that is to become the skirt. The length will be adjusted later.

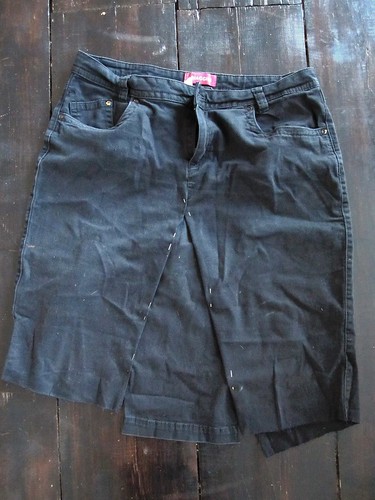
I held the pieces together with pins. And sewed the bits together with a double seam.

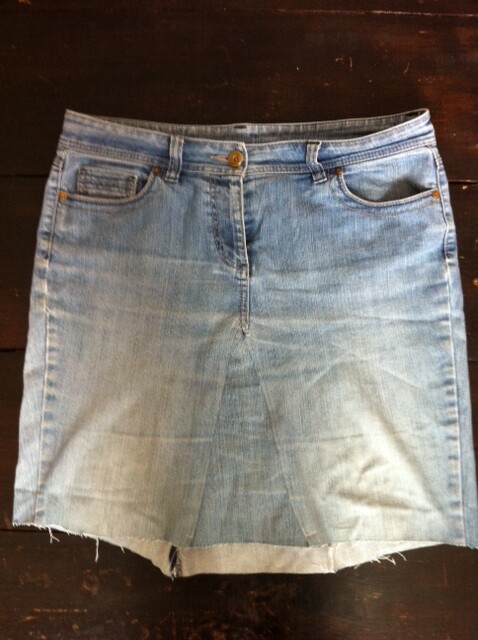
Here is the preliminary result before cutting the hem of the skirt properly.

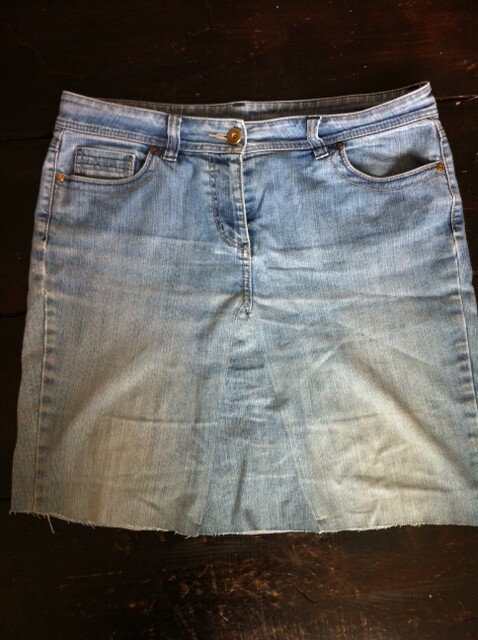
And here it is all cut at the right length. I actually decided to leave it unhemmed and go for the rugged, raggy look with bits of cotton thread eventually hanging down.

If you want slightly more detailed instructions, you can also look at my tutorial for a similar skirt I sewed some time last year. 

So I am now kitted out for Electric Picnic 2011. A skirt ready to be discarded on site, if dirty necessary. Can't wait to put my dotty wellies on!

Ready to rock!

Best,


Saturday, May 28, 2011

Next (f) Stop: T-Shirt

You have guessed it: I have been engrossed in my photography studies for the last while. Projects handed up, semester over, last exam sat - I am free to dabble in crafty creativity again. But I cannot quite let go of my photography obsession, so the little project I did just now is for photo nerds, again.


I recently got myself a really cool T-shirt with a Canon eos settings dial on it. It's great, but it got me thinking that you could make one myself and save the € 20,00 I paid for the dial shirt for other things. All you need is some iron on transfer paper, a printer, an iron and an idea. So I went out and bought a cheap white shirt for € 4,00 and set about designing my t-shirt.

What I came up with is probably gobbledegook for most of you but is instantly recognisable for photographers - I simply typed the standard f-stop numbers in an OpenOffice document, chose a nice font reminiscent of the fonts seen on lens dials and then gave my design a bit of colour by highlighting the three main f-stop numbers.

I bought my iron-on transfer paper a while ago when I was making T-shirts for my kids' play-café. These transfers seem a bit pricy - mine is a pack from HP, containing 12 A4 sheets. They were € 25,85 about three years ago. You can probably find cheaper ones nowadays.

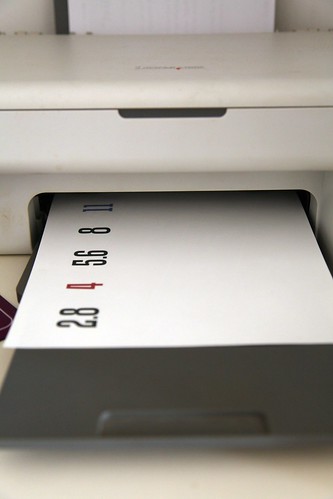
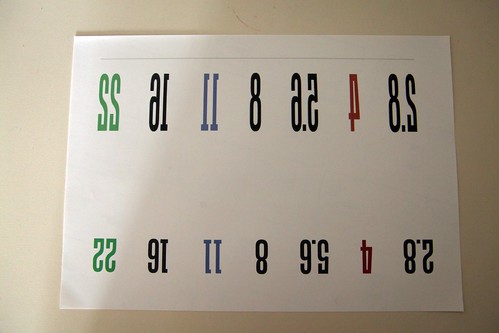
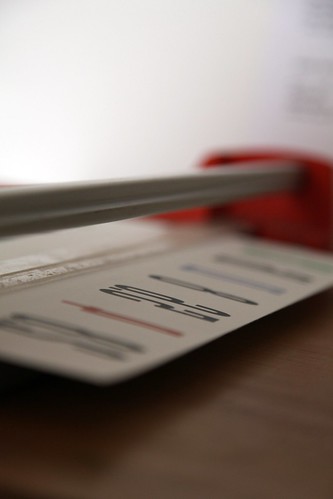
The next step is to print your design onto the transfer paper. Please be cleverer than me and think before you print. You need to flip the design horizontally before you print it in order for it to be the right way round when you have ironed it on.

So what you see here in the image on the right is wrong!!!

Cut your transfer paper to size - you don't need the whole page and you might want to use the left-over bit of transfer paper for another, smaller project. I used my guillotine for that.


The top row of this illustration on the right is what you need to have on your transfer paper - the image flipped horizontally.

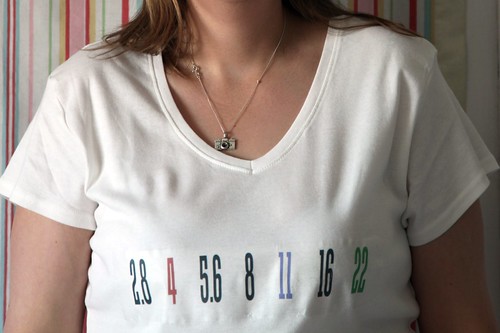
Anyway, once I had rectified that mistake, I was ready to wield the iron. Just follow the instructions according to the transfer paper manufacturer. I first gave my T-shirt a proper iron to make sure there were no creases on it. Then I placed the transfer paper right where I wanted it and ironed away. It took a good 5 minutes, I think. Taking the backing paper off can be tricky. For me it worked best to whack it off in one smooth motion, rather than doing it slowly. That might depend on the manufacturer, though.

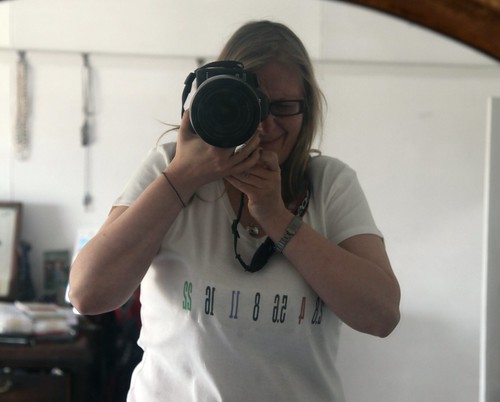
Tada, here is my photo-nerd shirt:


The shirt can be worn and washed frequently - my kids wore theirs a lot and the design did not come off for a long time. Eventually the plastic-y transfer stuff might start flaking off, but hey, that is just a sign that you should really think about designing another personal favourite.

Happy designing :-)
Best,

Sunday, February 27, 2011

Crea(c)tivism

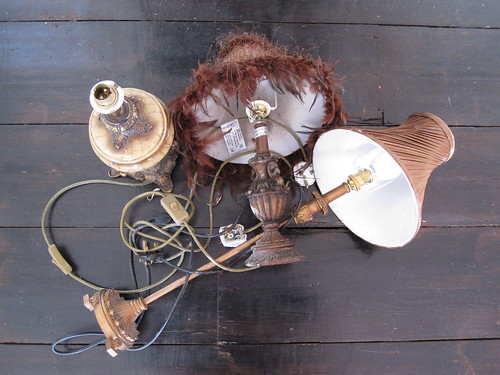
It's already a few weeks ago that I was walking home from a day out shooting. I can never pass a skip on the street without risking a quick look inside. And this time I struck lucky. Look what I found in that skip:


No, not the chair (however much bashed to pieces that is - blame the cats!). And neither the chocolate biscuits! I am talking about that cute lamp!

Well, it didn't really look so swish when I dug it out of that skip. There was a load of builders' rubble in there, plasterboard pieces and such like. And the lamp was in a slightly sorry state when I pulled it out. Initially I only wanted to take the tall lamp - the other two table lamps were just too disgusting, I thought. But then reason kicked in: I was only five minutes away from home, so why not lug all three with me. I could always throw out the other lamps if I couldn't do anything with them. All three lamps were in horrible brown-y shades. Who would want a rust coloured lamp, I ask you??? And the shades were dusty and broken.

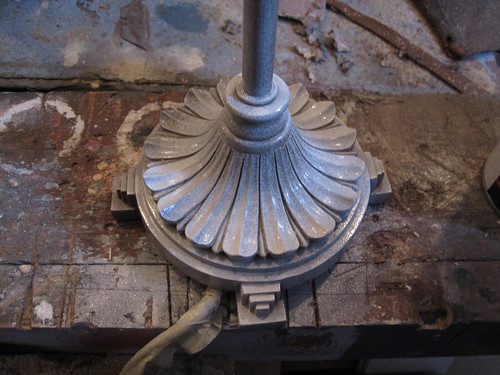
But nothing that a little bit of spray paint couldn't fix. I was feeling creative today, so I put on my oldest jeans today, flung over an old cardigan and headed for the garage for a bit of crea(c)tivism. I dismantled the shade (which was a bit of an effort - it had been screwed to the light fitting so tight, I had to use my husband rough force to loosen it) and covered the cord with some masking tape. After a little rubbing down with white spirit, I gave the lamp three coats of white spray paint. Very much unlike me, I waited impatiently to let the paint dry before spraying again.
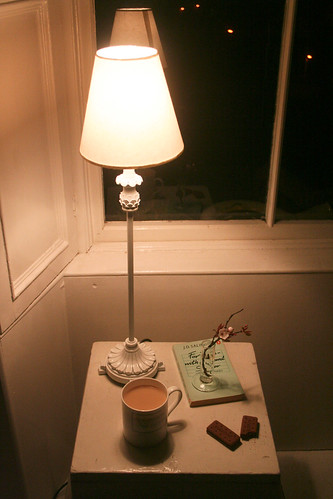
Then it was back up for some electrifying. I had to fix a plug onto the cord and find a bulb and a new shade for this little beauty. Done in 15 minutes. And now this sweet, slender thing graces my bedroom window and will light up my reading corner.


All set up with the essentials for good reading: Light, a couple of biscuits and a steaming hot cup of tea. (Pity you can't see what it says on my mug: "I'd rather be with Colin Firth" - how very fitting for this night which happens to be Oscar night - and I expect my favourite actor, aforementioned Colin, to win for his superb performance in "The King's Speech".) I bet those builders' wives are kicking their husbands now for having thrown out this lovely lamp.

Well, two more lamps to come, soon!

Best,

Sunday, January 23, 2011

Skirting the Issue

Why, hello! Let me skirt the issue today. Here is a little crafty thing I did - and which I had been meaning to do for ages. I have lately discovered skirts. For a long time I never wore any. My confirmation way back in 1852 1984 was probably the last time I was seen in a skirt. Ah, no, actually, it wasn't - I wore an unbelievable pleated affair to the then current boyfriend's fraternity do. (Not sure what to be more disgusted about - the frumpy skirt or the absolutely inacceptable fraternity sh*t that I put up with...) Anyhow, it's taken me yeeeeears - and several kilos of shed weight - to dare don a skirt. And now I quite like them. So much so, that I took my scissors to a pair of old trousers and made the snip.


They are not the hippest thing anymore, but you'll remember these skirts that looked like they had been fashioned from a pair of trousers. Well, they were. To get the right length of skirt, I placed my favourite shop-bought skirt on top of the trousers and then cut the legs off the trousers, leaving some extra material for the hem. The cut off bits I put aside.

Then I took the scissors to the top bit of the trousers, carefully cutting open the seams in the middle, all the way along the seam, right over the crotch.

Back to the cut off legs. I cut those along the side seams, too, receiving 2 separate pieces of material per leg. Then I placed one of those pieces inside, under the front of the top trouser bit and pinned it in place. Make sure you get it all smooth and right. (It probably would have helped if I had ironed the trousers before starting this project - the pictures would have looked better, too...)


For the next step I did not take a picture - having everything pinned into place, I sewed the skirt together. To give my skirt a bit of a jeans-y kind of look, I used thread in a contrasting colour and sewed a double seam. Bingo.


So, that is it - a new skirt from an old pair of trousers. Dead easy, took about an hour in all. And I am a fluky seamstress - but no pattern needed. Now, it's obviously not the chicest of garments, but it's alright.


Best,