FYI


Showing posts with label fabric. Show all posts

Monday, January 14, 2013

Oriental Bling

So this is how I spent my Sunday afternoon:


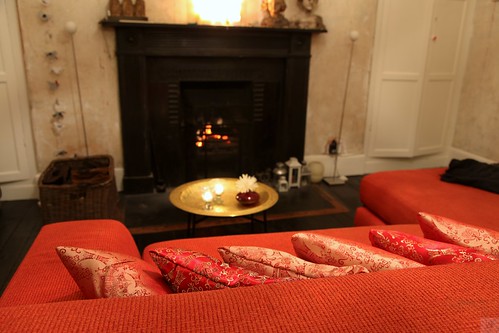
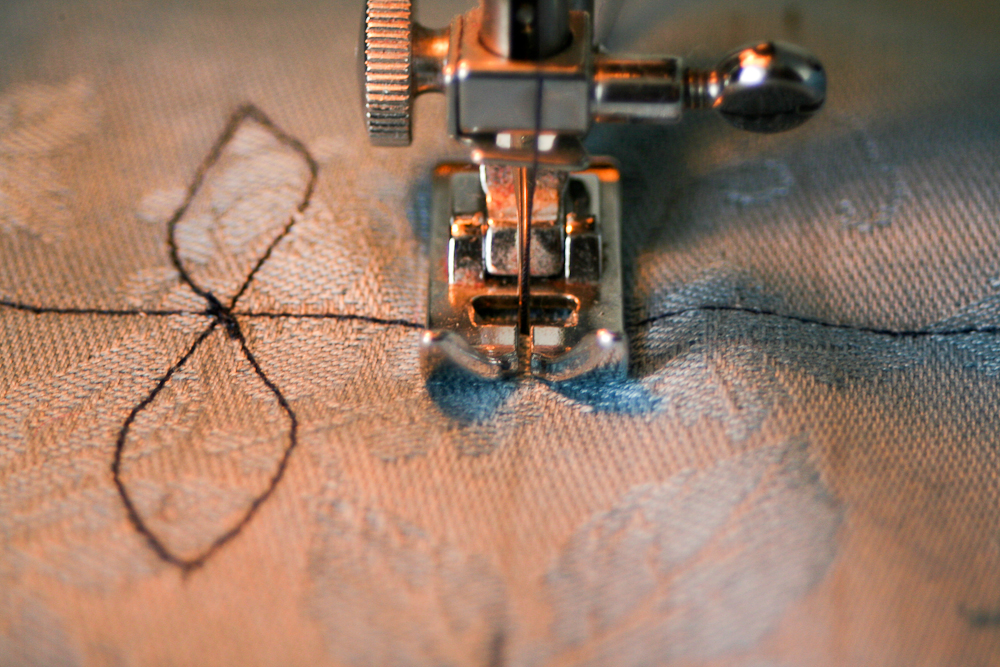
No, not lounging on the sofa in front of a cozy fire. I was a busy bee and sewed the cushions that are just visible there on the couch. This had been made necessary by the fact that my previous cushion project had become not only threadbare but cat-flea infested. Arrrrgh. So out with the old and in with the new.


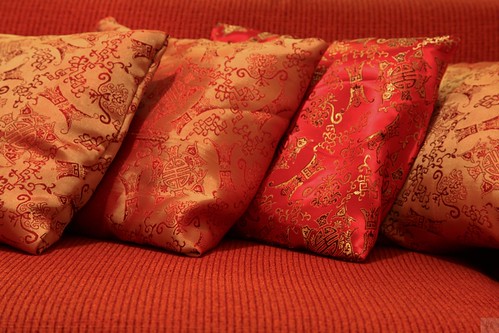
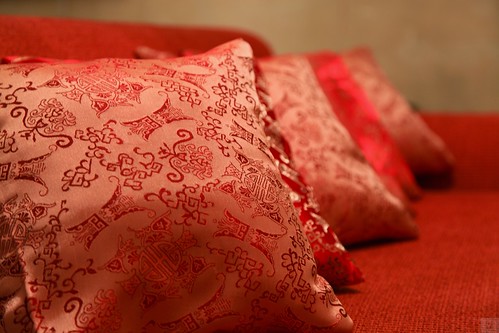
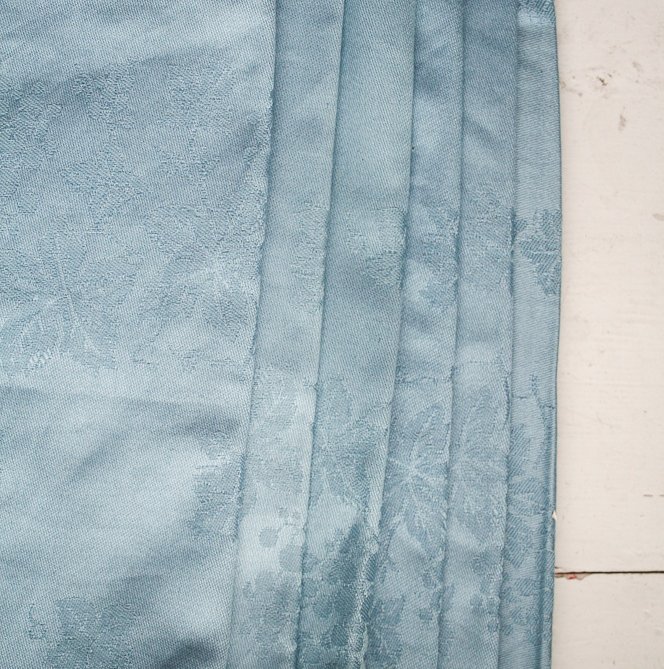
On my post-Christmas shopping spree last year I snapped up six Ikea cushions at € 0.50 each. They are 35 x 35 cm in size, and since I had six of them, they called for a coordinated effort. Ahem.

A look in my much ignored fabric stash brought out a large piece of fabric that a friend had brought back from China for me. I cut the fabric to size, ironed it and then set to it with my sewing machine. Incidentally I found the reverse of the fabric nicer and more fitting with the rather orangy red of my sofa, so I made four of them and two of the actual fabric front. The cushion case is removable, so it can be thrown in the wash if the cats get too familiar with them, again.


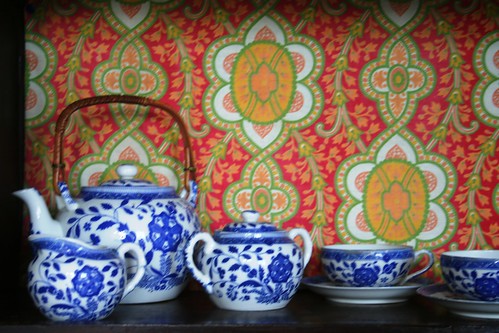
With my recent Ikea bargain - the golden tray table - it looks as if I have a bit of an Oriental thing going on in my drawing room now:


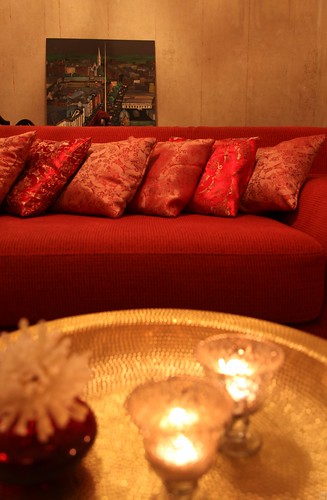
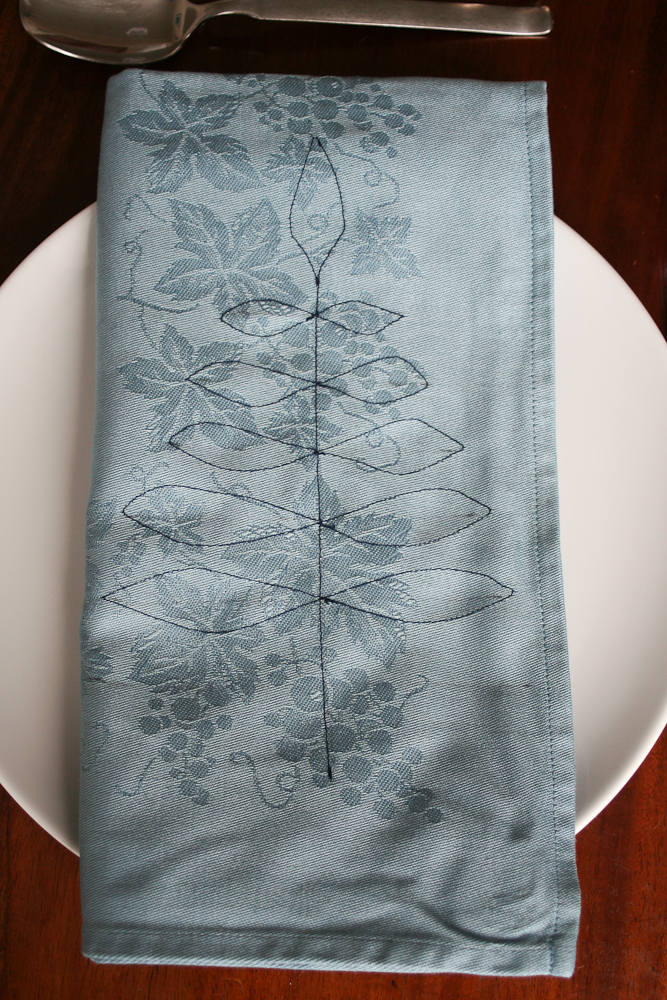
I think this calls for a pillow fight, actually...

Best,


Linking to: Transformation Thursday @ Shabby Chic Cottage

Saturday, January 16, 2010

Corsages - can't get enough of them

It seems that I am a bit obsessed about corsages at the moment. I came across a tutorial for making a corsage out of old denim a while ago. Sachiko's of Tea Rose Home great and easy way of making a pretty flower brooch convinced me that I should give it a go. And what can I say - I got into a bit of a flower frenzy, it seems. They are so easy to make that I didn't just make one, but kept going and made three corsages.


Now, there is actually no real need for yet another corsage tutorial. The reason I am including one here now is that I found a way of (literally) cutting corners. Oh, but before I start, I would also like to give credit to Beckie of Infarrantly Creative who made a stunning necklace that involved handmade flowers a while ago. Her bonheur necklace is really amazing. And I basically combined her instructions with Sachiko's instructions to make my own flowers.


Ok, so here we go: You need some synthetic fabric, beads, needle and thread, scissors and a lighter... *hehe* sounds mysterious, eh? But you will see where the lighter comes in. First of all cut your fabric into rough squares, differing in size from about 12 cm to 8 cm.  As you can see in my picture to the left, I cut mine very carelessly and roughly - I doesn't really matter at this stage!


Next create petals out of the squares. Here is my little corner-cutting and time-saving idea: Fold up your square diagonally - and then diagonally again - so that you come up with this: 


Holding the fabric at the point, cut off the top part of your triangle in a kind of B-shape. The further you cut into the middle, the longer the petals will be. Opened up it looks like this (see right pic).

 Depending on how see-through your material is and how transparent you want the finished corsage to be, you need to cut a number of squares. I made about 12 petals and sorted them according to size:


Again, don't worry that they are all different shapes - mother nature isn't particularly regular, either... and the finished flower will still look fine!


The next step is where the lighter comes in. In order to stop the fabric edges from fraying, use a lighter and "burn" the edges. Unfortunately I couldn't hold my big camera and at the same time handle fire, so I have no images of this process. Essentially you just move the flame swiftly along the edges of the fabric petals. Don't be too slow, or the fabric will catch fire. What you want is really just to get the synthetic fibres to heat and kind of get sticky... (*arrrrgh* difficult to explain when English is not my mothertongue.... sorry). Check the picture (right) where you can see the slightly curled and "glued" edges.


Now you simply stack the petals, starting with the largest at the bottom and going smaller. Make sure the petals do overlap nicely to create that flower shape. 


When you are happy with the shape, sew the stack of petals together in the centre of the flower with needle and thread. My fabric (which actually came from a tab top curtain in silver) had some simple twirly flower shapes stitched on. I had cut one of the petals shapes in such a way that the silver flower-twirl was in the centre of it - and I made that my top petal. I only sewed a grey bead in the middle of the twirl as the centre. And that's it. I attached a brooch pin at the back of it and it was ready to go...


However, I wasn't happy that the corsage was so two-dimensional - not very full. So I gave it a couple more tries. To the left is another one, this time all in red and with a flower-bead as the centre.


Here is a white and burgundy one. Isn't it nice and delicate? Unfortunately the beads are off-centre *doh*...


 I couldn't wait to wear it yesterday - it stands out nicely on my black pinafore. (But if you knew to how much trouble I went to get this seriously underwhelming shot of the corsage in action!!! My arm nearly fell off, trying to capture it by turning the camera on myself...) 


Which one do you like best?


18 January 2010: I have just discovered a nice site - cottage instincts and am linking this to

Friday, December 4, 2009

A Stocking for "Nikolaus"

The 6th of December is actually the Saint day of St. Nicholas, or Nikolaus, as we call him in German, aka Santa Claus. Traditionally in Germany children are given sweets and presents on that day - it's like "little Christmas". Children put their polished boots outside their doors on the evening of the 5th. Nikolaus visits them over night - and leaves treats in the boots. In my day, there were these hideous red, plastic miniature boots that came filled with cheap sweets *yuch* - although I can't complain; my mother was always a generous "Nikola"...


I am keeping up the tradition with my children while also trying to live the traditions of my adopted country, their home, Ireland. And something I have always loved were the Christmas stockings which are traditionally filled with the Christmas presents for Christmas day. Now, we do Christmas the German way, i.e. the big present-presentation happens on Christmas Eve. So we do not really have any use for Christmas stockings... Except - yes - they would do really nicely for the Nikolaus treats.

Anyway, even though I am not a very good seamstress, I decided to attempt sewing my own Christmas stockings. I had picked up a so-called "dolly bag" from a local haberdasher's which was full of red and green fabric remnants, perfect for Christmas.

I drew my own template of a large, roundy boot on newspaper first, cut it out, pinned it onto the fabric and then cut the fabric the right shape - three times per stocking. I first created a padded "side" for the stocking by  sandwiching some flat quilt wadding between two fabric layers. For a quilted effect I sewed a criss-cross pattern onto the fabric. Then I sewed around the boot shape. The dolly bag also contained some remnant felt which had been cut out in a scalloped shape. I sewed that to the top of the boot so it looks as if its top is rolled down.

I wanted to have a two-sided stocking, so I used the remaining cutout as a background for a giant, red C to personalize the stocking.


Then I put the padded front part of the stocking right-on-right with the personalised cut-out boot shape and sewed around it, leaving the top open, of course. Then I simply turned it inside out. Last thing I took a short bit of red silk ribbon and sewed it on as a hanger to suspend the stocking from.


I created another one for my daughter, this time in red, but essentially the same design. The kids love their stockings and use them every year now... 


Sunday, October 18, 2009

Antique Cabinet Before and After


My first Before and After-Post!!!


Project Drawing Room is progressing at a slowly but steady pace. There was an old, antique cabinet in the house that we thought might look good in the new drawing room. These cabinets traditionally come with a set of spindly legs and are usually placed in the corners beside the chimney breasts. As those corners in our drawing room are taken up with old in-built cupboards, we decided to float the cabinet on the wall instead. Not quite sure about the brackets with which it is held up, but its current position is growing on me. It makes a nice feature on a wall that is otherwise bare.


However, I thought it looked a bit boring, so I decided to update it a bit with a colourful inside. As it is a genuine antique, I did not really want to decoupage it and permanently fix paper to the back of it. Instead I used a piece of vintage fabric to cover the back. It is the same fabric which I used for my noticeboard way back in July.

I measured the inside of the cabinet and cut the fabric to size. Then I ironed the fabric and also ironed down a hem on each side. To fix the fabric in place I simply used some thumbtacks. They are easily removed if I don't like the pattern anymore and they won't damage the cabinet too badly. 


I think the cabinet greatly benefits from its makeover - it gives a bit of spectacle to an otherwise dignified and elegant piece of antique furniture. It is now a perfect place for the crystal glasses. And it gives my two prized tea sets - one a set of 6 differently patterned tea cups by the Russian Lomonossov Porcelain manufacture brought back 22 years ago from a study trip to St. Petersburg (then still called Leningrad!), the other a recently inherited old genuine Chinese tea set - a perfect display area.


Saturday, August 15, 2009

Retro Bag

I love the whole retro trend. Even when I was a kid I remember being fascinated by the then retro designs - my granddad used to have this shirt with Egyptian hieroglyphs on it that I had my eyes on. No idea where that went, unfortunately. So you can guess my delight when I came across an old suitcase full of old fabrics that was left in the old house I live in.

Now, a lot of the stuff in the "museum" (as I like to call my present residence) is actually quite old and hails back from the turn of the century before last (i.e. the 19th century). It is fascinating stuff - but I am usually too full of awe to touch it and make something with it. However, the aforementioned suitcase contained some material that looks as if it came from the 1960s. There was one design that I particularly liked - but there was very little fabric. Only enough to make a shoulder bag with it.

Using basically the same general pattern as my
lunch bag l improvised and sewed this little shoulder bag. Not only sewing the edges right on right, I also created "stronger edges". (Forgive me if this doesn't sound very clear. There is probably a technical term for this that those of you who are accomplished seamstresses know. As an inspired improvisor I have no idea what that is called - I just do it.) And I added a little outside pocket for money or keys, giving it a little decorative trim by hemming along the upper edge with a decorative stitch from my sewing machine.


The bag took me an evening to make.

Friday, July 17, 2009

Sprucing up my Napkins

I was given a set of blue damask napkins by a visitor years ago. I do like fabric napkins, but I confess I don't get them out very often. Noone at my table seems to use napkins very much, so it seems superfluous putting them out. Maybe I should turn them into little placemats? Or make them into mini-table cloths? They are rather big, almost 60 x 60 cm. Who has a gob that big???


Whatever - since they are not an essential item at my table I felt I could experiment with them. I had seen an easy design somewhere that I have tried to recreate. The outcome is a little Christmassy, as you can see on the left. It is, in fact, not a Christmas tree but a simple leaf design, very slightly inspired by Orla Kiely's stem designs. Here is what I did:


First I marked a rough guideline along which I could sew my design. I simply drew with a pencil on the fabric (I assume that will come out in the wash...). Then I started out by sewing half of the top leaf and continuing all the way down with the stem.


For the pairs of leaves I found it worked best if you start in the middle,
i.e. on the stem, then sew one leaf, crossing over in one continuous line to the other leaf. Continue to do that with as many leaf pairs as you need for the length of your fabric. The design will be a little bit irregular, unless you draw the complete design onto the fabric. However, the irregularity will add to the charm of your design (says Sonja, pretending she didn't want her leaves more uniform...) It might be an idea to practice this once with an off-cut!


I am quite happy with my result. Best is, that the design looks as neat on the back as on the front of the fabric. No tatty backside that needs to be hidden... One napkin will take between 30 mins and an hour to be made - depending on your sewing skills, I guess. My dining table will be spruced up with a spruce, so.

PS: Fabric without an in-woven design is probably better for this project. In my napkins it kind of interferes with the sprucy leaves...


Thursday, July 16, 2009

Lunchbag

For those of you who are still lucky enough to have a job (...), here is something to make your lunch a bit prettier! - It always annoyed me that I only had a few dirty, smelly plastic bags in which I brought my crispbread and lettuce up to the canteen. Very un-stylish! When I had to tidy up a few loose ends one evening, I decided to sew myself a pretty lunchbag.

Whenever I make a trip to Ikea (which is not that often, as Ikea is only opening in Dublin this July. Yessssssss - the suspense! the excitement! the expectation!!! I can tell you that a lot of Dublin ladies will be made very, very happy on July 27th *haha*), I stock up on the cheapest bargain fabric they are selling off. You often get colourful, nice fabrics for as little as 1 €/m. See a glimpse of my Ikea fabrics to the left.

For those of you who are dedicated seamstresses, my bag is probably a botch job. I am too impatient to work with templates, rulers and measures. Well, I'd like to say that I am pretty good at improvising... But here is a rough template I worked with. (Click on picture to enlarge!)


Basically cut out two separate rectangular side bits and one long rectangular bit which will form the bottom and the two smaller sides of the bag. Remember to calculate in 3 cm extra for sewing. I suggest you sew the bottom in first, with both larger side bits, and then do the side panels. Once everything was sewed together, I hemmed the top of the bag in one go.

For the handles, just cut two pieces of fabric to the length you want them and then fold them over twice and sew along the long side. Then sew them onto the top of your bag. Finished.

Here is my little maritime lunchbag (spot the Ikea fabric?)... Goes nicely with yoghurt, salmon and ciabatta bread...

Sunday, July 5, 2009

Noticeboard

I recently started working from home on my computer as a freelance journalist. And I found myself jotting down loads of guidelines and rules on various pieces of paper, only to loose them in the pile of documents that always litter my desk. I needed a noticeboard to keep track of my notes.

So one boring weekday afternoon I took a look around the house to see if I had any material for a noticeboard. That is the way I usually get crafty: A spontaneous need arises and I need to satisfy that need immediately. That means that I am quite good at working with what I have in the house, at economizing, recycling and generally improvising.

A look in a cupboard revealed an old picture frame, slightly oblong in shape, but with a removable board back. I also found a colourful piece of
vintage fabric, ca. 1970, some quilting padding, thin red satin ribbon and thumbtacks.

I started out by removing the glass from the picture frame. Then I covered the board back with the padding, tacking it into place with thumbtacks. (I could have used the tacker - except I had run out of staples for it *doh*.) Next I stretched the vintage fabric over the padding and again fastened it with tacks on the backside. Using the design of the fabric as a guideline, I then put the ribbon crisscrossing across the board to form a more or less regular design. To hold them in place, I pushed thumbtacks through the ribbon where they crossed. (I had to use a hammer for that.) When I was happy with the look, I fitted the finished board back into the frame.

The whole project took me literally only half an hour to make. I had the help of my partner with stretching the fabric across the board as it can be tricky holding it and stretching the fabric at the same time.