Now, here is another thing I have been working on the last few days. I came across a pattern for "beaded beads" that looked straight forward enough for me to attempt it. Candie posted an extensive and clear tutorial for the bead balls with lots of photos, so I sat down with my bead box and a string of nylon thread and made this:
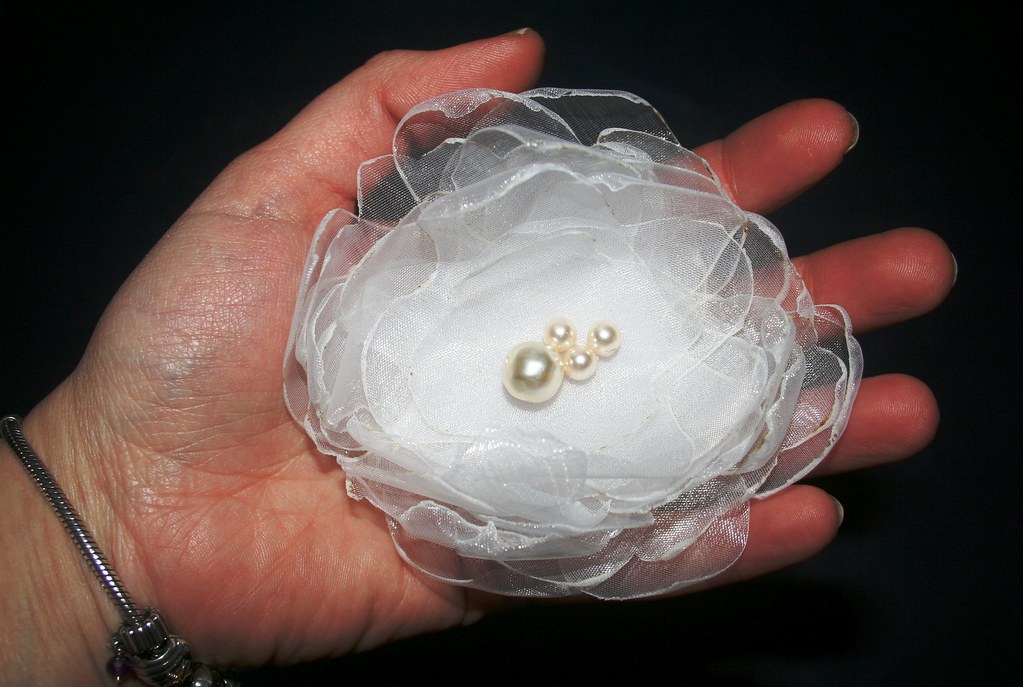
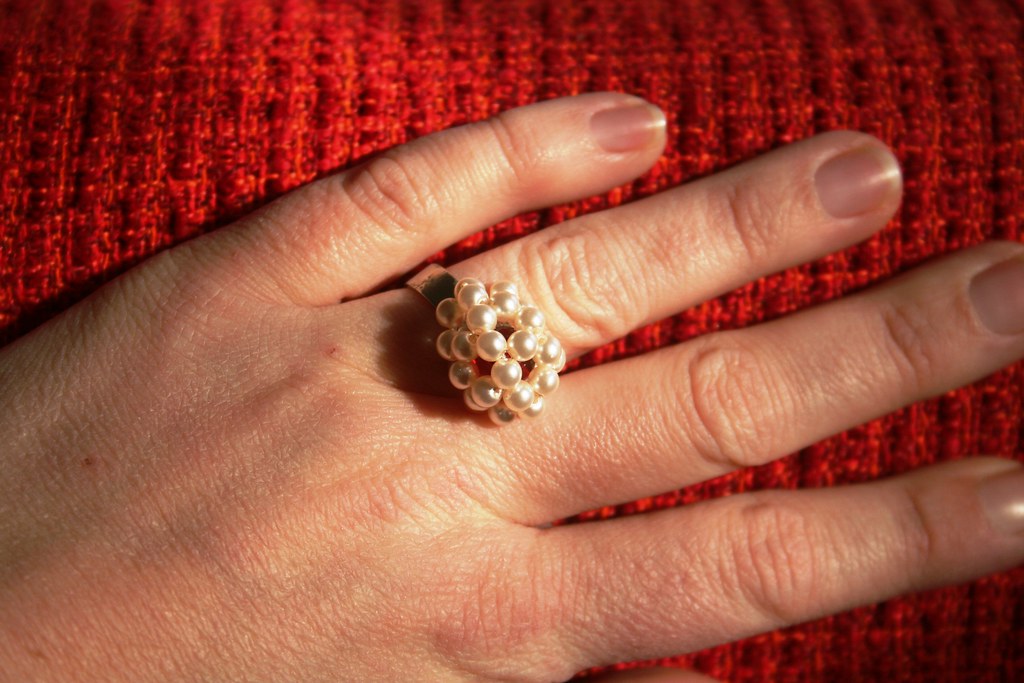
 I don't want to attempt another tutorial for this as Candie's instructions are detailed, so please check them out here. But I will show you what I made and how I adapted the bead balls. If you look closely at the photo above (and disregard the horrible, piggy fleshiness that is my hand *ugh*), you will see that I enclosed a pearly bead in the bead ball. I simply popped that into the ball before I threaded the last little bead on. A little surprise, so to speak...
 Without getting into a tutorial, I'll just write down a couple of observations that might help you when you are making these. My recommendation is to make a couple of these bead balls with slightly larger beads first before you start on the fiddly tiny ones. You need 30 beads of the same size, preferably round ones, and about 20 inches of nylon thread. Count out your beads and put them on a saucer on your crafting table! Making these bead balls is addictive, as Candie warned in her tutorial...
I have to admit, it took a few attempts before I got the bead balls right. But I ploughed on until I got it right. The whole process is fairly logical and regular, but I found I really understood the process of weaving them together, when I used different colour beads for the various parts. I.e. start with 5 beads of one colour. Then have 15 beads of a different colour. And for the last part have 10 beads of yet another colour. It just means you understand the pattern and the weaving better. It will help you to make your second bead ball in just one colour...
Without getting into a tutorial, I'll just write down a couple of observations that might help you when you are making these. My recommendation is to make a couple of these bead balls with slightly larger beads first before you start on the fiddly tiny ones. You need 30 beads of the same size, preferably round ones, and about 20 inches of nylon thread. Count out your beads and put them on a saucer on your crafting table! Making these bead balls is addictive, as Candie warned in her tutorial...
I have to admit, it took a few attempts before I got the bead balls right. But I ploughed on until I got it right. The whole process is fairly logical and regular, but I found I really understood the process of weaving them together, when I used different colour beads for the various parts. I.e. start with 5 beads of one colour. Then have 15 beads of a different colour. And for the last part have 10 beads of yet another colour. It just means you understand the pattern and the weaving better. It will help you to make your second bead ball in just one colour...
 Nonetheless I got a couple of them wrong and finished before I had a regular ball shaped pendant. They were more of a three-quarter globe, with the last bit missing. I found a use for those, too, though. I popped a red bead into one and then fixed the ball onto a ring.
Another three-quarters finished ball became the centre of one of my corsages. It looks lovely like that and was easier to sew on than a full ball, I think.
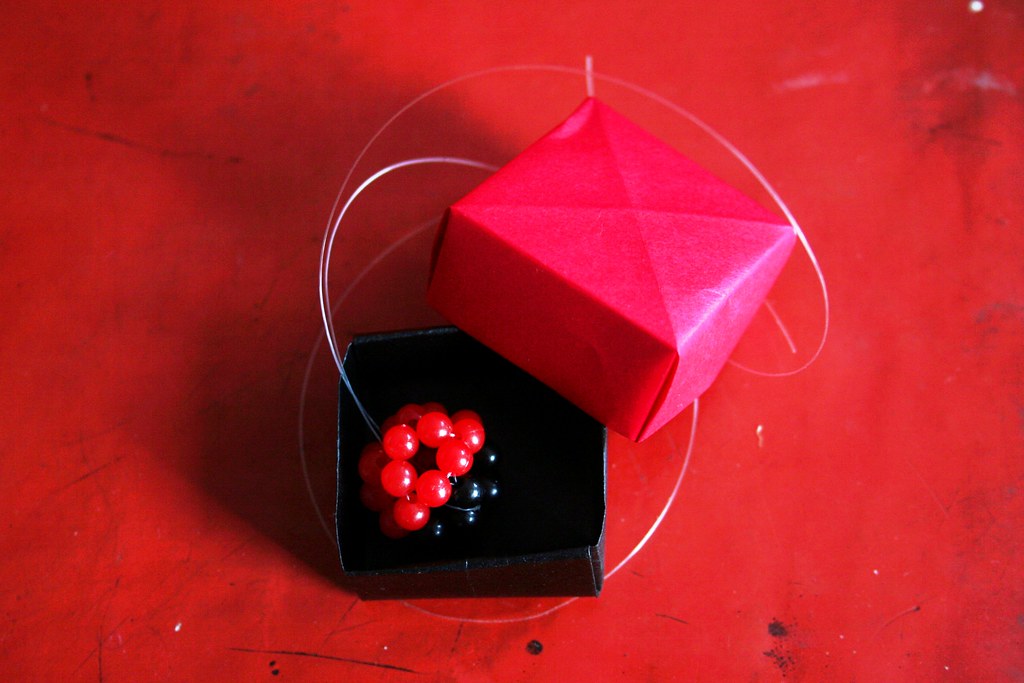
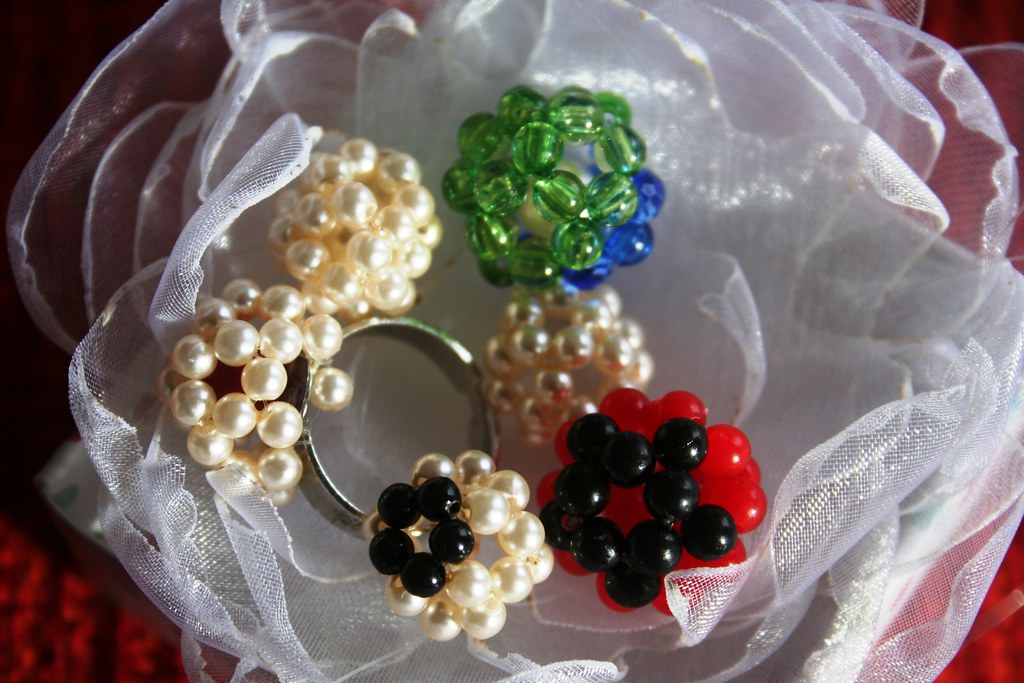
I am still wondering what to do with my green-and-blue bead ball - I think I will turn it into a pendant once I have figured out how to fix a little hoop onto it. The obvious use would be earrings - Candie shows several of hers. My daughter loves this red-and-black raspberry bead ball - not sure yet, what to do with it, but it already has a matching gift box *haha*...
Nonetheless I got a couple of them wrong and finished before I had a regular ball shaped pendant. They were more of a three-quarter globe, with the last bit missing. I found a use for those, too, though. I popped a red bead into one and then fixed the ball onto a ring.
Another three-quarters finished ball became the centre of one of my corsages. It looks lovely like that and was easier to sew on than a full ball, I think.
I am still wondering what to do with my green-and-blue bead ball - I think I will turn it into a pendant once I have figured out how to fix a little hoop onto it. The obvious use would be earrings - Candie shows several of hers. My daughter loves this red-and-black raspberry bead ball - not sure yet, what to do with it, but it already has a matching gift box *haha*...
 Best,
Best,

Did you check out the Craft Hope for Haiti etsy shop, dear readers? Lots of nice things to buy there, and doing a good deed while you buy.
Click the button to see the shop:  I received an e-mail from the organisers behind Craft Hope at 2.25 pm today, letting me know that my flower brooch had been posted in the shop. When I checked the link to my item just now (10 pm), I found out that it has already sold! Yaaaaaaaaaaaaaaayyyyyyyyyyyyyyyyyyyyyy! You can check my listing here. So thank you to the buyer! You have proven that you have a good heart - and style...
Wondering whether I should make another one and donate it???
It seems that I am a bit obsessed about corsages at the moment. I came across a tutorial for making a corsage out of old denim a while ago. Sachiko's of Tea Rose Home great and easy way of making a pretty flower brooch convinced me that I should give it a go. And what can I say - I got into a bit of a flower frenzy, it seems. They are so easy to make that I didn't just make one, but kept going and made three corsages.
Now, there is actually no real need for yet another corsage tutorial. The reason I am including one here now is that I found a way of (literally) cutting corners. Oh, but before I start, I would also like to give credit to Beckie of Infarrantly Creative who made a stunning necklace that involved handmade flowers a while ago. Her bonheur necklace is really amazing. And I basically combined her instructions with Sachiko's instructions to make my own flowers.
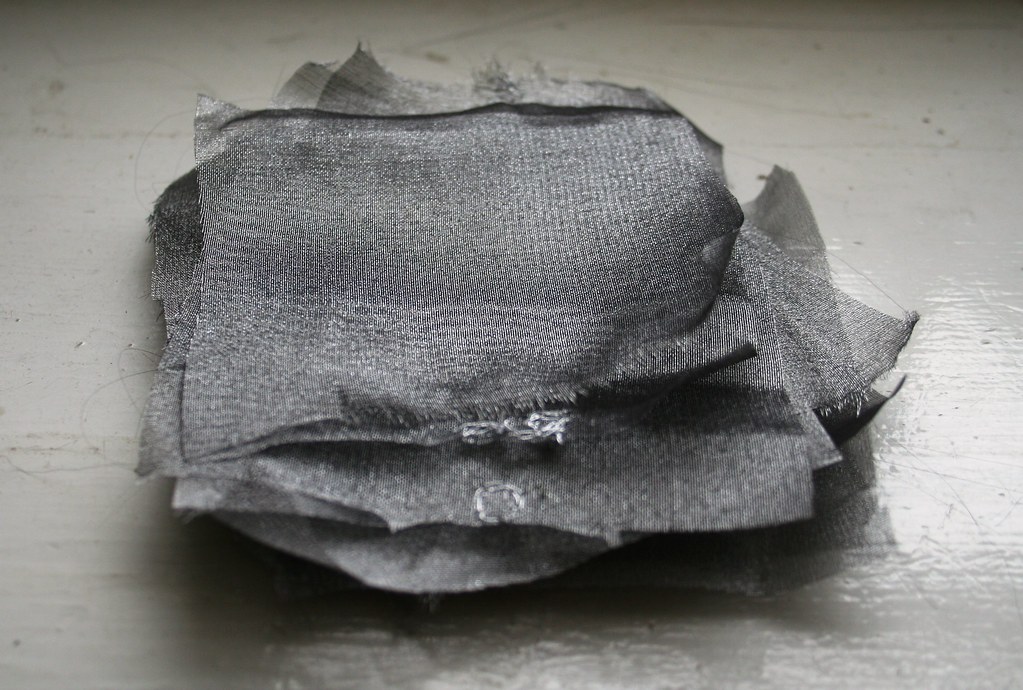
Ok, so here we go: You need some synthetic fabric, beads, needle and thread, scissors and a lighter... *hehe* sounds mysterious, eh? But you will see where the lighter comes in. First of all cut your fabric into rough squares, differing in size from about 12 cm to 8 cm. As you can see in my picture to the left, I cut mine very carelessly and roughly - I doesn't really matter at this stage!
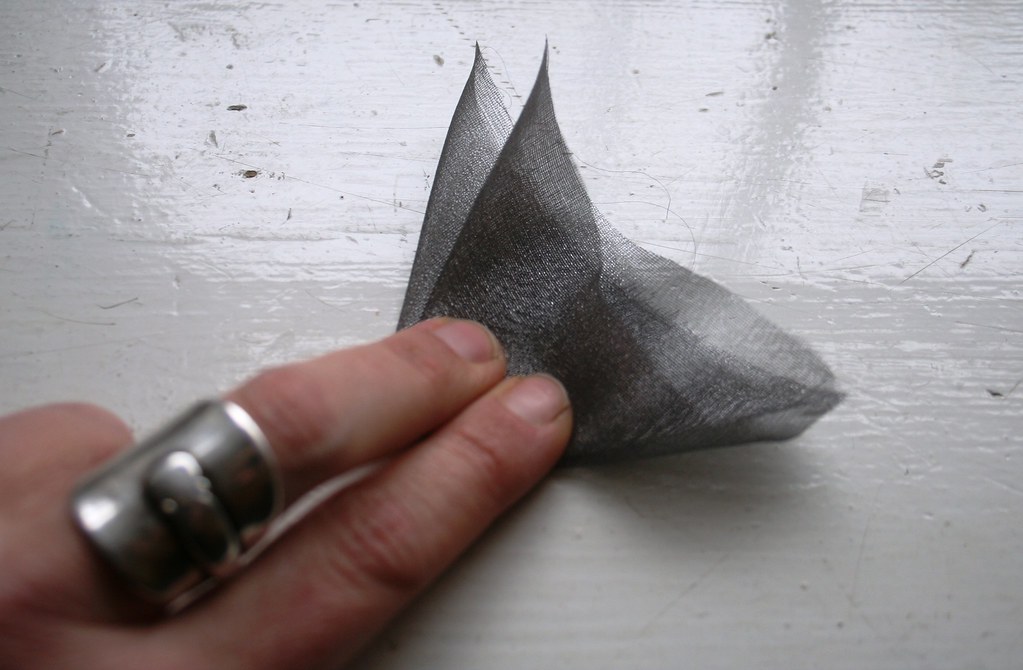
Next create petals out of the squares. Here is my little corner-cutting and time-saving idea: Fold up your square diagonally - and then diagonally again - so that you come up with this:
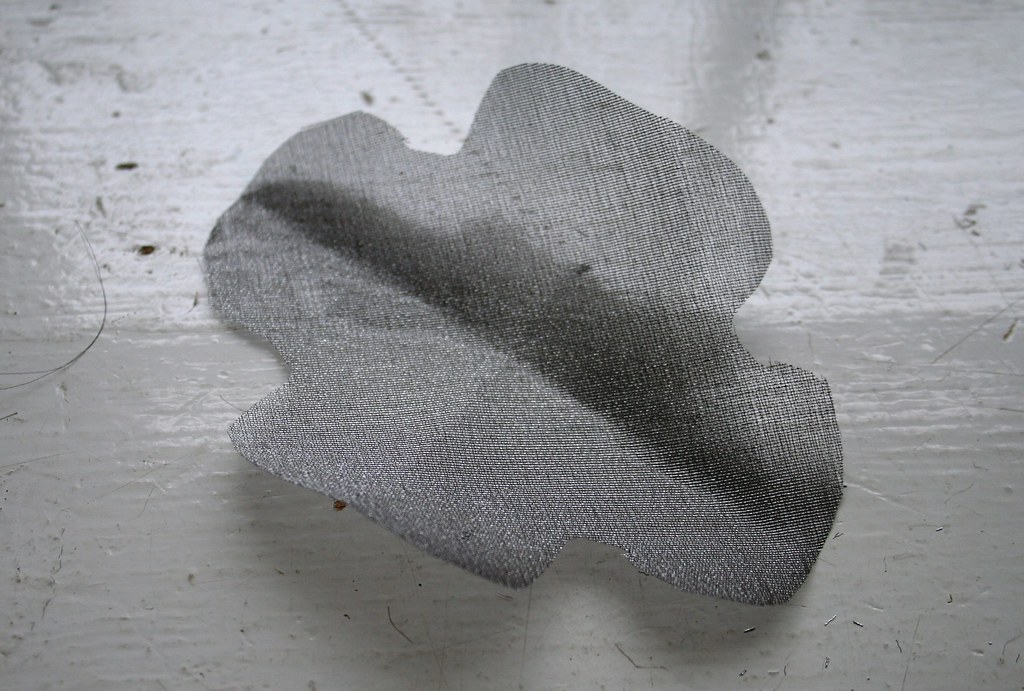
 Holding the fabric at the point, cut off the top part of your triangle in a kind of B-shape. The further you cut into the middle, the longer the petals will be. Opened up it looks like this (see right pic).
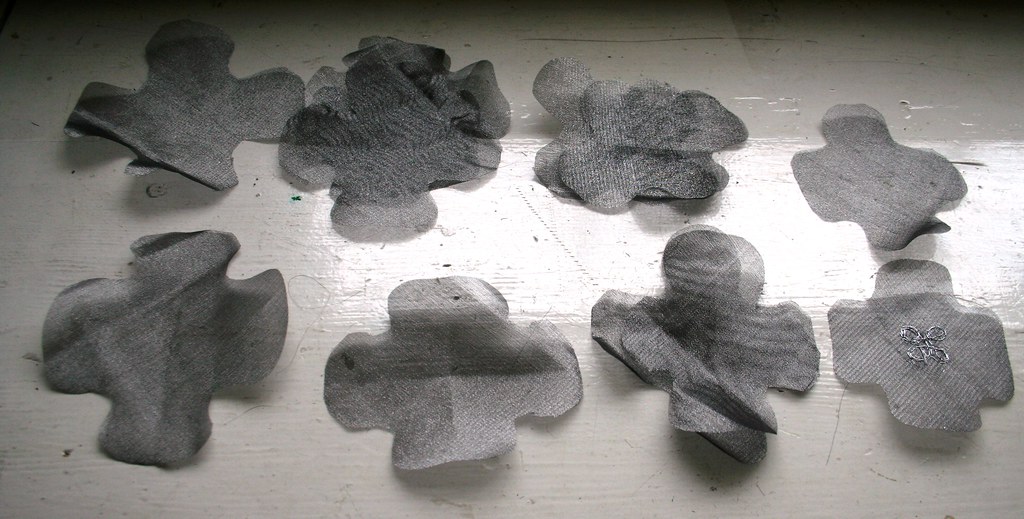
Depending on how see-through your material is and how transparent you want the finished corsage to be, you need to cut a number of squares. I made about 12 petals and sorted them according to size:
Again, don't worry that they are all different shapes - mother nature isn't particularly regular, either... and the finished flower will still look fine!
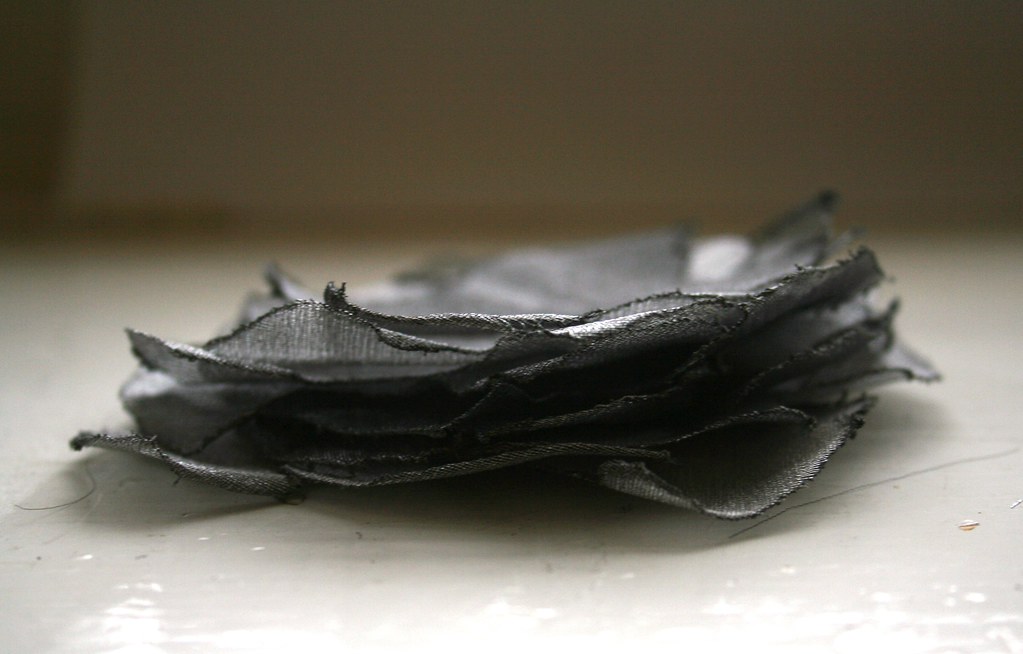
The next step is where the lighter comes in. In order to stop the fabric edges from fraying, use a lighter and "burn" the edges. Unfortunately I couldn't hold my big camera and at the same time handle fire, so I have no images of this process. Essentially you just move the flame swiftly along the edges of the fabric petals. Don't be too slow, or the fabric will catch fire. What you want is really just to get the synthetic fibres to heat and kind of get sticky... (*arrrrgh* difficult to explain when English is not my mothertongue.... sorry). Check the picture (right) where you can see the slightly curled and "glued" edges.
Holding the fabric at the point, cut off the top part of your triangle in a kind of B-shape. The further you cut into the middle, the longer the petals will be. Opened up it looks like this (see right pic).
Depending on how see-through your material is and how transparent you want the finished corsage to be, you need to cut a number of squares. I made about 12 petals and sorted them according to size:
Again, don't worry that they are all different shapes - mother nature isn't particularly regular, either... and the finished flower will still look fine!
The next step is where the lighter comes in. In order to stop the fabric edges from fraying, use a lighter and "burn" the edges. Unfortunately I couldn't hold my big camera and at the same time handle fire, so I have no images of this process. Essentially you just move the flame swiftly along the edges of the fabric petals. Don't be too slow, or the fabric will catch fire. What you want is really just to get the synthetic fibres to heat and kind of get sticky... (*arrrrgh* difficult to explain when English is not my mothertongue.... sorry). Check the picture (right) where you can see the slightly curled and "glued" edges.
 Now you simply stack the petals, starting with the largest at the bottom and going smaller. Make sure the petals do overlap nicely to create that flower shape.
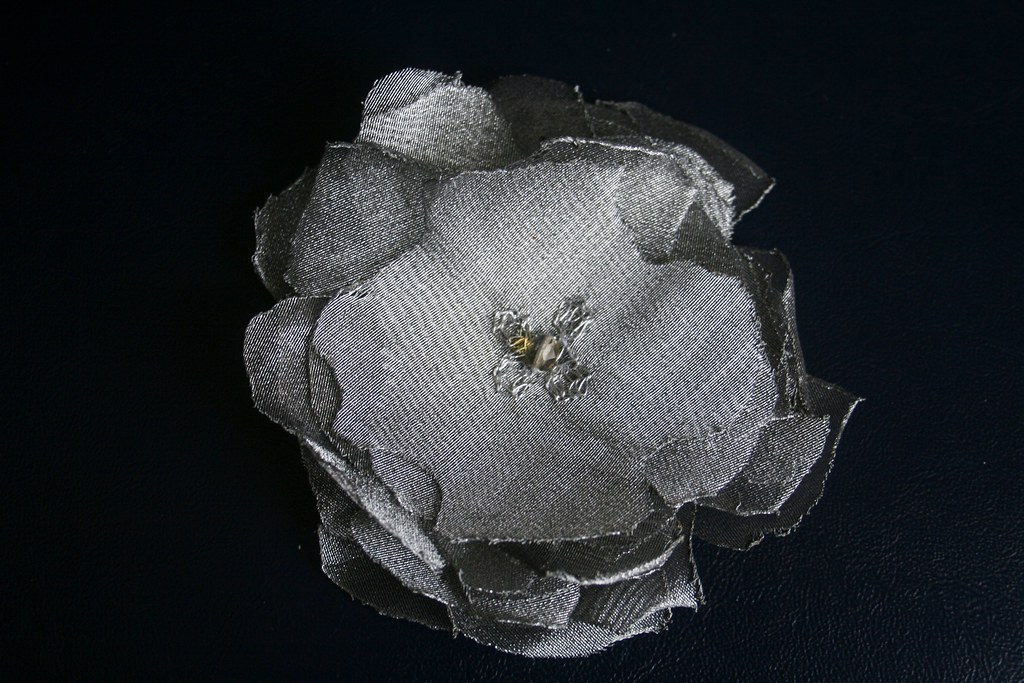
When you are happy with the shape, sew the stack of petals together in the centre of the flower with needle and thread. My fabric (which actually came from a tab top curtain in silver) had some simple twirly flower shapes stitched on. I had cut one of the petals shapes in such a way that the silver flower-twirl was in the centre of it - and I made that my top petal. I only sewed a grey bead in the middle of the twirl as the centre. And that's it. I attached a brooch pin at the back of it and it was ready to go...
Now you simply stack the petals, starting with the largest at the bottom and going smaller. Make sure the petals do overlap nicely to create that flower shape.
When you are happy with the shape, sew the stack of petals together in the centre of the flower with needle and thread. My fabric (which actually came from a tab top curtain in silver) had some simple twirly flower shapes stitched on. I had cut one of the petals shapes in such a way that the silver flower-twirl was in the centre of it - and I made that my top petal. I only sewed a grey bead in the middle of the twirl as the centre. And that's it. I attached a brooch pin at the back of it and it was ready to go...
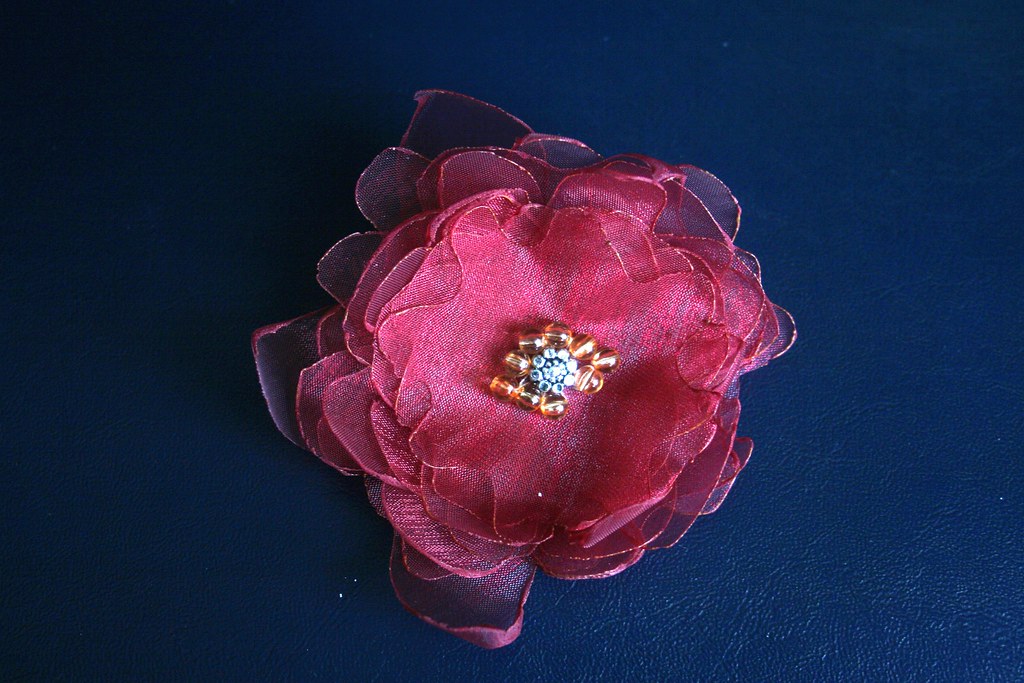
 However, I wasn't happy that the corsage was so two-dimensional - not very full. So I gave it a couple more tries. To the left is another one, this time all in red and with a flower-bead as the centre.
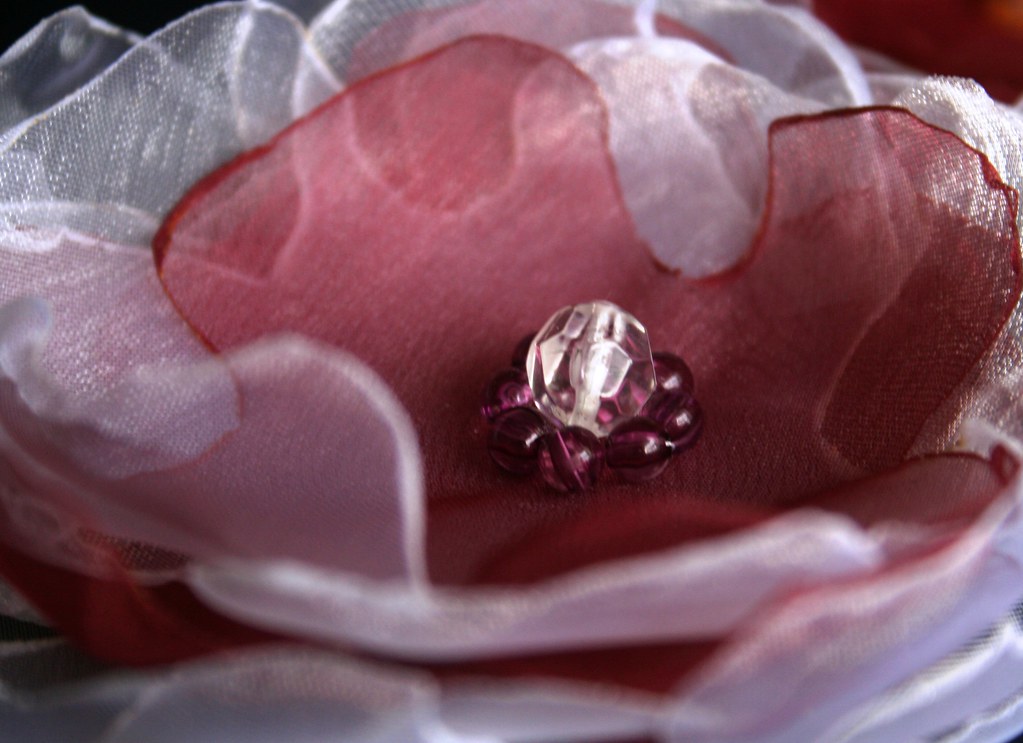
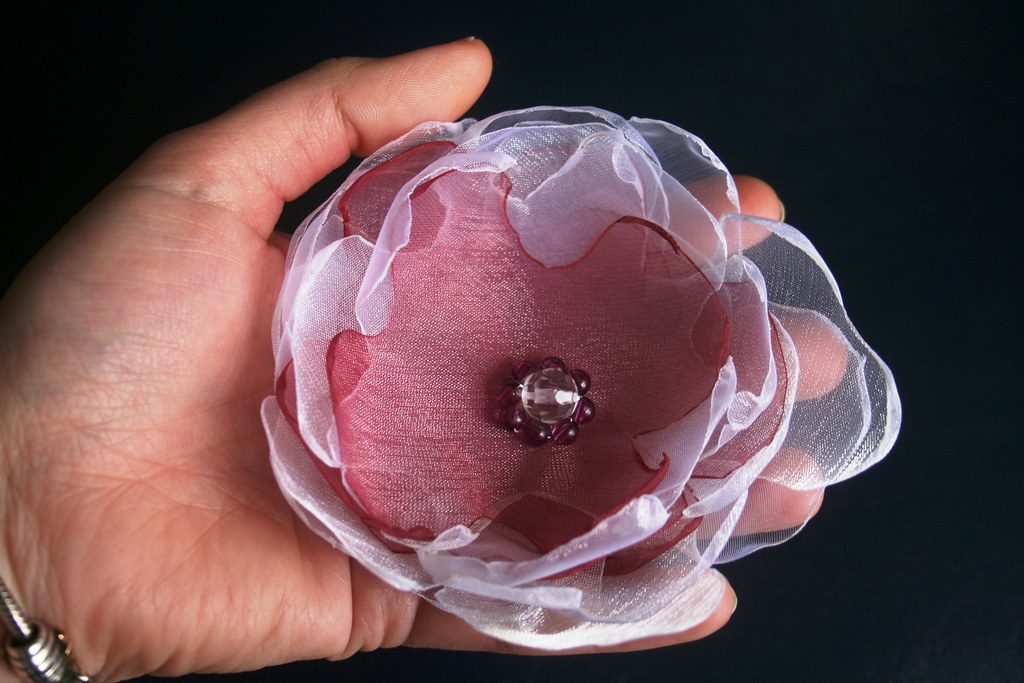
Here is a white and burgundy one. Isn't it nice and delicate? Unfortunately the beads are off-centre *doh*...
However, I wasn't happy that the corsage was so two-dimensional - not very full. So I gave it a couple more tries. To the left is another one, this time all in red and with a flower-bead as the centre.
Here is a white and burgundy one. Isn't it nice and delicate? Unfortunately the beads are off-centre *doh*...
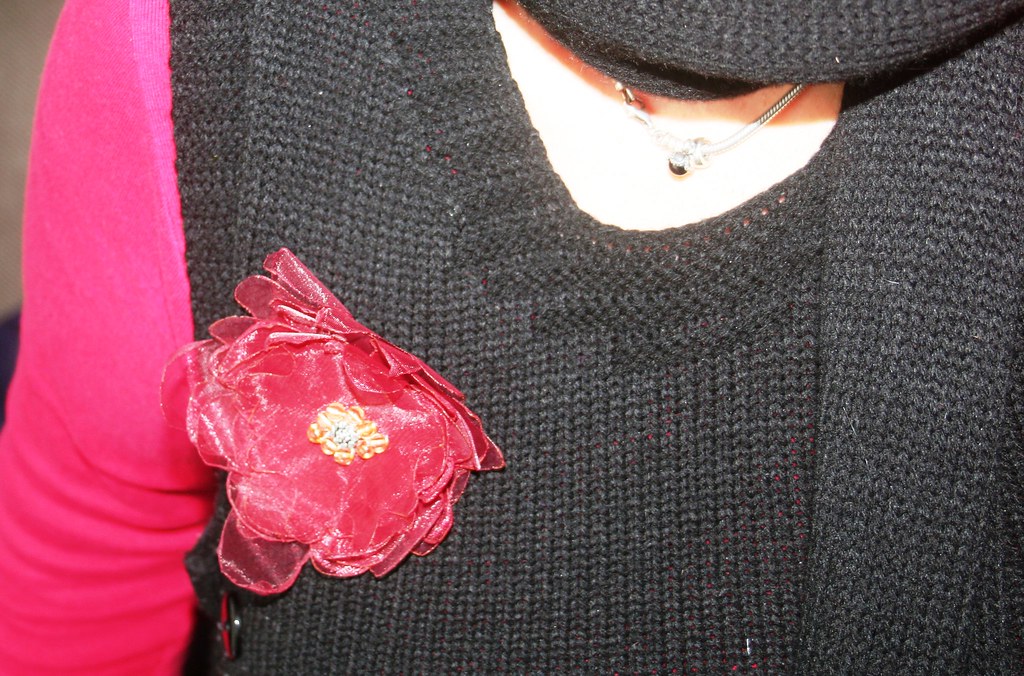
I couldn't wait to wear it yesterday - it stands out nicely on my black pinafore. (But if you knew to how much trouble I went to get this seriously underwhelming shot of the corsage in action!!! My arm nearly fell off, trying to capture it by turning the camera on myself...)
Which one do you like best?

18 January 2010: I have just discovered a nice site - cottage instincts and am linking this to 

 I don't want to attempt another tutorial for this as Candie's instructions are detailed, so please check them out here. But I will show you what I made and how I adapted the bead balls. If you look closely at the photo above (and disregard the horrible, piggy fleshiness that is my hand *ugh*), you will see that I enclosed a pearly bead in the bead ball. I simply popped that into the ball before I threaded the last little bead on. A little surprise, so to speak...
 Without getting into a tutorial, I'll just write down a couple of observations that might help you when you are making these. My recommendation is to make a couple of these bead balls with slightly larger beads first before you start on the fiddly tiny ones. You need 30 beads of the same size, preferably round ones, and about 20 inches of nylon thread. Count out your beads and put them on a saucer on your crafting table! Making these bead balls is addictive, as Candie warned in her tutorial...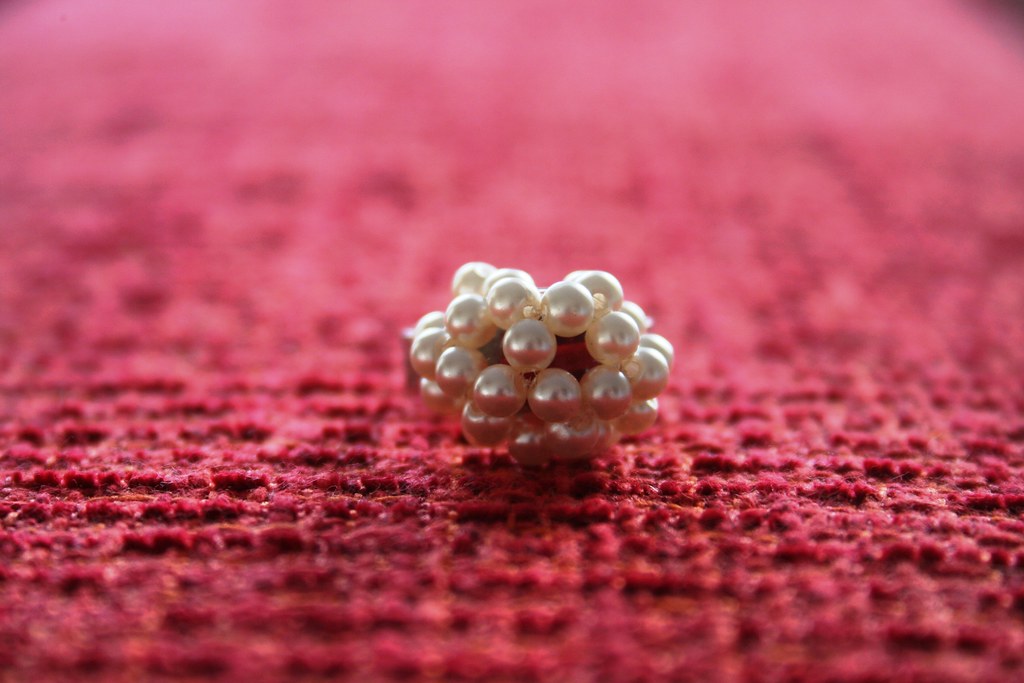
 Nonetheless I got a couple of them wrong and finished before I had a regular ball shaped pendant. They were more of a three-quarter globe, with the last bit missing. I found a use for those, too, though. I popped a red bead into one and then fixed the ball onto a ring.