FYI


Showing posts with label remodeling. Show all posts

Wednesday, September 8, 2010

Chunky Necklace - Recycled from Unloved Bracelets

Ok, I suppose I won't get away with a post that ignores the fact that Craft-Werk had been languishing for nearly four month's??? Well, I'll keep it short - (I may not have any readers anymore who interested in my ramblings, anyway.) What happened was that I had to sit my finals for my Diploma in Photography in May. I passed (with distinction, she brags) and I partied. I took a break from crafting to just enjoy life for a bit without the pressure of being creative. Then I went on holiday to Germany and Poland. And the longer I put off writing a new entry for the blog, the more difficult it became to find an excuse for my long absence - in turn putting me off to get back into blogging. On top of that the irrational pressure that I had to come back to blogging with a "bang", i.e. a total stunner of a project. Rubbish, all of it - instead I decided to follow the marketing-effective advice of a well-known sports equipment manufacturer, and just did it. So without further ado, back into the flow...

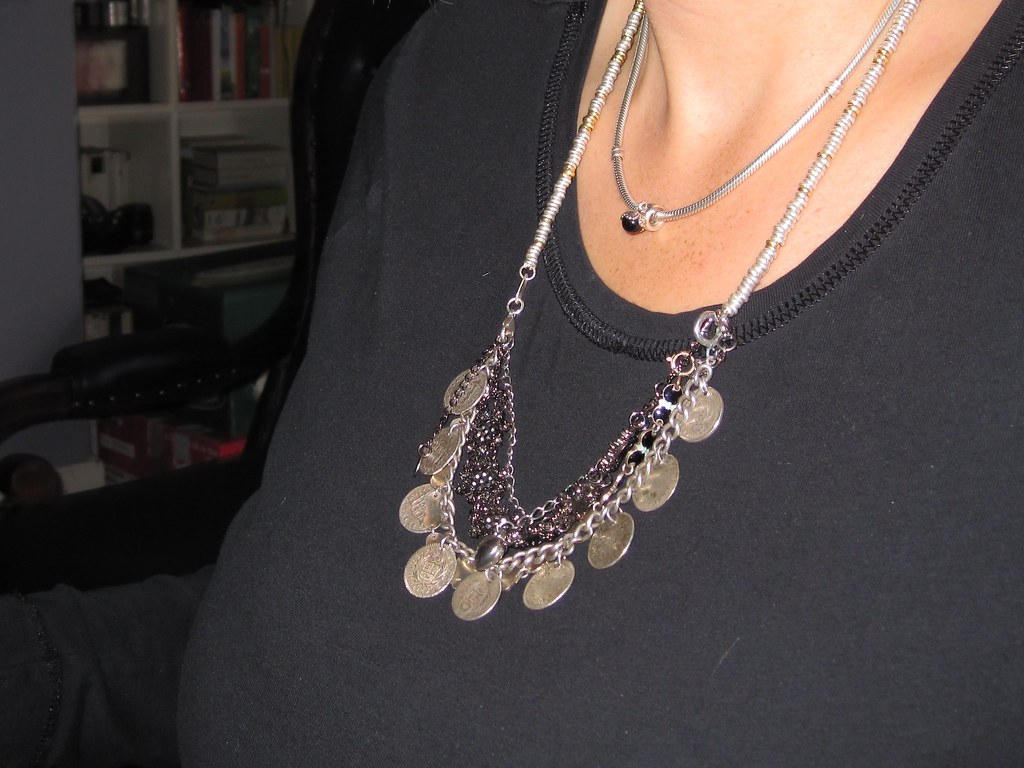
I love costume jewellery, particularly bracelets. Recently I discovered that I hardly wear my bracelets anymore, though, because they annoy me when I am typing at my laptop. I don't want to give them away, however, and so I had to think of a way of reusing them. Currently you see a lot of layered necklaces in the shops - and they were my inspiration for this:
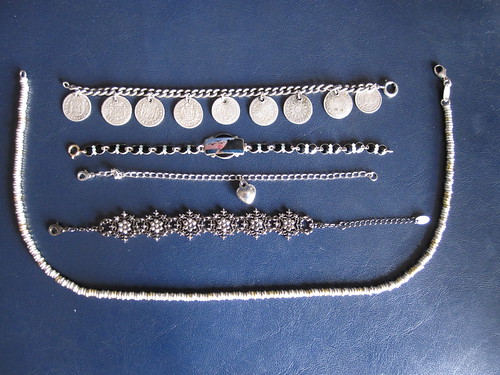
This is one of the easiest re-using projects I have ever done.  Here is my material:

1 chunky, long silver necklace

4 bracelets of little monetary but huge sentimental value, i.e. the dangling, antique Silver coins, collected by my father-in-law in Peru for his wife and then attached to a chain; an enamelled bracelet bought in the 1940s in Norway by my grandfather for my granny; a sweet little silver heart (which came from a kids magazine) and a shiny metal bracelet from China.
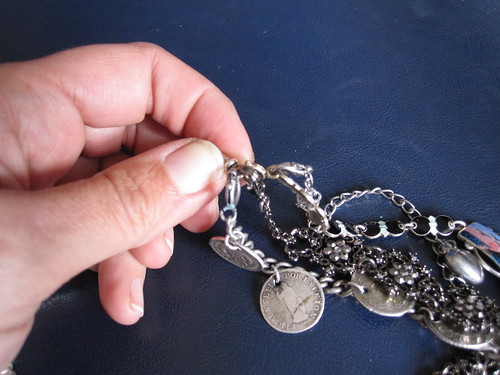
No tools necessary as I all I did was put the hoops of the bracelets through the clasp of the necklace - and attach the clasps of the bracelets to the hoop of the necklace.

A bit fiddly, I admit, but done in all but 5 minutes!


Chunky and folksy jewellery is still in fashion, I believe - so here is my updated, recycled look:

Right - that's it for now. Hope you'll like it!

Best,

Posted to:


Saturday, February 20, 2010

Kitchen Chairs Enlivened

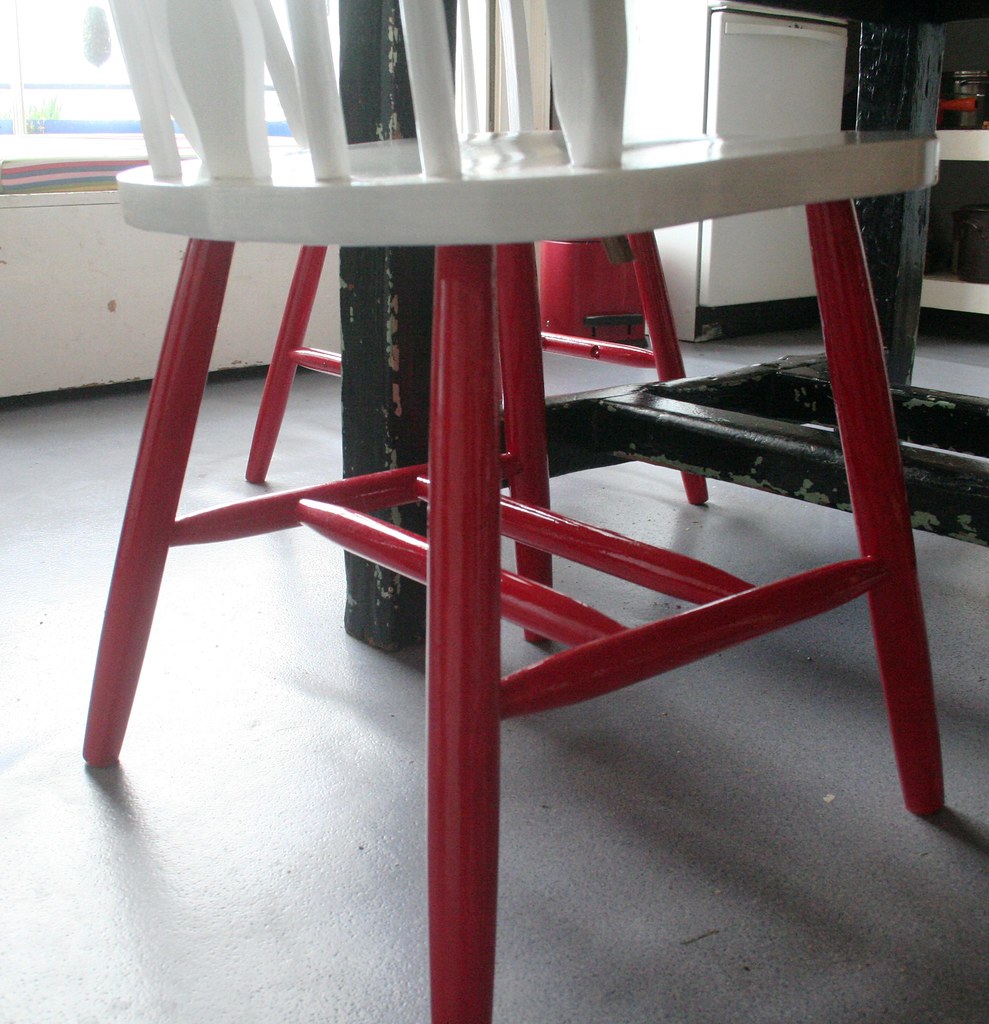
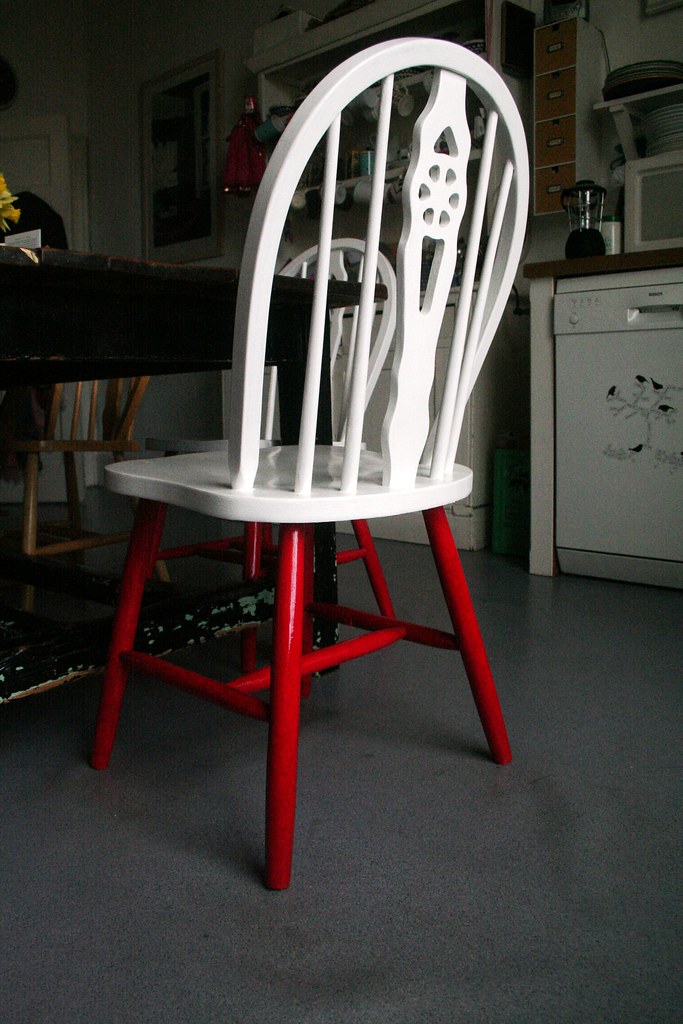
When we remodeled our kitchen four years ago, we were given a set of six wooden chairs by my brother- and sister-in-law who had just moved into a new house. Now, I am not a great fan of "rustic" furniture, but who looks a gift horse in the mouth? Besides, the chairs are a classic design and were neutral, as in "wooden". Ultimately I would love to have some design classic like the Arne Jacobsen Series 7 chair. But I guess I will have to save a bit for that... In the meantime we have updated and enlivened our kitchen chairs with a bit of paint.

 
Oooops, I should've hoovered the floor before I took that pic *blushes*. 

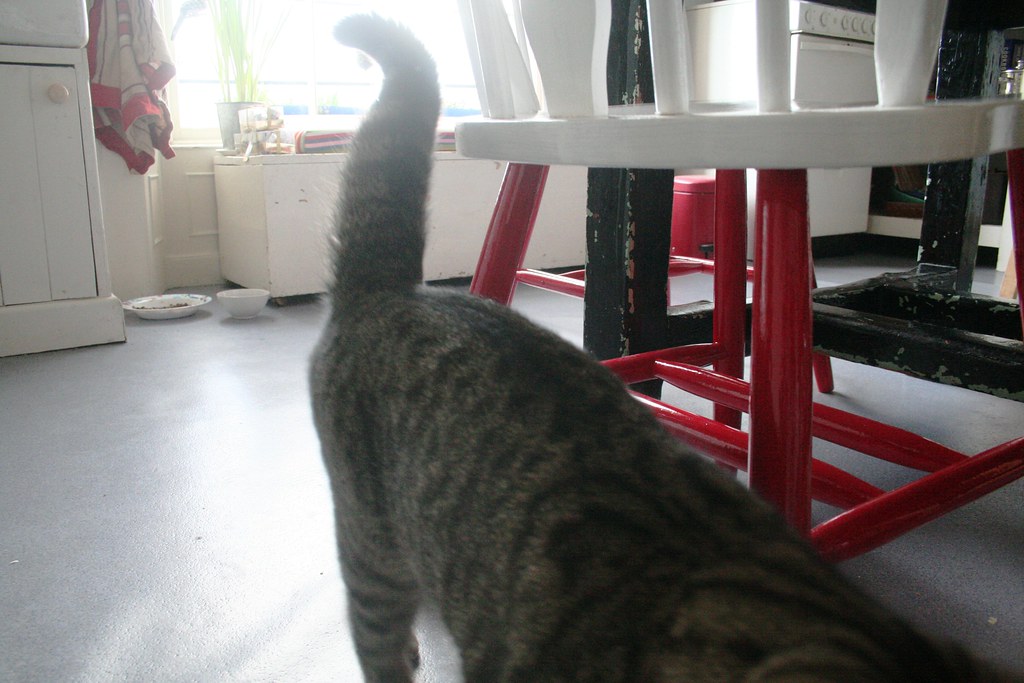
Guess who walked right into the photo shoot? Yep, always there, just in case we put out some food... (In fact Skittles had just pushed a pan with left-over mashed potatoe from the kitchen counter onto the floor and was happily nibbling away at it...) Apologies for the picture quality in this post - it is difficult to really show the chairs in context. 
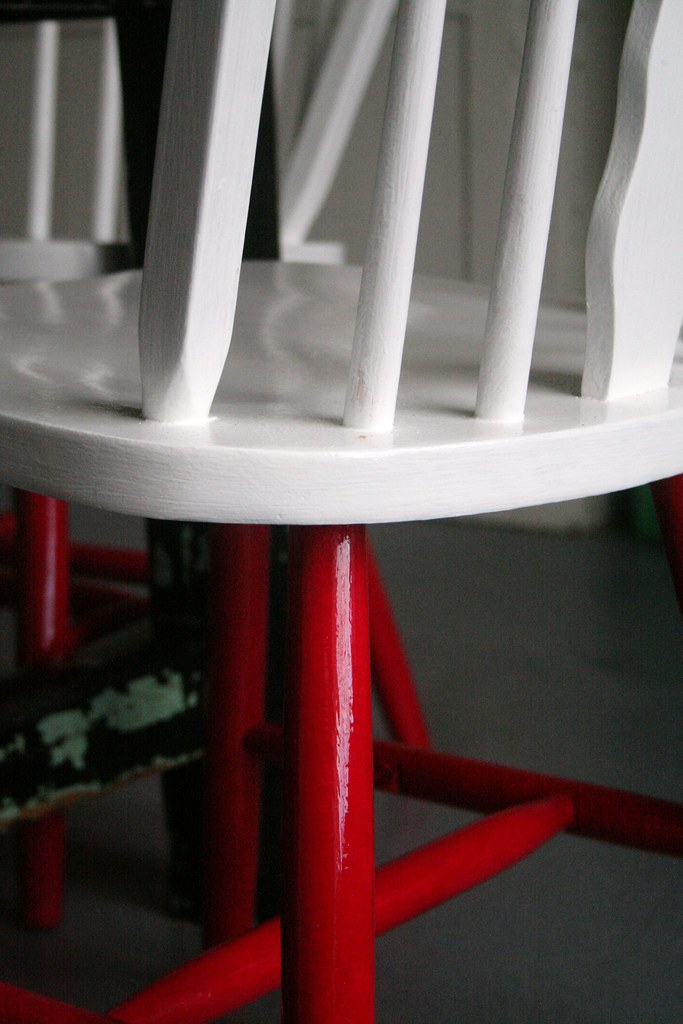
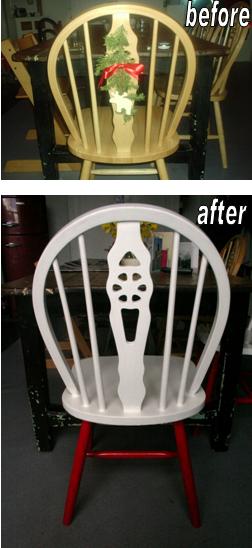
Essentially we painted the legs a bright red and the seat and back brilliant white. I know it is a bit playful and not very elegant. Maybe "quirky" - but I like quirky. At least it means that not everyone has it. And red just lifts my spirits...
Here we go with a little before and after - sorry, the "before" image was taken around Christmas, hence the decoration with reindeer and fir...


On a different note I would like to say a big thank you to you, dear readers, for taking part in my little giveaway! I love getting your comments and I usually reply to them via the comment box, myself. This time I am avoiding that because I don't want to upset the numbers for the draw. Anyway, thanks for taking part and for visiting the blog. It's not only motivating, but also uplifting to know that you are out there!!! - If you haven't yet entered the giveaway, please do so here by simply leaving a comment. I will draw the winner on Monday evening, 11.30 pm.

 Best,


Monday, January 11, 2010

Guestroom turned Drawing Room: Before and After

Strictly speaking, decorating is not crafting. However, when decorating, crafting often comes into play. I have noticed that a lot of rather crafty blogs which I follow, very often include posts on their remodeled/redecorated/renovated rooms. So I hope my esteemed readers do not mind me posting a "before and after" here which refers to the (ongoing) remodeling of my drawing room. It's a longish saga, so bear with me, please ;-)


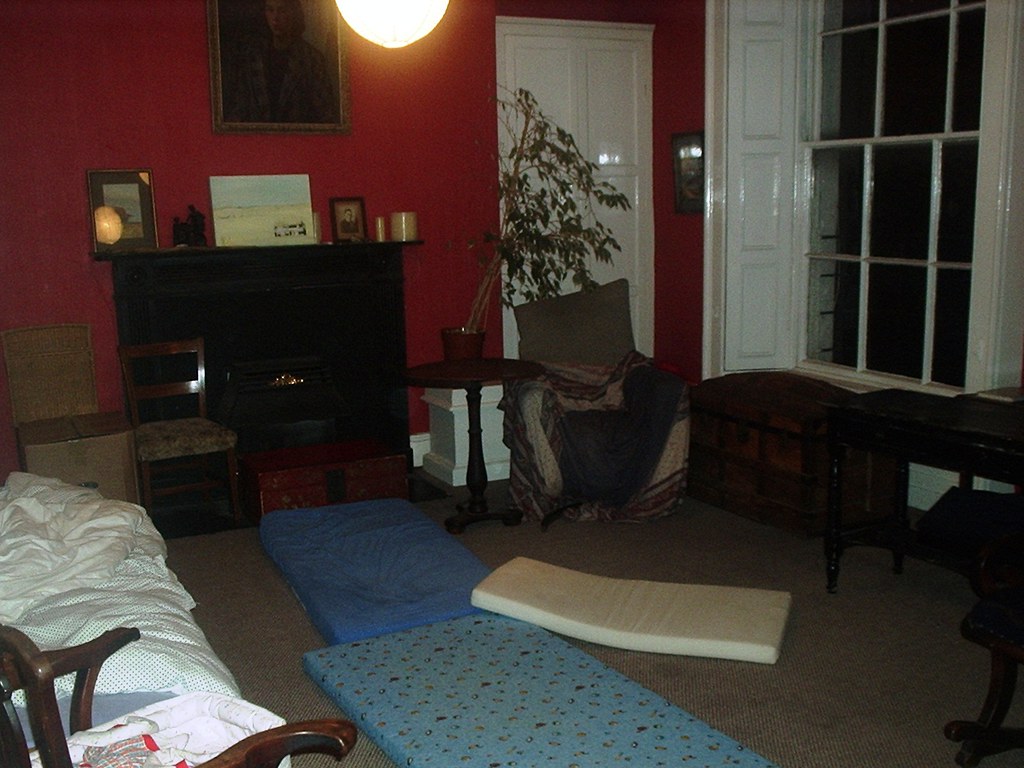
What is now our drawing room started out as our guestroom. (Historically, however, the room was the master bedroom of our 200-year-old house and then had been used as an office before we moved in... what a journey!) I have I only got one picture of it - it just was never nice enough to merit the taking of photographs... Here it is before:


The deep burgundy on the wall was our choice *eeek* - well, it was the late 90s... The room housed a merry mixture of all the old furniture in the house. Some rather tatty, some nice antiques but all mismatched. It had nasty light brownish carpet in it and the walls were papered with structural wallpaper. As you can see it was also used as the kids' playroom, hence the mattresses on the floor (must have been some gymnastics session going on there...).

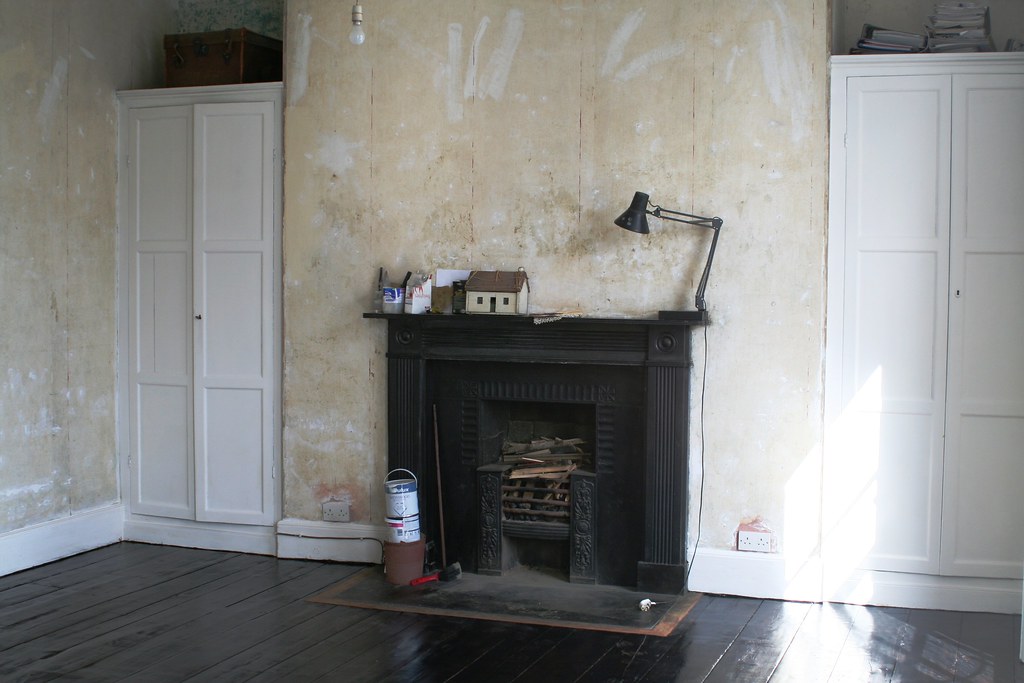
Anyway, I always thought it was the nicest room in the whole house: Very large, 2 really tall windows which look out onto a park, and always warmer than all other rooms because it caught the morning sun and heated up nicely. In short: It was a shame and a waste to use it as an occasionally used guestroom and not for continuous use. So the decision was made to turn this space into our drawing room. But oh, how long it has taking us to remodel this room *siiiiiiighs*. Finally about a year ago we tackled the project. The Royal spouse is a hands-on man, so he ripped off the wallpaper one day when I was at work and on my return I was met with this frightening sight:


The most difficult part of the whole project was actually reshuffling all the furniture, paintings and bits and pieces that had accumulated in the room over the years. But since we were working towards a particular date (an exhibition of my photographs that was due to take place in this space), we had to plow on.

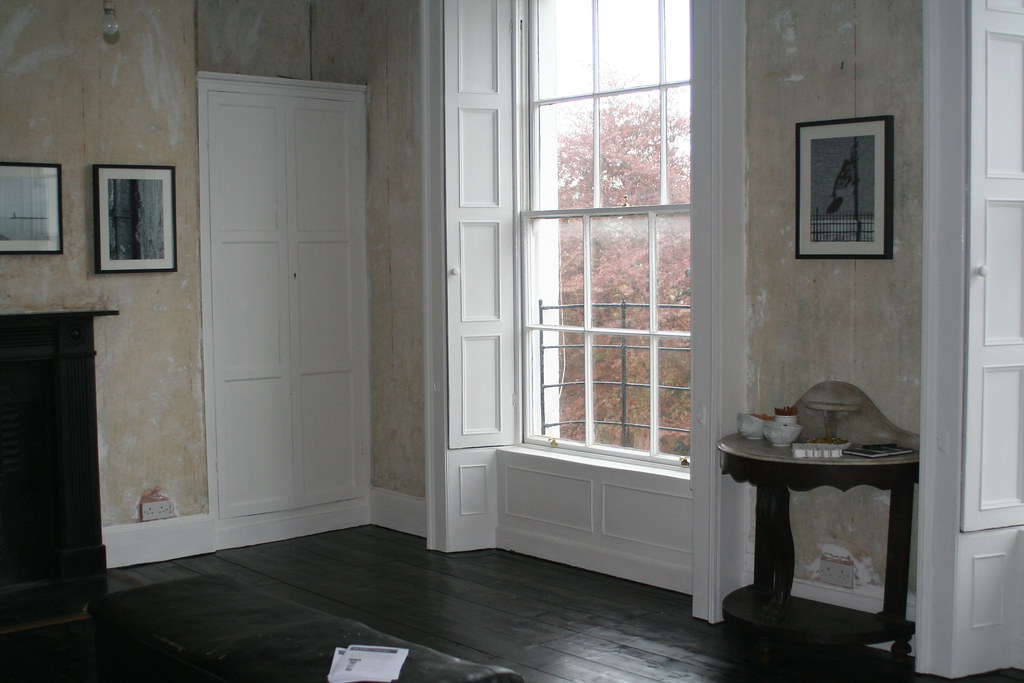
Once emptied, the room was even nicer than we had thought. The floor badly needed some kind of treatment although it consisted of beautiful, wide planks (I think it is spruce???) and was in very good condition. As is traditional in old houses like this, it was only stained around the edges. Most of the floor would have been covered by a large rug, so even the Georgians cut corners and only stained that part of the floorboards that was visible. There was no option but to sand the whole floorspace. We rented a sander and did it in an afternoon. The result already enhanced the room.


We thought the colour of the floor was too light, though, and also wanted to stain it for protection. The colour of choice was something resembling cherrywood. We stained the floor - and were disgusted with the vibrant, orange floor that we achieved. So disgusted in fact, that I did not document that detour on our road to the perfect drawing room... The only efficient way of dealing with this desaster was staining over the orange stain. And that meant a really dark brown stain, something we initially had not considered. So we stained again and this time the result was satisfactory:
 

Here is another image with less reflections, looking towards the fireplace: 


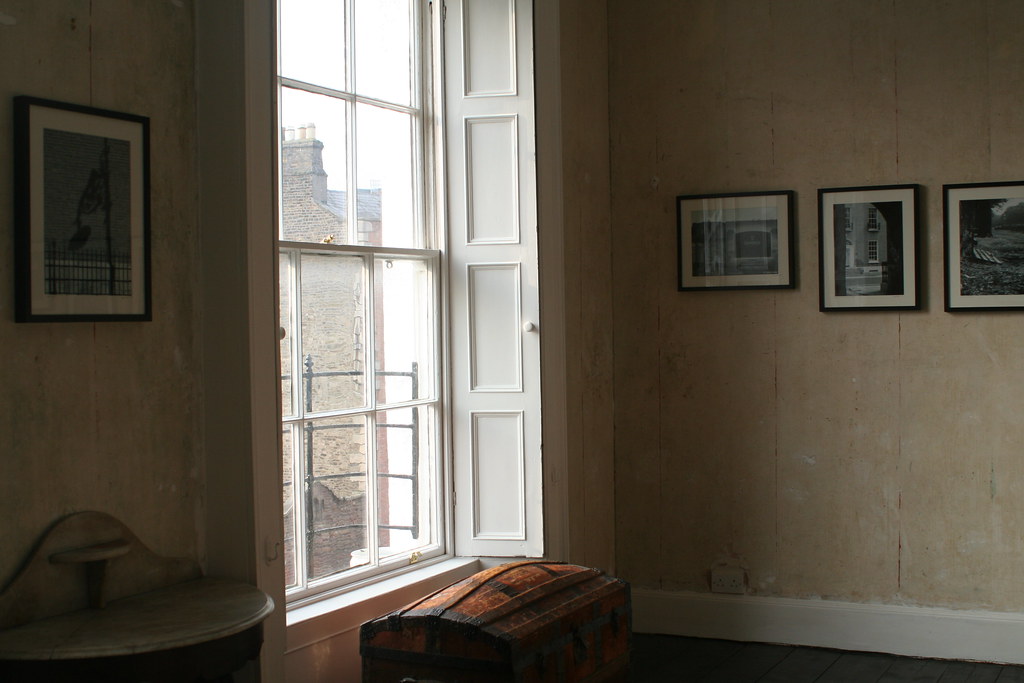
With the floor finished the room was ready for the exhibition. The neutral walls, the pristine floor and the high ceilings certainly enhanced the displayed images - it was a successful enterprise, I must say... See for yourself:


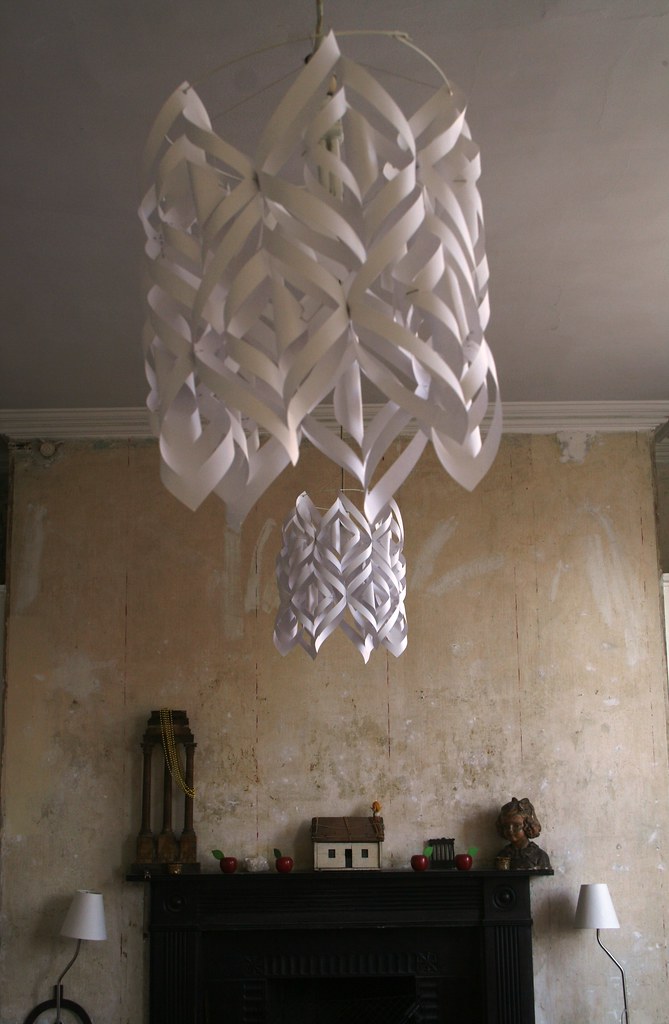
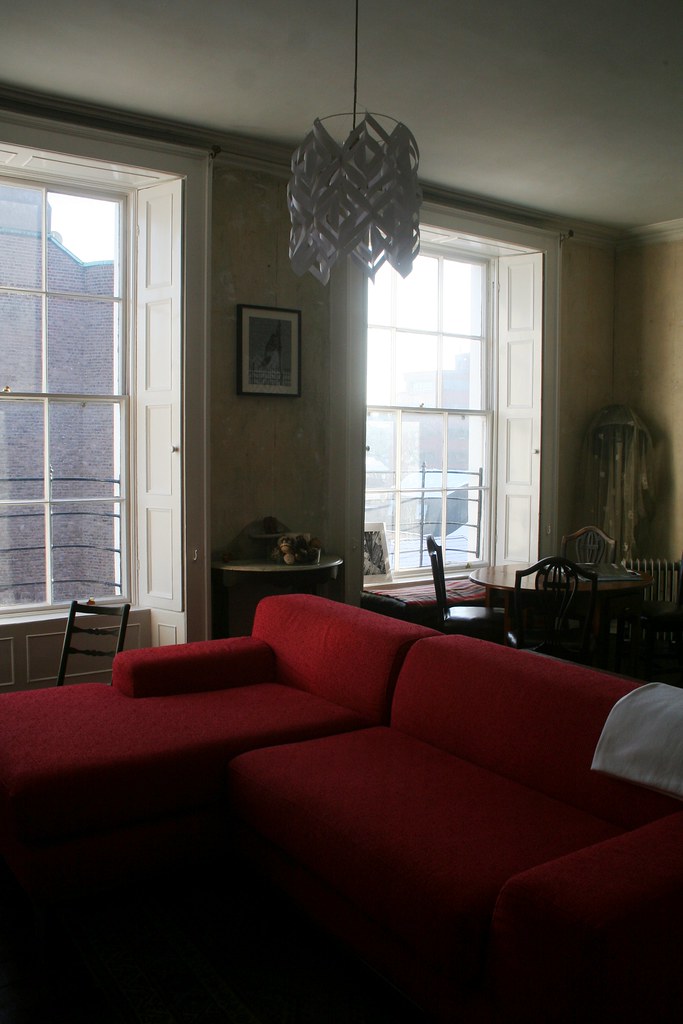
Now we were ready to furnish the room. But the reshuffling game was so daunting, that the room languished several rooms until we made the last push. With a nice sofa ordered, some lampshades crafted (check my blog post here!)and assorted pieces of furniture approved for and placed in the room, the drawing room is now my favourite room in the house! 


We thought long and hard about the wall decoration - and decided to leave the untreated wall as it is. We washed it down with sugar soap and dusted it. What appears as very obvious paint brushstrokes on the walls, does not stand out nearly as much when you look at it. It's a bit of a statement that not everyone likes. (As in the inimitable words that only a mother could surreptitiously comment: "Oh, so you are not going to paint the walls..." NO, mum!!!)


It is not quite finished yet - we have plans for a large bookcase on the wall opposite the fireplace and I would also like to rehang pictures (they are still hanging on the nails we hammered in for the exhibition...), but it's a space that I do invite guests to sit in. But no more sleeping in here - it's not a guestroom anymore *yay*.


I am linking this to the DIY Show Off Show & Tell.


21 January 2010: Linking this to Transformation Thursday .