A pinhole camera is a simple device with which you can take photographs. It simplifies the photographic process and illustrates how a camera works: Essentially any camera is a black box with a hole through which the light will expose the light-sensitive material which is stretched at the back of the box. As light travels in straight lines, the reflected light from the object that the camera is pointed at, will fall through the hole and produce an upside down, left-to-right image.

To make a camera, you need:
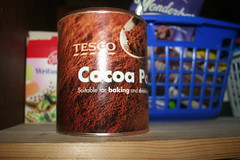
- a box, tin, carton or any other container with a lid
- (masking) tape
- tinfoil
- cardboard
- matt black spray, shoe polish or cardboard
- scissors
- a sewing needle
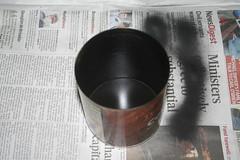
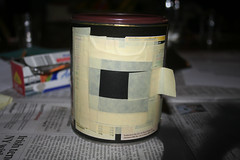
1. Clean your container. The pinhole camera needs to be matt black inside in order to avoid the light reflecting and bouncing around in the inside of the camera. I sprayed the tin with some blackboard paint.
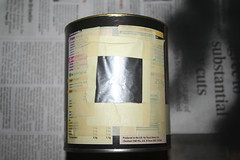
3. Tin foil won't let any light shine through, so you stretch a bit of tin foil over the hole and secure it in place with masking tape.

4. Then I made a tiny little hole in it, using a sewing needle. The tin foil won't fray and therefore the light that will fall through this hole will not create a fuzzy image on the light sensitive material at the back of the tin.
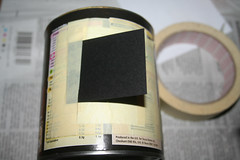 5. As a "shutter" I cut a piece of black cardboard and secured it with masking tape. For easy "shutter release" I folded the tape over so it can easily removed and closed again once the image has been recorded on the paper. My camera is closed with the plastic lid that came with the tin. To make the camera light-tight, you need to stick it in place once you have loaded the camera with the paper or film.
And that is it - from a cocoa tin to a pinhole camera in five simple steps.
>>>>>
Now, to actually use your pinhole camera, you need light sensitive paper. It is available from brands like Ilford. However, to load your camera with the film, you have to operate in total darkness or under red light. So measure your container and make a template from which you can cut the light sensitive paper to size. In darkness or red light open your pinhole camera and insert the paper on the opposite side to the hole/lens. Secure it in place with blue tack. Shut the lid again and stick masking tape around the rim to make sure it is light-tight. Your camera is now ready for shooting.
Working out the exposure time requires a maths degree - so experimenting is the way to go for those of us who can't get their head around numbers. I think it is going to take at least a couple of minutes for my camera.
Once you have shot a picture with your camera, you can only retrieve the paper in dark or red light conditions and then develop it. Hehe, but you have to work that out yourself... There are plenty of sites on the web, though, that give you more information on this if you are intrigued. Mr Pinhole can help you work out your exposure times. Pinhole.cz has lots of info on pinhole cameras.
Have a hole lotta fun!!!
2 comments:
liebe sonja, bitte mach mal einen blick hier her: http://waschkueche.blogspot.com/
je mehr leute davon erfahren desto besser!
schönen abend!
cool-mathegames.com
Post a Comment