Oh my, I have only just copped on that a few of my past projects had been mentioned in Jan's Boardwalk Blotter.
This blog pretty much does what it says on the tin banner - it is a uncommented list of interesting and inspiring projects and tutorials that Jan finds in Blogworld. I have to say I feel quite honoured in the company of some truly cool projects there. From my blog Jan picked the bird magnets, the paper stars and the designer lampshade. Check it out - there is some fantastic stuff in there!!!
My list of "featured"-buttons is growing *yay*. It is so good to get feedback like that. No, I am not crafting to be loved - I craft because I like to be creative (and because I am a cheapskate *haha*). But it's great to know that others like what you do. I would actually love to know if any of the readers here have ever recreated something that I posted on this blog? If you did - please take a picture and show me!!! I am so curious! And I would love to feature your craft-werk creation on the blog! Hehe, I would even consider coming up with a button for future features!!!
Edit: I have actually just added my e-mail address to the ABOUT ME section. From now on I can be contacted via craftwerk(at)ymail(dot)com. Looking forward to hearing from you!!!
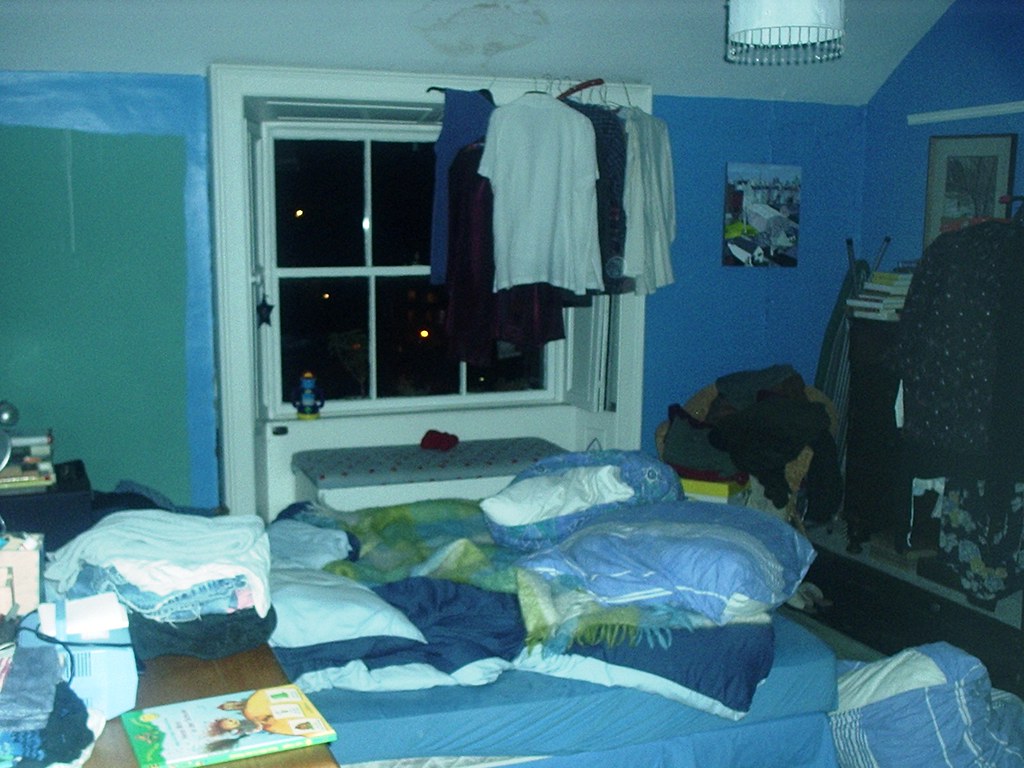
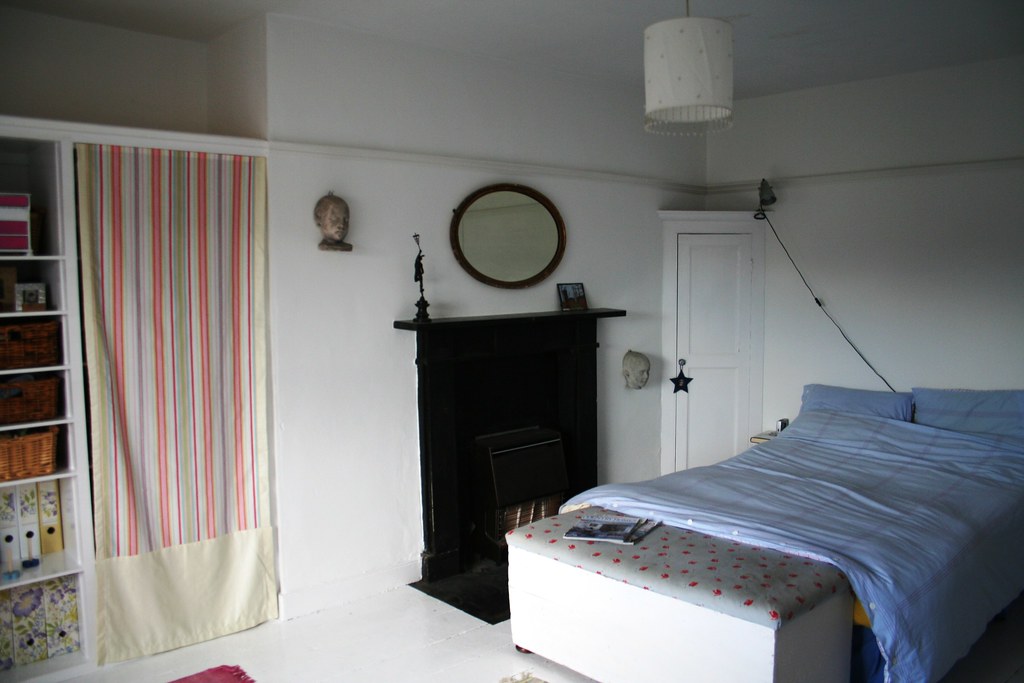
I am just in the middle of a tiny, little furniture re-do. But it isn't finished yet, so I thought instead I'll show you how a little bit of paint and some reshuffling of furniture updated our bedroom. I did this a couple of years ago, and the bedroom has evolved a little since then, but nonetheless there is already quite a difference when you compare the before and after. So without much ado, here is a picture of the bedroom as it was before.
Have you recovered from the shock? I am embarrassed to show what it looked like - and to publicly prove what we put up with. But blogging is exhibitionism bare-all, isn't it, so for the sake of showing off the impact you can have with just a bit of paint, I am including it here... So much was wrong with that room:
lazy painting with the original jade green visible where previously had been a wardrobe which we had painted around with the new light blue paint
wooden flooring that was partly stained dark brown and partly painted white
no proper hanging space for shirts and trousers, thus misusing the window surround as a clothes rail
water marks on the ceiling where the roof had leaked
general untidyness due to this being an unloved room
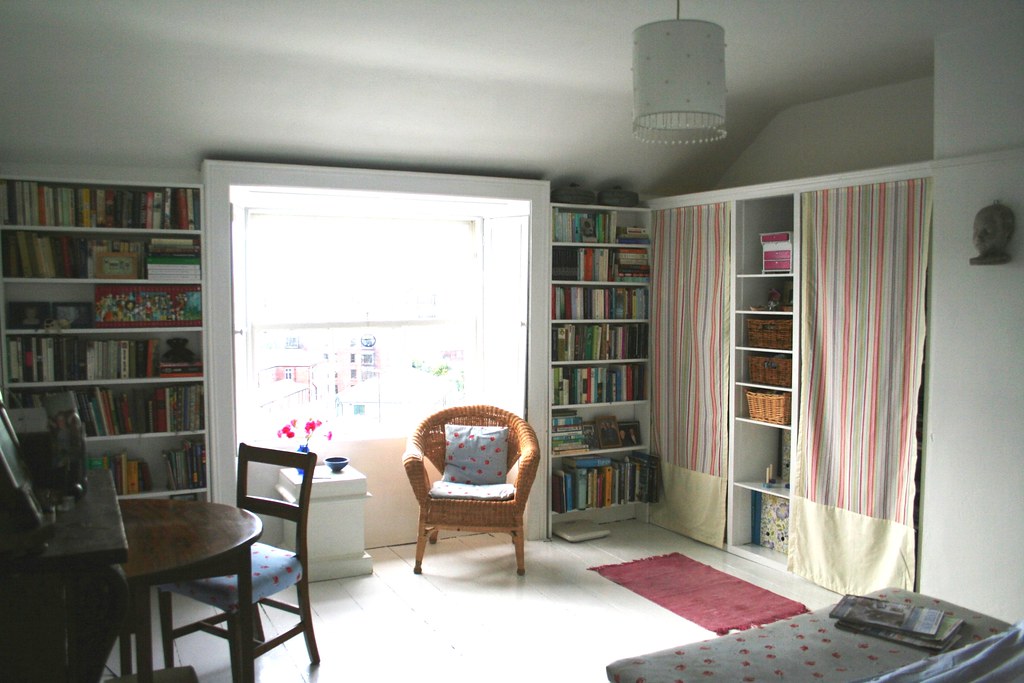
Some major changes were needed to make this a room that we like to be in - namely a proper paint job on walls and floor, wardrobe space, and easy to tidy organisation. Ten years ago I loved all the strong colours on the wall, but gradually I became really tired of all the greens and blues that I had surrounded myself with. I just wanted rest - easy-on-the-eye white. And no pictures, please, although there are tons of beautiful paintings in this house (plus a better half who is a talented painter).
So here is what we did: After shipping off our kids to their grandparents for a few weeks, we set to work and painted the walls and the floorboards white. It immediately opened up the room and made it seem so much cleaner and bigger. Then my partner did his magic with a few planks of wood and some dowelling and created bookshelves on either side of the window to house our ever-expanding library of books. I love having a little reading corner in the privacy of my bedroom, plus the books stacked against the wall seem to be acting as extra insulation! I re-covered the chair on the left and created a small work space for my laptop with an antique, folding table on the left wall, where previously the bed had been. (That used to be where I did my writing and working for a while - luckily I now have a proper study...)
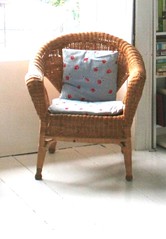
The wicker chair had been left in the house by previous tenants. I simply updated it with some cushions that I covered in the same Ikea fabric which I had used for the trunk (visible against the window in the before pic).
The ideal place for a wardrobe was the alcove to the left of our fireplace. We could see from marks on the walls and the floor that there must have been an inbuilt wardrobe there, before. Sadly, it had been ripped out. We re-instated it and my partner built it to our specifications - with hanging space on the left that has two rails on top of each other, eight rectangular cubbyholes in the right hand side and shelving in the middle that would provide space for folders, big books and drawers. I managed to source wicker baskets that were exactly the right size for the short shelves. Money was tight, so we did not build doors for the wardrobe, but I simply sewed some panels from Laura Ashley fabric, which I had found as off-cuts in their bargain corner.
The bed was moved to the other side of the room. At the time of taking the photo we had not yet made any bedside tables. Hence the bedside light is perched on the funny, triangular corner cupboard that was original in the room.
Wanna see a direct comparison? Here are the before and the after are side-by-side.
The greatest investment in this re-do was the time we put in - and the effort of motivating ourselves to get off our arses do it. I really like being in this room, even though it is not always as tidy as in the pictures.
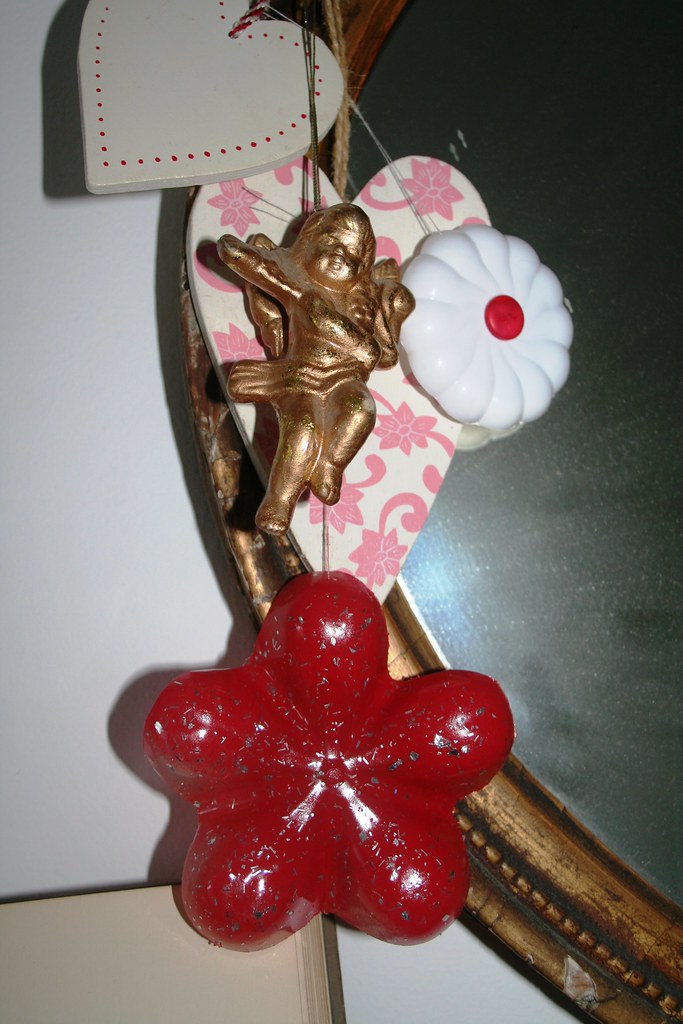
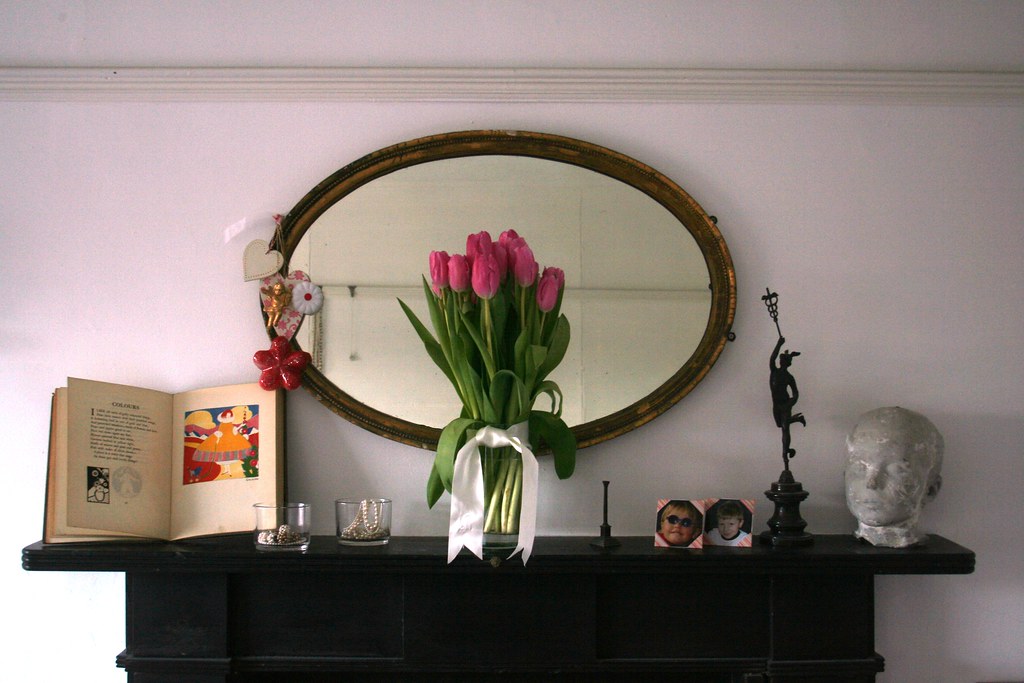
Did anyone take a closer look at the mirror decorations in yesterday's post? I had a bundle of hearts and flowers hanging on the mirror. I was in two minds about showing the flowers closer, because this is a slightly rubbishy craft project. Yes, literally. The "flowers" are made from plastic bottle bottoms! But now I have decided to show them in detail, because I just saw the most amazing chandelier made from those bottle bottoms. Jan from bobbypins boardwalk posted a whole list of inspiring chandeliers made from all sorts of things, among them one that was made from the plastic bottle bottoms. Grrrrrrrrrah, and I thought I was soooo original, creative and imaginative *hmph*...
I had noticed a while ago that the bottoms of the plastic bottles had a flower shape and I wanted to make something with that, too. With spring coming, now is the time to start digging out some flowery decorations. "Spring coming", I hear you wonder? Well, in Ireland, the first day of spring is traditionally St Brigid's Day, which is the 1st of February. The day after tomorrow. Ha! Spring? It's -1°C outside!!! But a little cheerful flower decoration will certainly lift my spirits!
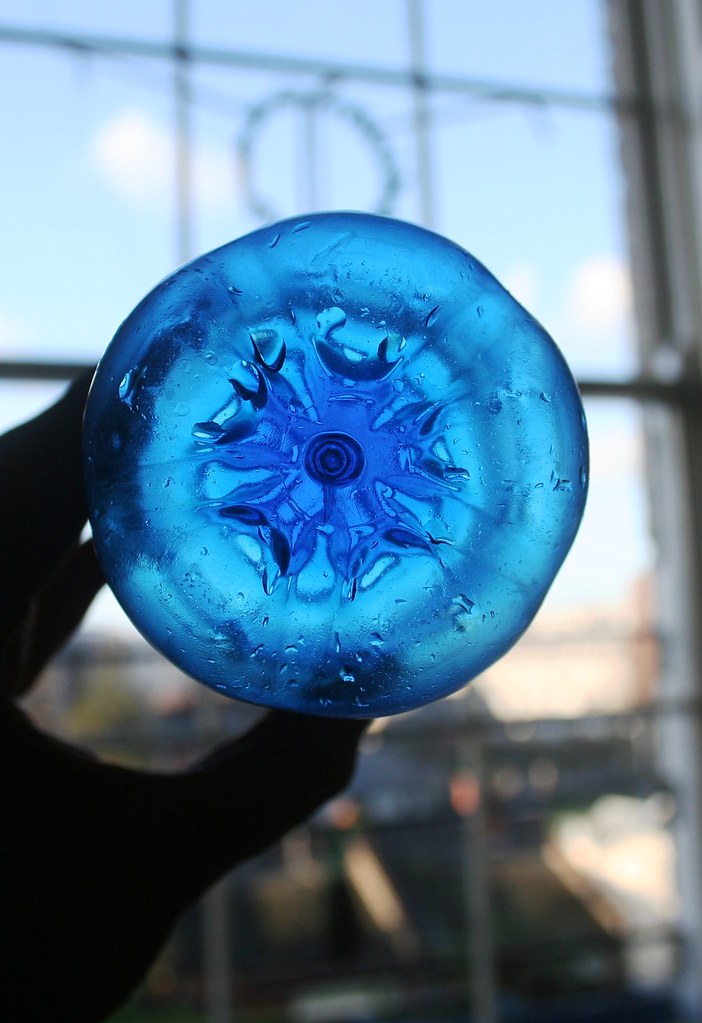
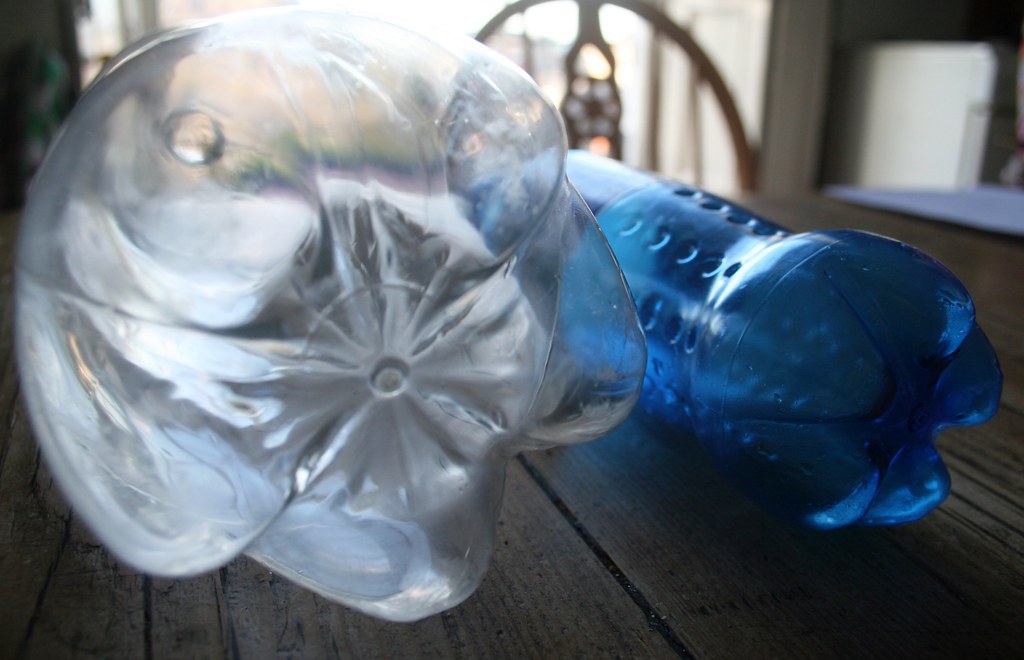
So, anyway, I rinsed my plastic bottles and then used a sharp, serrated bread knife to cut into the plastic. Once you have a cut about 1 cm long, you can wedge your scissors in there and continue cutting with them. If you use the knife for cutting the whole bottom off, the edges will be rather rough. You can tidy them up with your scissors, too.
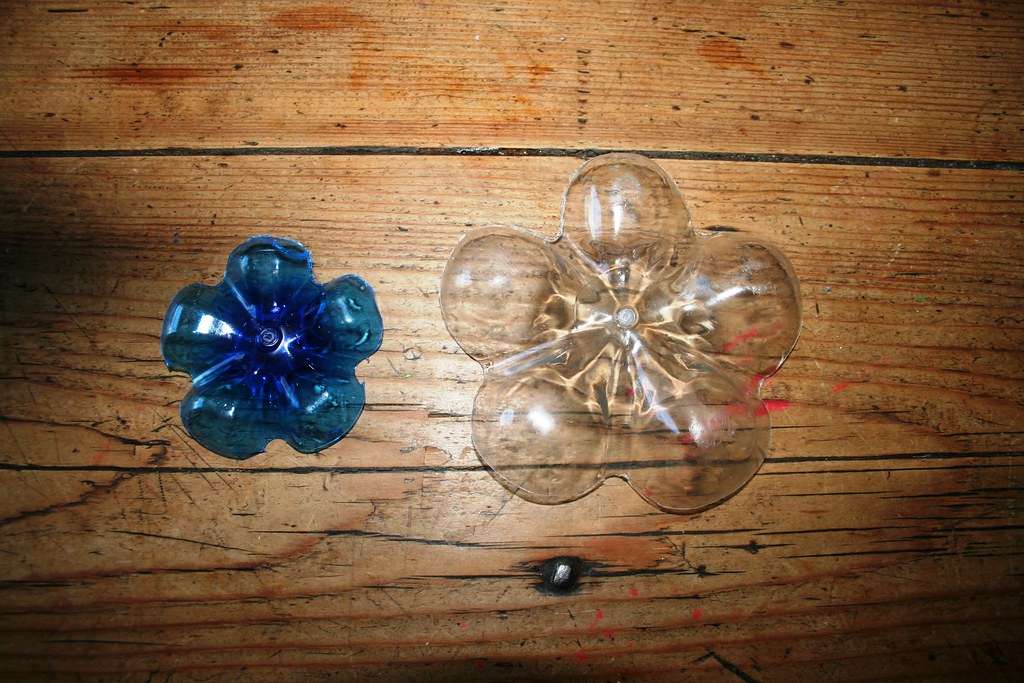
And that is it - you already have your flower shapes there. I did this with a 2 Liter Pepsi bottle (see clear, bigger flower on the right) and a smaller Sprite bottle (blue flower on the left).
The clear flower I then sprayed with red spray paint, and while the spray paint was drying, I sprinkled some glitter on it. I am leaving the blue flower as it is, just glueing a little white button into the centre. Punch a hole in it with a needle and attach a piece of thread to hang it from.
Here is another small flower. It was made from the cap of an old can of whipped cream. The plastic was a little bit thicker and slightly more difficult to cut. With a small red button in the centre it makes a cute little flower.
This is an easy project - and a fun one, too. Might look nice in the kids' room. Or just glue some skewers to the back of them and stick them into a potted plant? For the moment I kind of like them on the mirror...
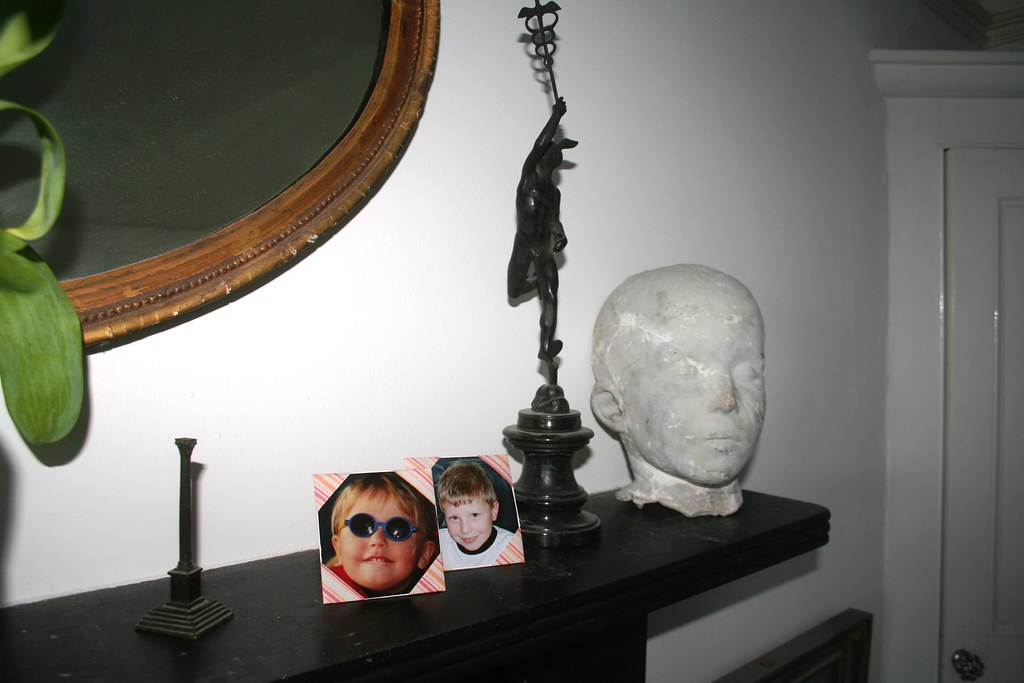
Seems that I am on a treasure finding trip at the mo. Looking through my daughter's bookcase, I found a lovely old book of poems for children, illustrated with cute but simple graphics. Unfortunately there was no date of publication in the book. Just from the style of illustrations I would guess it is from the 1920s. In any case, the pictures are lovely, and I decided to display the book so that it gets the attention it is due.
The mantle in the bedroom was lacking a bit of care. So there was the perfect display space for the book. As usual my mantle is rather sparsely decorated - partly because I am not the only one looking at the decorations and my better half does not go for frilly, elaborate displays. So here is the compromise.
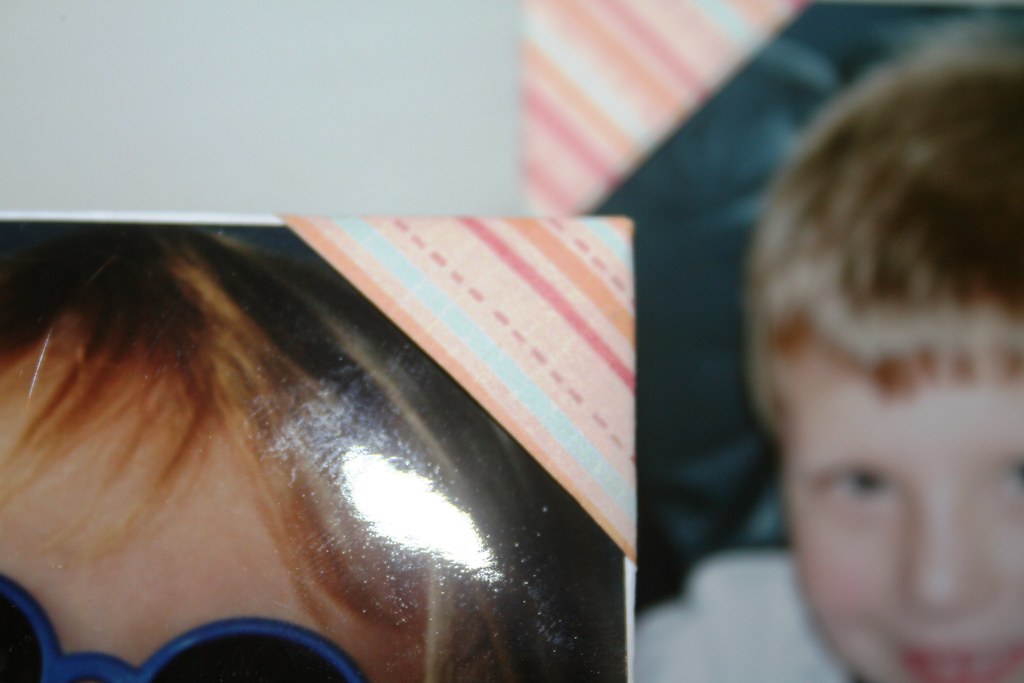
Do you see the two photos on the mantle? They were a two-minute addition when I felt that the mantle was too bare. I didn't have any frames handy, so I did some little magic with origami again. Here's what I did:
I printed some origami designs on scrap A4 size paper. I cut it into half and then trimmed the resulting A5 size pages into two squares. Then I folded the paper to produce this photo display, where you tuck your photo under the corners. It even comes with its own "stand".
I made a little video tutorial for you - as you know I hate picture tutorials for origami, so this will show you how it is done.
Easy or what? With a bit of measuring and thinking you can make these to suit all photo sizes. Makes giving a photo as a gift a bit more substantial, I think, and you can choose your paper according to your decor.
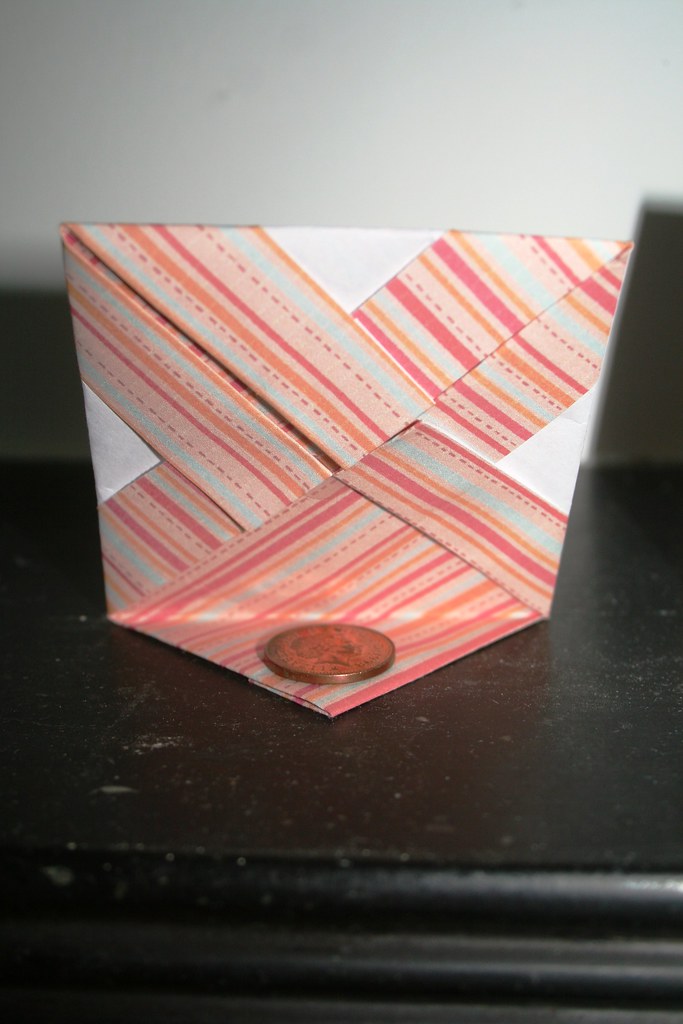
Here is the backside of it. As you can see I simply glued a penny onto the bottom "quarter" of the frame. The remaining three quarters I fixed in the middle with a glue dot. It stands perfectly on its own and does a great job.
Living in an old house has its drafty, cold, 18th century drawbacks, but is amazing and surprising for an old history head like myself. Come on and follow me delving into an old chest where I knew I would find some hidden gems beads, which I wanted to use for more bead balls. (A little warning - this is a loooongish post.)
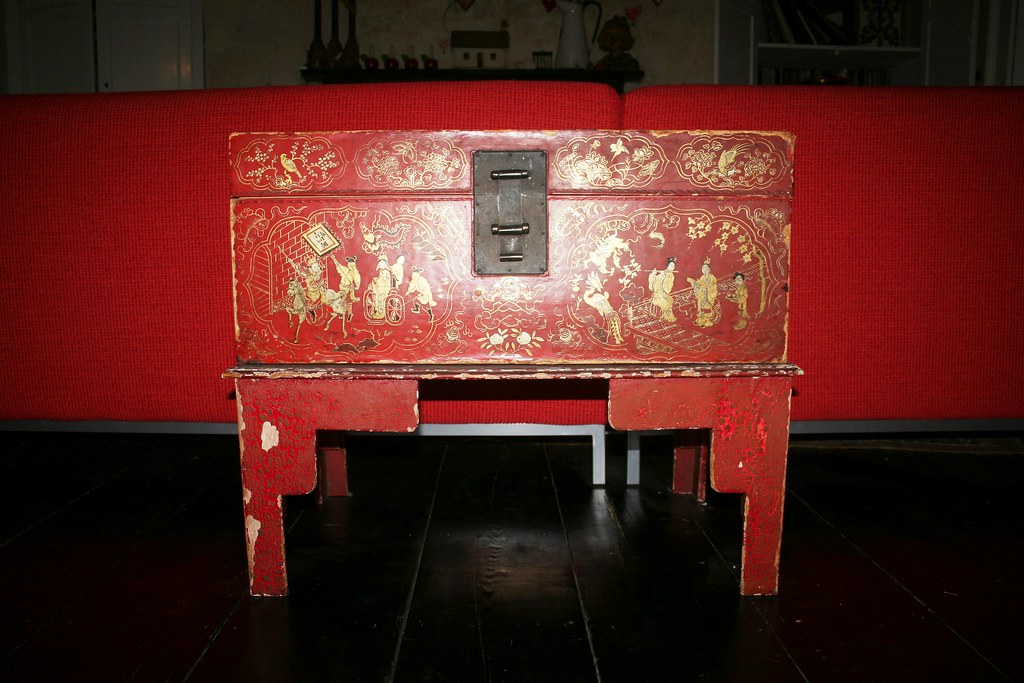
Hot on the trails of the beads I turned to this old Chinese, lacquered cardboard box. (After being battered around by my children it has finally got pride of place in our newly renovated drawing room, the before and after of which you can see here.)
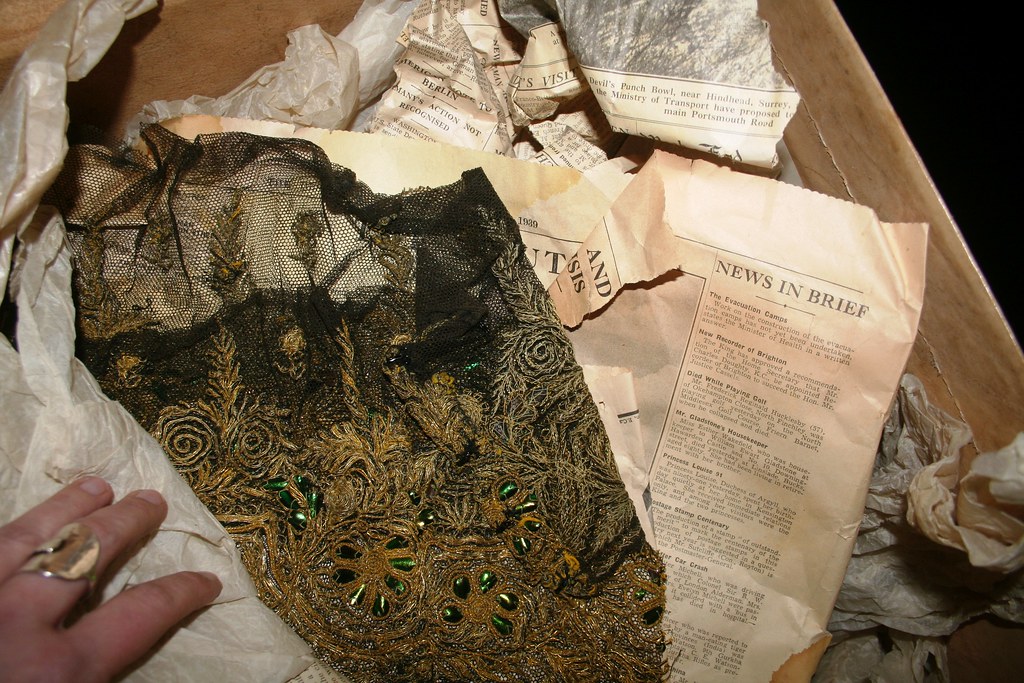
There are plenty of old chests in this house, filled with treasures that I love looking through. This one houses... a lot of tissue paper, it seems. But wait, let's delve deeper. ...
Oh, look, here is a bit of black, embroidered lace. Do you notice the green, fingernail-shaped sequins? Well, they are actually not sequins at all. A friend of mine who happens to be an expert on 19th century costumes told me this amazing fact: The green embellishments are actually the wings of a beetle which were used back then for decoration!!! Check the date on the newspaper - 1939! I'd say that was when the items were packed into the box. They must be way older than that... I know from taking out the paper that the exact date is 19th of March 1939. Little did they know that a few months later a war would start that ravaged the world for nearly six years...
Ok, deeper we dig and we find... a nice fabric covered box. Don't you love the font of "Walpole's"? Very late-1920s... And that gives us a hint about the finds in this box. They are actually peeking out under the tissue paper on the left...
Wait, let me open the lid...
We are getting closer. Something pearly, beady, some silk scraps. What is it?
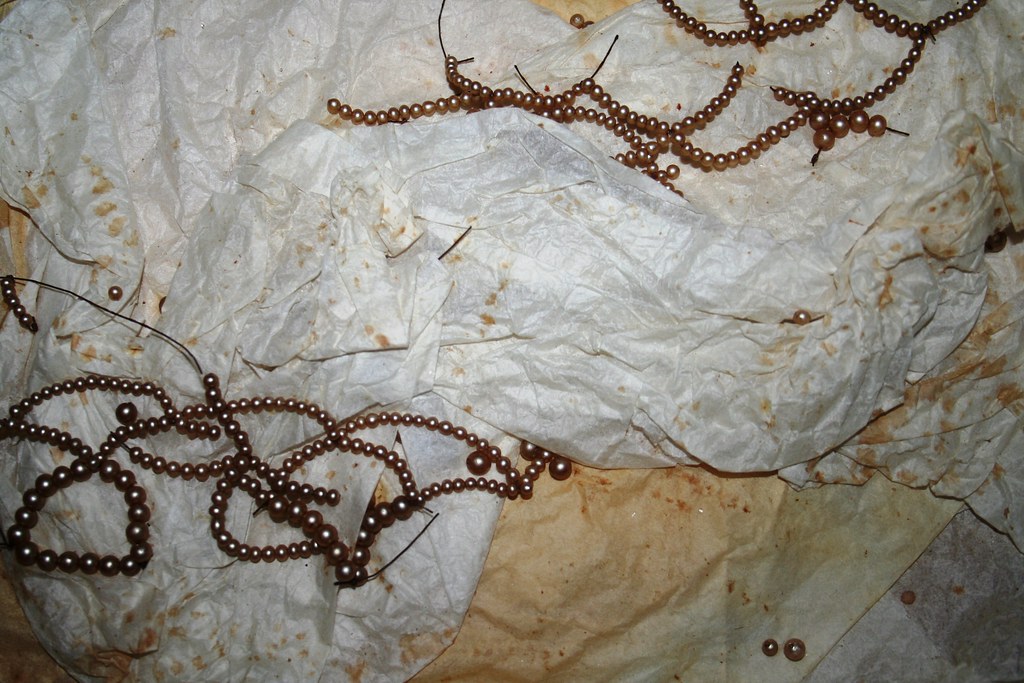
Let me show you properly. This is a headdress, made of artificial beads, strung on thin metal wire and decorated with some blue bows. As a matter of fact this is a bridesmaid's headdress. I know this because I remember seeing a newspaper clipping showing the 1929 (?) wedding of a family ancestor. The three bridesmaids all wore a headdress like this.
Unfortunately they have not all stood the test of time. One of the three has actually pretty much fallen apart - ehm, the headdresses, that is, not the bridesmaids... The wire has rusted and broken away, the beads have slipped off. I found them spread all over the green box and the big box, too. But I felt I could gather those beads and re-use them and therefore not destroy the other two headdresses which were still almost intact.
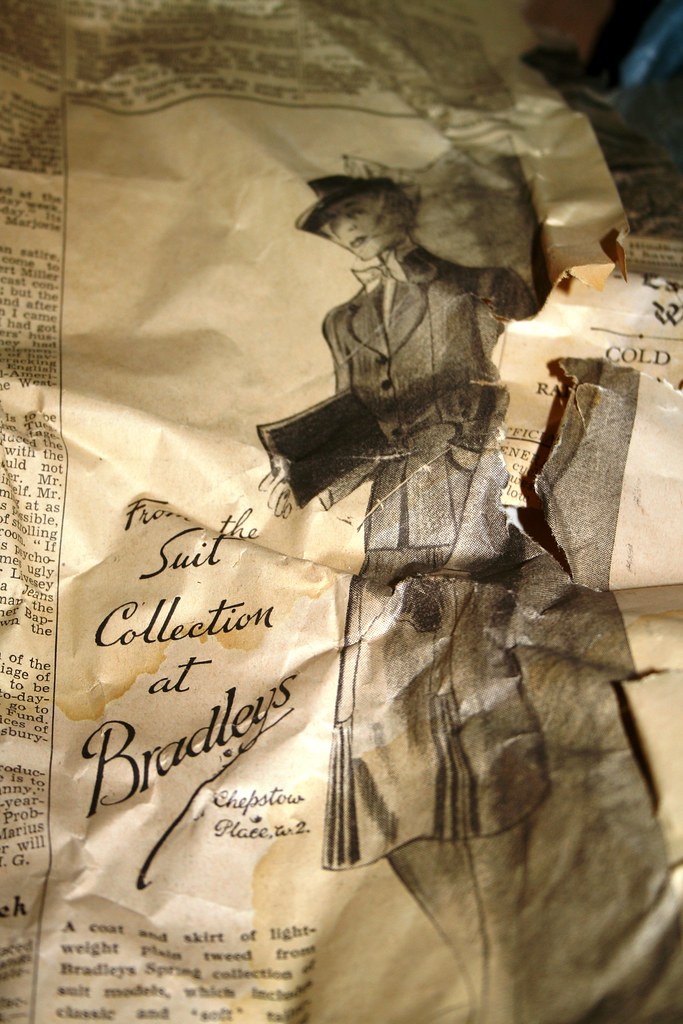
So let's carefully cover and pack everything again, now that we have had a little look at the past... Didn't they have style back then? Here is a glimpse of (slightly later) 1930s style - "the suit collection at Bradley's". Ooooh, fancy, classic, costume style. Look at the jaunty little bow and the funky hat. I can imagine myself kitted out in my tweedy suit, alighting lady-like the London-Edinburgh express, off to meet my other charitable-lady-friends in a Mayfair tea room for cream teas... "Lady Imogen, I have heard, is now living with her lover - 25 years younger than she..." "No???" "I saw them the other day. Of course they cannot attend society together." "Indeed not!" "Will poor Augusta come out this year and be presented to the king? Surely with such connections the pitiable daughter of a society pariah cannot mingle with polite society." "No, that will not do! I have already told my Prudence to sever all ties of connection to her..."
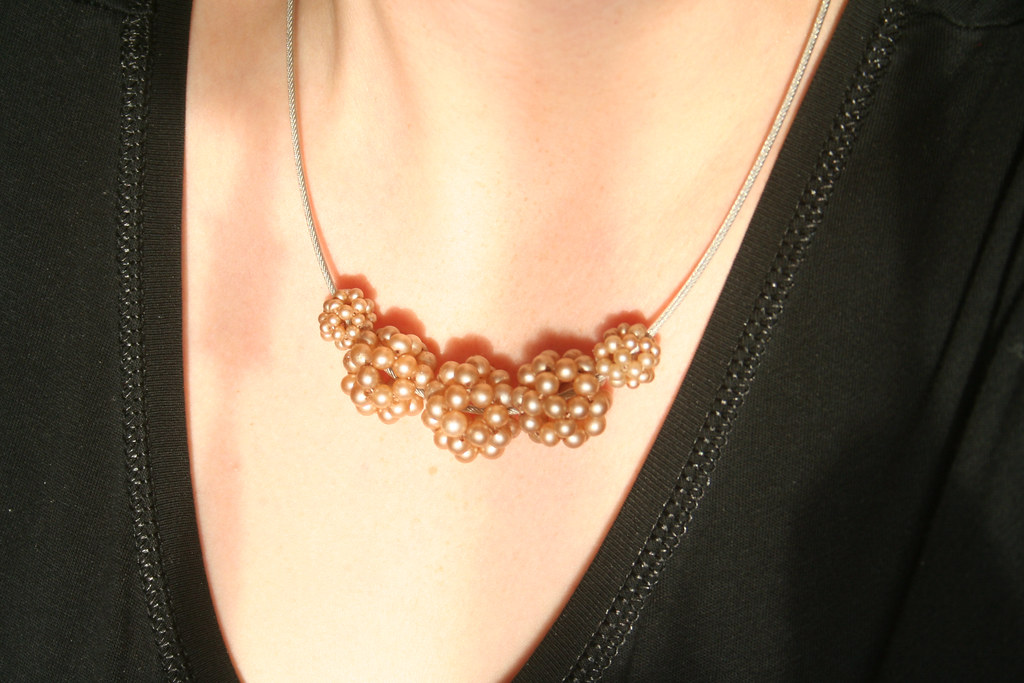
Ooops, getting a bit carried away there. Right, now - with the vintage beads I made five bead balls. It only took me the duration of Ocean's Twelve to make them. (George Clooney certainly makes the fiddliest of tasks do-able...) There were roughly two sizes of beads. I made three larger and two small ones. This time I didn't worry about attaching hoops to them, because I had thought up an easy way of displaying them - just slide them on existing necklaces. (For link to instructions and hints for making the bead balls, go here.) So here is a modern version with all five threaded on a steel cable-type of necklace.
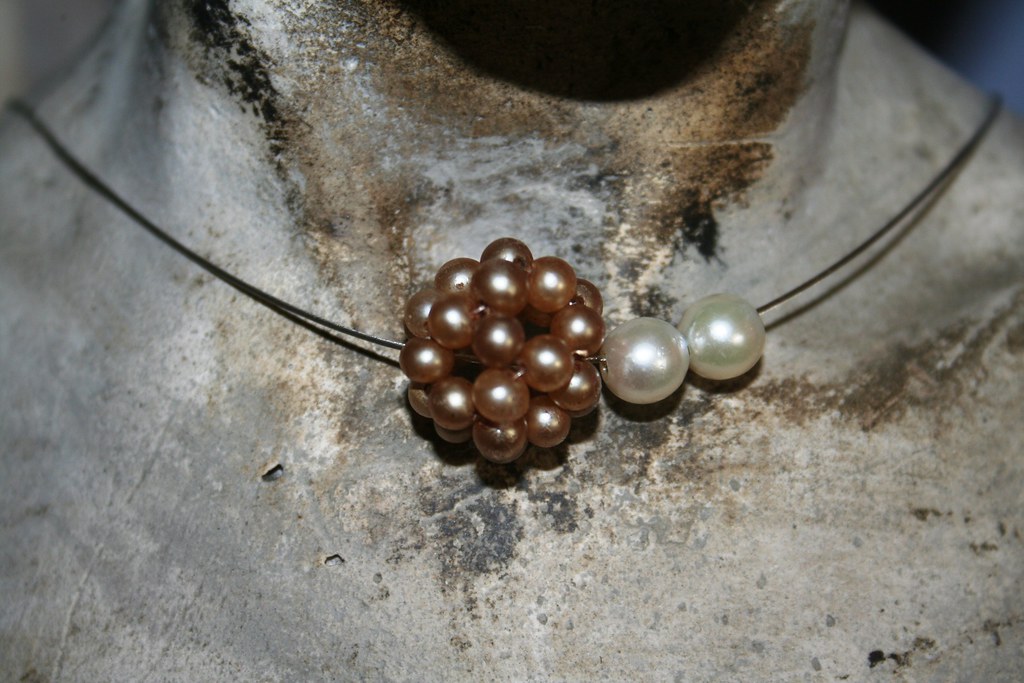
For a slightly classier look, I threaded a small bead ball on my white gold cable necklace and left two real pearls on.
Today I am wearing one small bead ball on a simple, black leather band which suits my casual look.
What do you think? I love being connected to the past through re-using finds like this. Somehow I believe that whoever's headdress this was will not mind me turning it into something new... I hope you enjoyed my little trip into the past - sorry about my lecturing, that's the history teacher in me...
I love it when things fit together thematically. Just as I was showing off my new bead ball earrings today on Craft-Werk, over on Remodelaholic Cassity has decided to post my - slightly - related lost earring reuse project.
Ever lost an earring? It's a bit like the mystery of the vanishing socks - you are left with a single earring. Useless on its own, but still too precious to throw away. I had lost about eight of them in the past year and I couldn't stand the lonely sight of them. So I came up with a way of turning them into something new.
Check out my project on Cassity's blog - she's put my instructions into a really sleek and easy-to-view tutorial. And make sure you look at Cassity's cool ideas she is showcasing on Remodelaholic, like the Valentine's door hanging made from muffin liners, her super-stylish screen and the many inspiring before and afters. Leave her a comment and tell her I said 'hi!'...


 and
and