FYI


Wednesday, July 29, 2009

A Flower for my Baby

Today's project is already a good few years old. As old as my daughter, actually. And therefore please excuse the bad quality of some of the pictures. They were made in pre-digital times. Aeons ago, so to speak. But baby projects have come back to the top of my list. Noooo - don't congratulate me yet *haha*. Not me, but some of my dearest friends are in the middle of procreating. So Sonja is busy thinking up little pressies...

Back when my daughter was a tiny tot, she would lie on the bench in the kitchen and keep us company
while we were having meals. But she sometimes got bored, because lying on her back there was not much to see. I eventually decided to make her a simple paper mobile which would softly move and keep her entertained. It occurred to me, though, that most mobiles are actually not very cleverly designed - they are meant to hang above baby cots or changing mats. Yet when you look up, the paper shapes hang vertically and therefore you only see a small strip of paper but not the shapes. Sonja revolutionised baby mobiles forever with her simple design.

I cut out a daisy shape from a piece of strong, white cardboard and stuck a round bit of yellow paper in the middle.
Then I made lots of butterflies from safety needles and colourful card. Thread some small beads onto the safety needles. These needles will be the butterfly bodies. And they provide a bit of weight so the butterflies can flutter prettily.

For the butterfly wings simply fold over a piece of card and cut out the shape. Important: You have to make sure that the safety needle will fit around the middle of the paper butterfly, or to be exact: around the fold line. Just put the safety needles around the butterfly shape and fold the card butterflies open. Then attach a piece of thread to the side of the needle where there are no beads. Attach the other end to the petals of the daisy. And voila - there is a 3D mobile for baby which is actually visible from below!



Sunday, July 26, 2009

It's not too late to do up your garden!
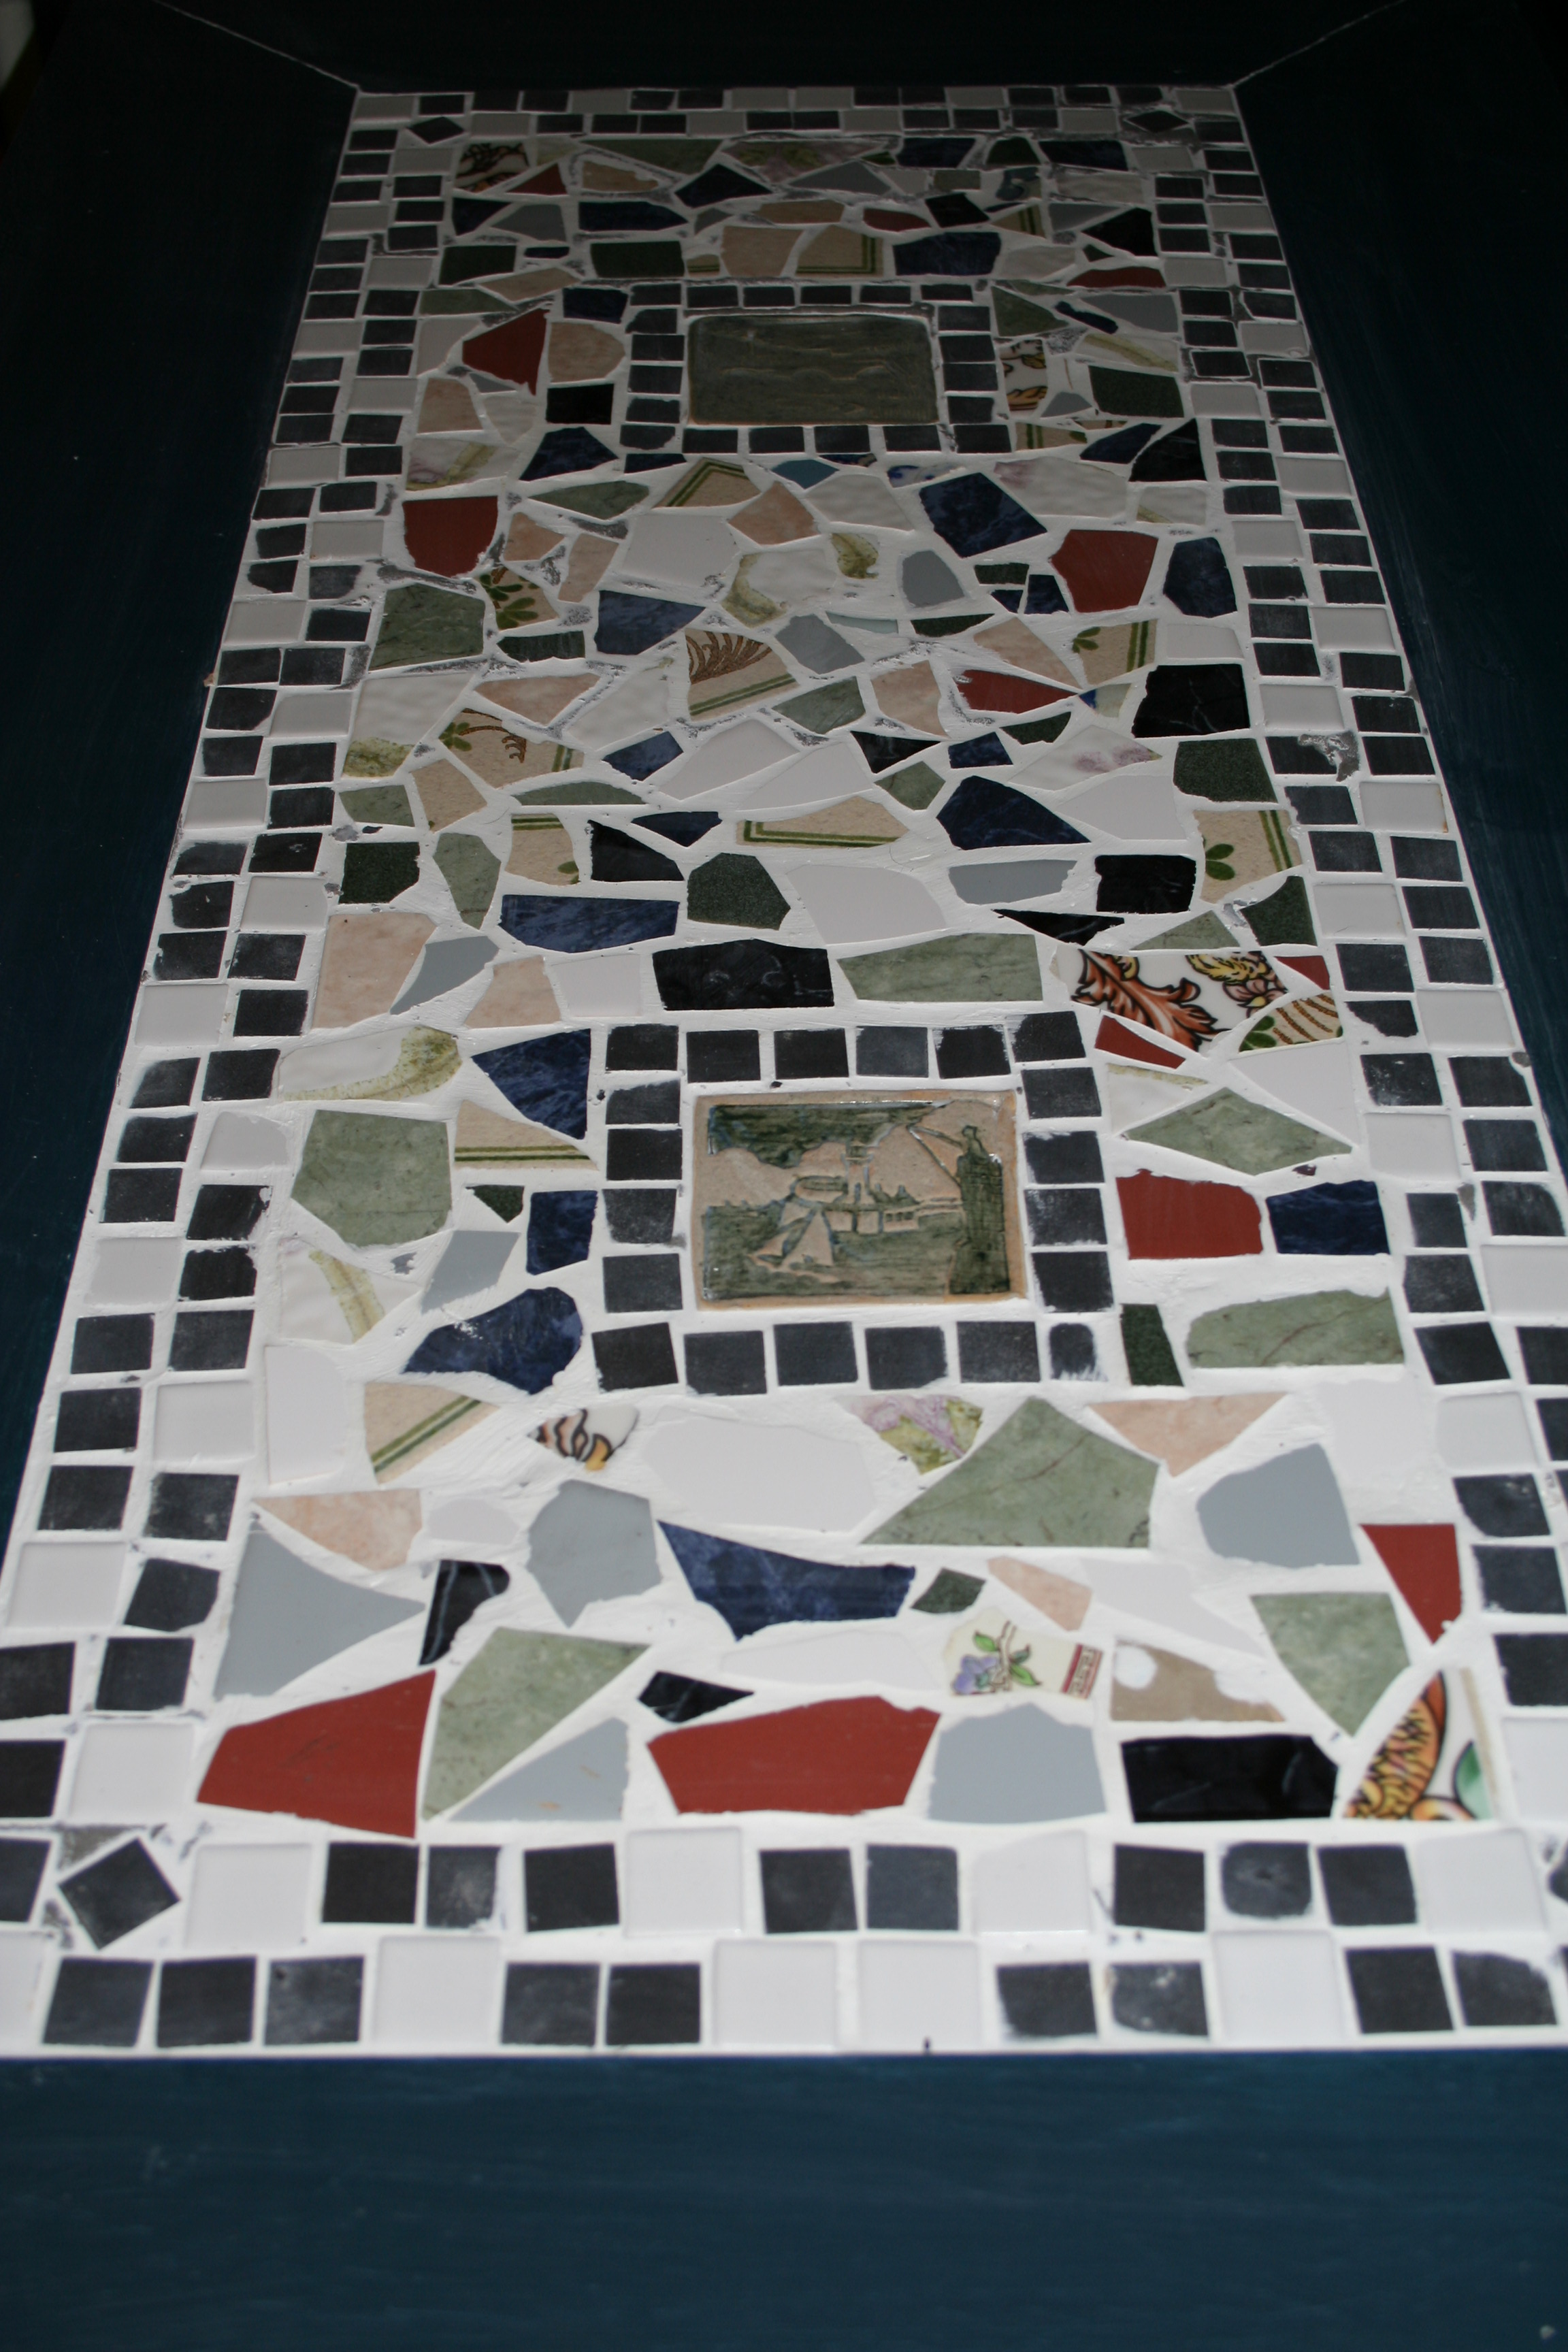
For years and years I collected broken and left-over tiles because I wanted to make a mosaic tabletop sometime. I eventually forgot about my collection of mosaic pieces after I had shoved them into a cupboard and firmly shut the door on them. When redecorating our house I had to delegate my former desk into the garden. And it was then that I remembered my former mosaic plans. With the able help of my partner - who is always great when I need to do the "rougher" part of crafting - I made a lovely new tabletop which now has pride of place in the garden.

My partner built me a simple "frame" into which I was to lay the mosaic. Meanwhile I broke up the tiles into small pieces. (Take an old pillowcase or fabric tote-bag and bash it with a hammer. Or take it outside and hit the walls with the bag. Honestly - not only works but can also have a therapeutic effect on you!) Before setting the mosaic in cement, do lay the pieces on a template! I know - time-consuming and annoying. But it will give you an idea whether you have enough pieces, you can try various designs and you can move them around and experiment with the best fit.

Then set up your mosaic top. I would suggest that you lay the mosaic in stages. I had especially fast-drying cement and had to work really quickly so that the cement didn't set before I had transferred all my mosaic pieces. So cover only a bit of the table at a time with cement - thick enough to stick the pieces in. Don't push them in all the way, let them stick out a bit and create gaps between the individual pieces. That's where you will later spread the grout. Some of your tiles may have been thicker than other, so also make sure that the pieces are all flush, otherwise your tabletop will be uneven!

Once you have arranged all your pieces in the cement, you will have to wait for it to dry. Allow for as long as your cement instructions advise you. Only then mix the grout and fill the gaps with it. Again, let it dry as instructed and then clean off the surplus with a soft, wet sponge.


My tabletop incorporates not only bathroom tiles from my parents' house, but also broken china pieces and some handmade pottery tiles from my partner's aunt which were finally given their proper place.

Thursday, July 23, 2009

Fantastic Japanese Paper Designs


In yesterday's blog entry about my holiday memory box I mentioned the Chinese-style paper I decorated my box with. I was not quite accurate. The paper is actually not Chinese but Japanese in style. But all scrapbook enthusiasts will be pleased to learn where you can get such lovely designs.

My paper came from a fantastic website which I found the other day. I am a true Canon-girl, i.e. I photograph with my Canon eos 350D. And while browsing on the Canon website, I saw that they have downloadable paper designs which would also be great for scrapbooking. Japanese Chiyogami papers which you use for origami and paper projects, are very dear. However, the Canon papers can be downloaded for free! Then you simply print them out on your printer.

Of course the printing will loose the delicate gold lines which these Japanese papers often have. You can see it on this collection of tiny scraps of Japanese paper that I have:
However, depending on the quality of your printer, the downloadable ones still look lovely when printed. Normal writing paper will do, but you can probably also use thinner paper and then get the true Japanese feel to it.

Check this out on Canon's Creative Park. There are many, many different designs to choose from. Thank you, Canon!

Wednesday, July 22, 2009

Holiday Memories

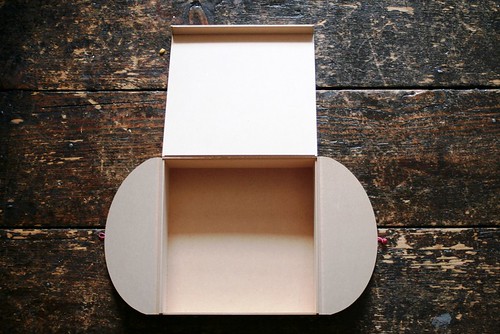
Isn't this a beautiful box? It came from my sister- and brother-in-law. When they visited us recently, they brought it back for all the family. There were little cakes in it which are traditionally given as presents in the Chinese spring festival. Very nice. Alas, against usual evidence I was not really interested in the cakes. I really only wanted the box, because I can't resist beautiful things. And lucky I was - the family was happy with the cakes, and I got my box!


The Chinese definitely have a knack for presenting things in lovely cardboard or wooden boxes,
as I found out when I travelled to Shanghai two years ago. Whether you buy a lucky charm, a decorative teapot or a kite - they always came in beautiful handmade boxes with colour paper or fabric cover. I should really take a picture of all the Chinese boxes that have been amassed in our house, also thanks to a generous friend who lived in China and often brought back pressies for us.

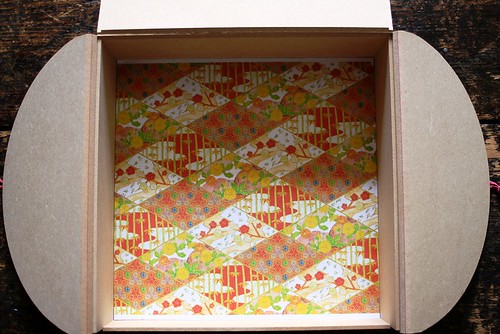
Anyway - the box was far too nice to be hidden away in a drawer for a yet-unknown later use. So I have turned it into a display box for my Shanghai mementos. If you want to do this, just find a nice box. It doesn't have to have a lid or "doors" like mine - it will look great just as a 3D-display on your wall or on a shelf.

I started by pasting a Chinese-style paper onto the back of the box to make the inside more colourful. (Tommorow's blog entry will be about the source of my paper.) Then I simply glued paper mementos onto the "back wall" of my box. The bigger and heavier souvenirs like the Mao badge I stuck on with blu-tack. That way I can remove them should I need them. The hand-painted lucky charm is fastened with a thumb tack.


I finished the project just in time - I am going on holidays in a couple of days' time, and will probably come back with another handful of
sugar sachets, ticket stubs, coins and stamps. So get collecting all the bits and pieces that you find on holidays, and make your own memory box. I already have my sights on a couple of other nice boxes in my son's room - and neither last year's trip to Namibia nor the family holiday in Silesia have been preserved for posterity yet. Watch this space!

Friday, July 17, 2009

Sprucing up my Napkins

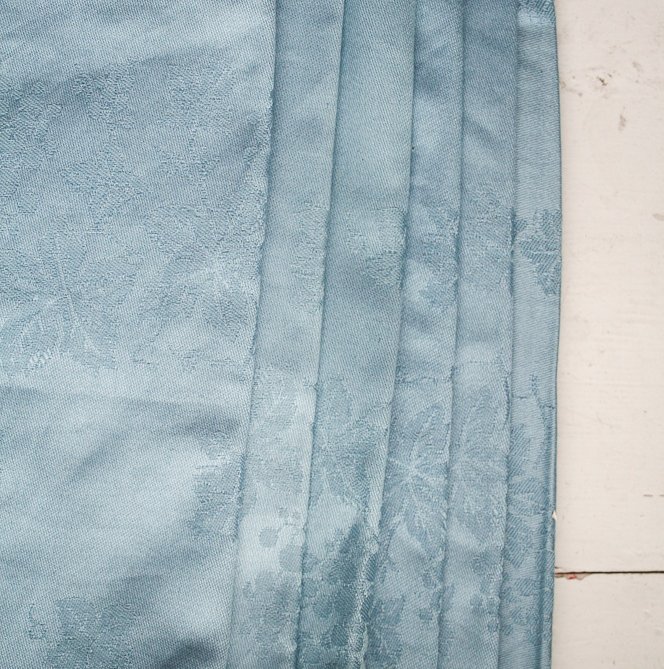
I was given a set of blue damask napkins by a visitor years ago. I do like fabric napkins, but I confess I don't get them out very often. Noone at my table seems to use napkins very much, so it seems superfluous putting them out. Maybe I should turn them into little placemats? Or make them into mini-table cloths? They are rather big, almost 60 x 60 cm. Who has a gob that big???


Whatever - since they are not an essential item at my table I felt I could experiment with them. I had seen an easy design somewhere that I have tried to recreate. The outcome is a little Christmassy, as you can see on the left. It is, in fact, not a Christmas tree but a simple leaf design, very slightly inspired by Orla Kiely's stem designs. Here is what I did:


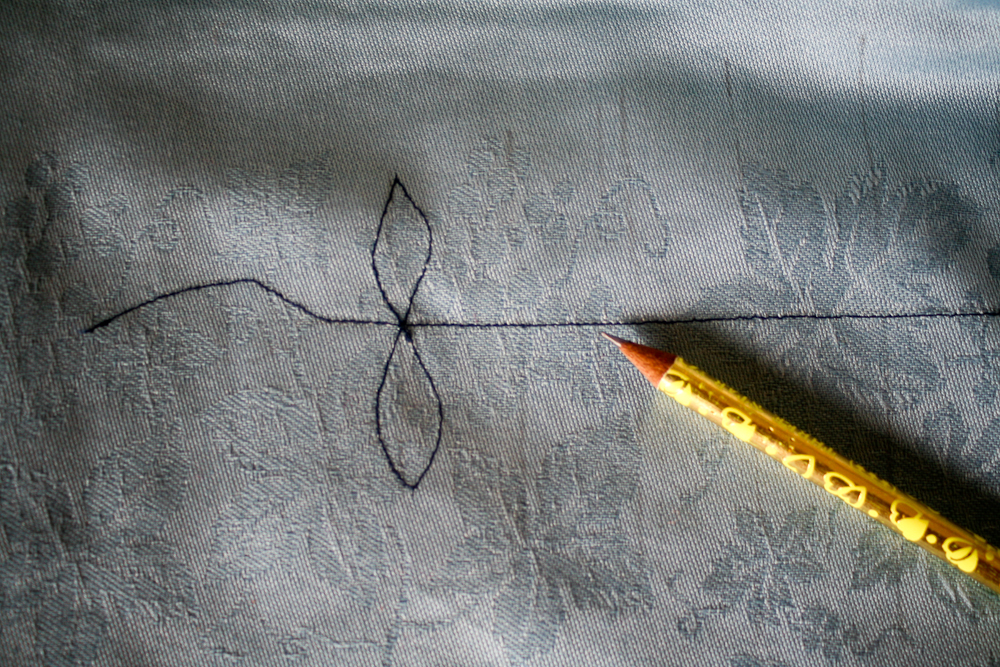
First I marked a rough guideline along which I could sew my design. I simply drew with a pencil on the fabric (I assume that will come out in the wash...). Then I started out by sewing half of the top leaf and continuing all the way down with the stem.


For the pairs of leaves I found it worked best if you start in the middle,
i.e. on the stem, then sew one leaf, crossing over in one continuous line to the other leaf. Continue to do that with as many leaf pairs as you need for the length of your fabric. The design will be a little bit irregular, unless you draw the complete design onto the fabric. However, the irregularity will add to the charm of your design (says Sonja, pretending she didn't want her leaves more uniform...) It might be an idea to practice this once with an off-cut!


I am quite happy with my result. Best is, that the design looks as neat on the back as on the front of the fabric. No tatty backside that needs to be hidden... One napkin will take between 30 mins and an hour to be made - depending on your sewing skills, I guess. My dining table will be spruced up with a spruce, so.

PS: Fabric without an in-woven design is probably better for this project. In my napkins it kind of interferes with the sprucy leaves...


Thursday, July 16, 2009

Lunchbag

For those of you who are still lucky enough to have a job (...), here is something to make your lunch a bit prettier! - It always annoyed me that I only had a few dirty, smelly plastic bags in which I brought my crispbread and lettuce up to the canteen. Very un-stylish! When I had to tidy up a few loose ends one evening, I decided to sew myself a pretty lunchbag.

Whenever I make a trip to Ikea (which is not that often, as Ikea is only opening in Dublin this July. Yessssssss - the suspense! the excitement! the expectation!!! I can tell you that a lot of Dublin ladies will be made very, very happy on July 27th *haha*), I stock up on the cheapest bargain fabric they are selling off. You often get colourful, nice fabrics for as little as 1 €/m. See a glimpse of my Ikea fabrics to the left.

For those of you who are dedicated seamstresses, my bag is probably a botch job. I am too impatient to work with templates, rulers and measures. Well, I'd like to say that I am pretty good at improvising... But here is a rough template I worked with. (Click on picture to enlarge!)


Basically cut out two separate rectangular side bits and one long rectangular bit which will form the bottom and the two smaller sides of the bag. Remember to calculate in 3 cm extra for sewing. I suggest you sew the bottom in first, with both larger side bits, and then do the side panels. Once everything was sewed together, I hemmed the top of the bag in one go.

For the handles, just cut two pieces of fabric to the length you want them and then fold them over twice and sew along the long side. Then sew them onto the top of your bag. Finished.

Here is my little maritime lunchbag (spot the Ikea fabric?)... Goes nicely with yoghurt, salmon and ciabatta bread...

Easy Decorating with Paper

Now that I have got my treasure box of beautiful papers, I have to use them. And if I don't want to keep making cards, I have to use it otherwise. There is plenty of cardboard-y paper with a mother-of-pearl sheen which would look good as cards, though. I was more keen on using the almost translucent paper strips which were in the goody bag.


After browsing through my book on papercrafts and experimenting with Japanese lanterns (unsuccessfully :( ) I found a quick and easy project: decorating a simple glass votive. Amazing, what you can do with a strip of pink, a strip of white and some raffia. I just wrapped the paper around the glass and then tied it in place with some raffia. For the other candle holder I glued the white piece of paper onto the pink and put a tiny bit of glue on the paper to stick it together.


Here are the finished candle votives - think pink!

Wednesday, July 15, 2009

My Loot

I have to show my loot from yesterday! My friend R-M told me about a little paper shop in Dublin where a friend of hers had bought a bag full of off-cuts. Sounded good - and as Camden Street is not very far from where I live, I visited the shop yesterday. What a fantastic recommendation. Daintree Paper is an absolute treasure trove! They sell handmade paper and all trimmings that you need for making your own cards, especially wedding invitations etc. I spent quite a while browsing the beautiful paper products, getting lots of inspiration. - Eventually I found the "goody bags". For a mere € 10 I bought a whole bag full of paper off-cuts. Here is the lo(o)t:

Now, I do not really have any intention of getting big into scrapbooking or card-making. Generally I think it is overrated and in my own personal experience the receivers of cards most often than not do not appreciate the time and effort that goes into making it. Let's face it - the cards are usually received and then discarded. I do like the way people in English-speaking countries display their birthday/Christmas/special occasion cards for a while. But even then they eventually land in the recycling bin.

Nonetheless I could not resist making a card today - just as an easy project to illustrate my posting with. So here is my Daintree card, with matching tag *sooooooo twee*...

I already have a few cunning ideas up my sleeve for more paper crafts, though, so watch this space!

Monday, July 13, 2009

Simple Necklace

Today I am showing you a necklace which I made a while back. Not that I didn't have a more recent crafts project. I actually spent all afternoon yesterday working on my latest project. I have finished it. And yet I haven't. There are some essential bits missing and I don't want to show it here until I am happy with the outcome. Currently that involves surfing eBay and other sites, hunting for some cut-class beads. You shall see as soon as I have what I need. But for now you have to do with my cutesy, not so little necklace.

A project for when you have half an hour to spare. Or you need to keep the kids occupied. In fact, when I first wore my necklace, a colleague commented whether that was one of my little crafts projects for my daughter *grumble*. No - I entirely managed to do this on my own. Ha! And am proud of it, nonetheless.

So, get yourself a length of black leather string (2m) and some colourful beads. The beads should be 1 cm in diameter. I bought my wooden beads in a wonderful shop in Dublin called Crown Alley (unfortunately they don't have a website - visit the shop anyway, if you are in Dublin. It is a treasure trove of beautiful, sparkly little bits and bobs... My picture here doesn't do it justice at all!)


Anyway, start by making a simple knot at the end of your string, leaving about one hand's width to the end of the string. Now string your bead onto the string. Make another simple knot right behind the bead. That way it is kept in place and will not move. Using your hand as a measure, make another knot another hand's width from the first bead. Put on bead. Make knot. And so on and so on. When you have the required length, just knot the string together.

Even if it is a simple necklace, I think it is quite beautiful and I often wear it with my favourite red dress. It even looks good on more sophisticated ladies:

Saturday, July 11, 2009

Bottle Recycling

A quick blog entry before I am heading out tonight to a birthday party. Can't go before I have shown my latest creative project, though, which I did yesterday on the spur of the moment. The idea comes from a German craft blog, which I absolutely adore.

Hanna Charlotte Müller is an industrial designer with focus on textile design who regularly blogs on her crafts, paper and textile projects. She does this for the well-known German women's magazine Brigitte under the heading of "Selbermachen!" (do it yourself). Her projects are really unusual but always original, crafty, mostly easy and certainly not the usual pastelly-twee stuff that you find on so many blogs and crafts sites. Please check it out yourself - even if you can't speak German. Her entries have detailed descriptions, illustrated with many photos. Click here.

So after being inspired by Hanna and still being in recycling mode, I made a little multi-purpose container, fashioned from an empty shampoo bottle. All you need for this project is an empty plastic bottle (shampoo bottles, lotion containers, shower gel bottles of all shapes, colours and sizes will do) and (nail)scissors, a sharp, sturdy knife and a pencil, possibly a punch or a ticket punch or a scalpel.

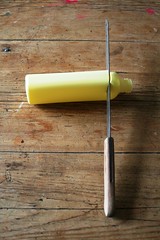
Start by cleaning the bottle and drying it. Then cut off the top. I used a sharp bread knife to give me a headstart because my little nail scissors could not cut through the thick plastic screw top of the bottle.


Then mark the design of your bottle on the plastic with a pencil. For my starter project I decided not to be too ambitous and chose an easy scallop edge design which I marked out by laying the nail scissors onto the bottle and then draw around the edges with the pencil - see the photo.


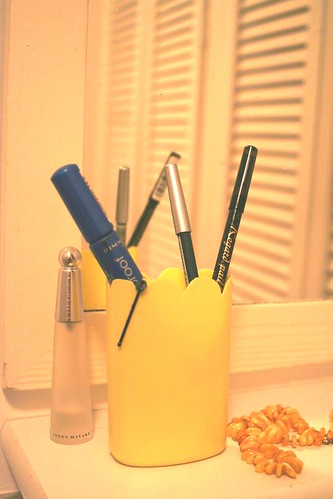
Next I cut the scallop edge with the nail scissors. It was a bit fiddly but it is not that difficult. My bottle was too small to then punch holes into the edge and I did not have my scalpel at hand, but theoretically you could make lace-y designs by using a ticket-punch or cutting out shapes with the scalpel.


The container took half an hour to make and cost nothing! This is more a decorative object than one with a clear practical use, but I can think of various uses for my new plastic container - as vase, make-up container or pencil tidy on my desk. Here are my suggestions:

Friday, July 10, 2009

Flour Power

A friend sent me a link to a delicious blog, called delicious:days. This is a food blog with step-by-step instructions and very detailed discriptions of all manners of food. But what really stands out for me is the quality of the photographs on the blog. I am not kidding - my mouth spontaneously started watering when I saw the images. Check their gallery here.

Anyway - it occurred to me that baking is crafts with food. You make something yourself and there is often a lot of thought put into the presentation and/or decoration of the produced dish. And that's why I decided to include a recipe here in Craft-Werk.

As a German living in exile, I really miss hearty bread. The so called "wholemeal" bread here is not an ounce healthier than your average white loaf and soda bread is occasionally nice with a bit of smoked salmon and a slice of lemon, but is usually too crumbly for my taste. A thoughtful friend gave me a bread maker years ago, though, and I haven't looked back since. I bake my family's own bread (only my non-German partner occasionally giving in to the temptation of shop-bought "bread"), with as many seeds and grains in it as I can get away with. Recently I discovered how easy it is to use the machine to produce the dough overnight and then shape and bake bread rolls ("Brötchen") in the morning, ready and warm for breakfast.

So here is my crafts project for today - Flour Power.
Make a yeast dough - either in a breadmaker or by hand. My recipe for the breadmaker needs 250ml milk, 1 egg, 450g flour, 40g soft butter, 1 tsp salt, 2 tsp sugar, half a sachet of ready-yeast. Follow the instructions of your breadmaker and produce the dough. Or combine all ingredients to a soft, not too sticky dough and let it rise in a warm place for at least an hour and a half.

After rising, knead the dough thoroughly again and work in more flour if it is too sticky. (It is perfect when the dough is soft, yet doesn't stick to your hands.) Now shape the dough into a long sausage, approx. the width of a cucumber. Cut 1.5cm pieces, shape them individually in a ball, then squash them slightly.

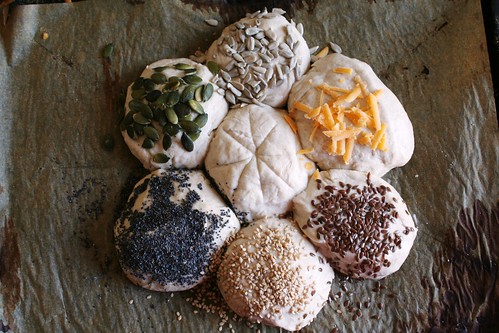
For presentation's sake arrange the individual rolls on a baking tray in a flower shape, starting with the centre one. They don't even have to touch each other - they will rise later and then stick together. Cut across the tops with scissors or a knife.

Now you can decorate them to your own taste with all sorts of seeds and grains. Brush them lightly with milk and then sprinkle the seeds on. I used poppy seeds, sesame, linseeds, pumpkin seed, sunflower seed and grated cheese.

Ideally you should let the rolls rise in the oven for another 15 mins before you finally bake them for approx. 20 mins at 180°C. Yeast pastry is best eaten freshly from the oven, so have a nice breakfast quick!

Thursday, July 9, 2009

Recycling Crafts

Just as I am very fond of making my own lampshades, noteboards or decorations, I also am a firm believer in recycling! Well, you could probably also call me a cheapskate, I guess *haha*. But seriously - why throw out things once you don't need them anymore or if they are (partly) broken? Most often than not you can still make things from them. It only takes a little bit of imagination, but you can often find another use for the material. So today I want to show you something that I came up with a little while ago.

Walking around Dublin in the winter you can't help but notice the number of broken umbrellas lying discarded in the gutters or sticking out from the litter bins. "There must be something you can do with those!", I thought to myself. And when I saw my friend's handy tote bag I had an idea.

Cheapskate Productions proudly presents: the recycled tote bag.
All you need is a broken brolli, scissors and pins and your sewing machine.
First, cut the material off the umbrella ribs and lay it on a flat surface. Usually the smaller collapsible brollis are made from 6 "wedges" of material sewn together. Check if your brolli cover still has the little velcro fastener attached. (This will come into play later.) Then fold the material in half with the velcro fastener being in the centre wedge of your material.

Now cut the outline of your tote bag with your scissors. A simple rectangle will do, size depending on the size of your material. The folded edge should be the bottom of your bag. (There will be a little hole there in the centre from where the material was attached to the "pole" of the brolli. Don't worry, you can sew over that later.) If you model it on my bag, also cut two matching holes for the handles of the bag.

Open up the material again and now first hem the upper edges of your bag. If you followed my example, now you also have to hem the handle holes.
Next fold the material right on right again and use pins to mark the sides of your bag. Using your sewing machine, sew the sides together. (If needed, you can also sew the bottom together now.) Presto! Turn it inside out and y
our bag is basically finished!

But now the afore-mentioned velcro fastener comes in: It should be sort of at the bottom of your bag. Why need it? Your bag can be folded into a handy little package and then held together with the velcro fastener. It will fit into your handbag, coat pocket etc. See here:

I have made several of these handy bags already. There is no shortage of material - thank God for the Irish weather...

The whole project takes about 3 hours to make and costs nothing, zero, zilch!

Wednesday, July 8, 2009

Designer Lampshade

Ooooh - yesterday was a day without blogging. Even though I only started this blog recently, I already had serious withdrawal symptoms. I couldn't wait to get back to updating my blog. Especially as the following is my "star" project. I absolutely love the outcome of this experiment...

I am in the middle of decorating my sitting room in our Georgian house. There was a bit of a stand-off between my partner and me about the lamps. While he preferred bare lightbulbs (...), I was all for buying a statement lampshade.

As a compromise I eventually made my own designer lampshade. It is actually based on the same individual paper squares as the Christmas star, posted in this blog on June 24th. I wrote detailed instructions on how to make the individual pieces. For the lampshade you need 12 such pieces, a bit of strong wire (preferably white coated) and some nylon thread or thin silver wire to hang it with. You also need a stapler, a punch and some (white) electrical tape.

First follow the instructions on how to make those 12 individual paper pieces. Click here. (This will bring you to the old post.)

Then put 6 of them in a line and staple them together at their widest point, not at the tips, that is. Make sure they all face the same direction to make the lampshade look regular. Also staple the first and the last together so they form a circle. Repeat with the other set of 6.

Next just place the two circles on top of each other, slotting the upper circle into the "gaps". It is a bit fiddly, but then staple the tips of the lower circle into the "joints" of the upper circle. (By that I mean the points, where you stapled the individual paper pieces together when you made them a circle.) That way the two circles should be joined together.

Last you punch holes into the tips of the upper circle, using a punch. Thread the wire through the holes and join the wire together by sticking the electrical tape around it. To hang the shade, knot 4 lengths of nylon thread onto the wire. These 4 wires you can then attach to the cord of your pendant bulb.


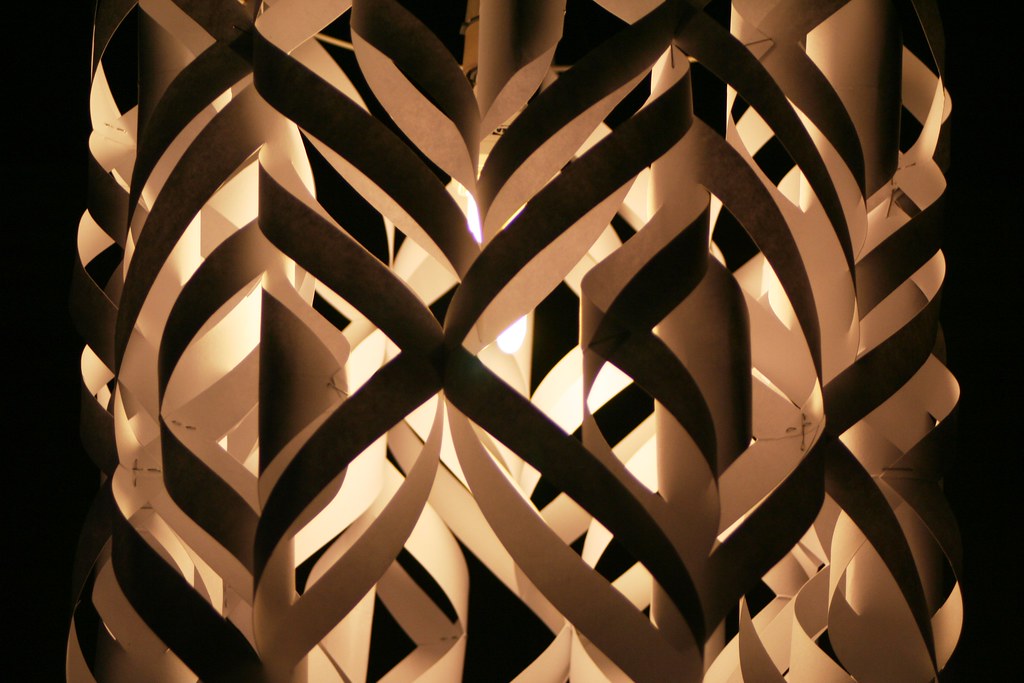
The whole project took one afternoon to make. It looks great in my living room and cost me more or less nothing. The light get's filtered nicely - it is much brighter though than in the pictures here - I took those without flash, for atmosphere's sake ;-).

You can of course customize the shade by fixing more than just 2 circles together. Make a huge floor lamp by joining 4 or 5 of the circles. Or try something else altogether - make a large paper screen by creating longer rows of the pieces. If you do - let me know. I'd love to see what other creative uses you might have for the paper squares. 


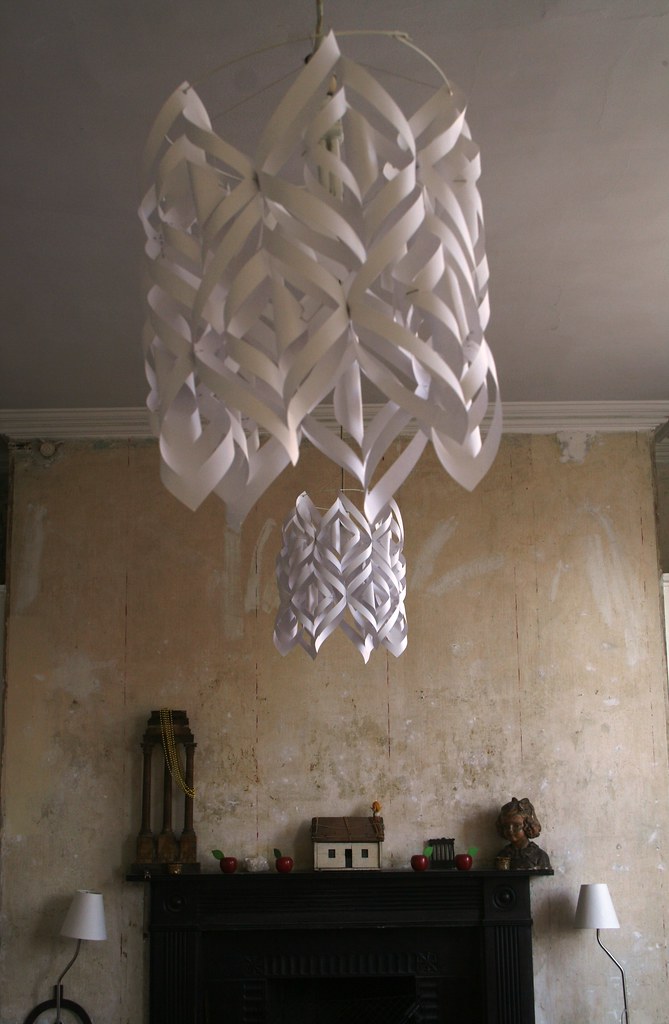
Update 9th January 2010: When I wrote this post last summer, our sitting room was in the middle of remodeling. It still hasn't been finished, but we are getting there. And parts of the room are presentable, so I thought I'd show the paper shades in context. There are two of them lighting up the room. This view is of our fireplace (*ahem* as if you didn't see that...).


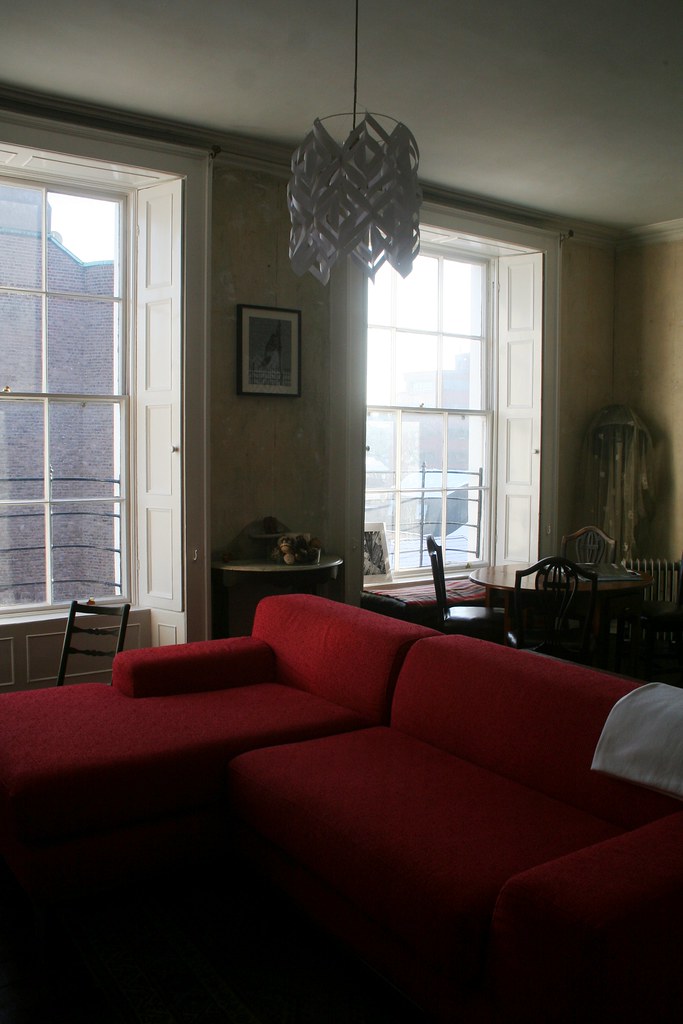
Here is another view from the sitting area to the dinner table. They are working very nicely with the decor of the room, I think. And they attract a lot of attention when people come to visit. They give a nice soft light - well, the bulbs are not that highly powered, I guess. Anyway, 6 months in I am still quite pleased how they have worked out.


13th January 2010: I have linked this to the aptly named Wednesday Bragfest at bobbypins boardwalk.


1st February: Linking to