FYI


Thursday, October 29, 2009

Happy Halloween, everyone

Back to my blog after a short absence and holiday abroad. And just in time to wish everyone a happy Halloween!!!


I am not much of a Halloween fan myself - it never played a big part in my childhood and has only recently become a big thing in Germany. As the celebration originated in my adopted country Ireland, though, I have started decorating for it, too. Besides, I love to bake pumpkin bread from the pumpkin flesh which I have to take out when carving the pumpkins.  

But I also want to take the opportunity and gush a bit about craft-heaven. Yes, I have been to the pearly gates of craft-shopping in Germany. And I could not resist buying a few things, even though I hadn't even got any particular projects in mind with them. I came away with lots of thin silver wire, two packets of straws from which I intend to make straw stars for the Christmas tree. I bought lots of Christmassy decorations, some silver leaves-wire, and thin strips of paper from which to make Froebel stars.

So, dear readers, there will be loads to come in the next weeks...

Tuesday, October 20, 2009

Pinhole Camera - for the Photo Junkies among you

Photography is - quite literally - "drawing with light". Nowadays we are using high-tech digital cameras and hardly think about the technology that makes image-creating. However, the principle on which photography works is a very simple one - and you can even build your own simple camera. So this is a slightly specialist crafts project

A pinhole camera is a simple device with which you can take photographs. It simplifies the photographic process and illustrates how a camera works: Essentially any camera is a black box with a hole through which the light will expose the light-sensitive material which is stretched at the back of the box. As light travels in straight lines, the reflected light from the object that the camera is pointed at, will fall through the hole and produce an upside down, left-to-right image


To make a camera, you need: 

  • a box, tin, carton or any other container with a lid
  • (masking) tape
  • tinfoil
  • cardboard
  • matt black spray, shoe polish or cardboard
  • scissors
  • a sewing needle


 1. Clean your container. The pinhole camera needs to be matt black inside in order to avoid the light reflecting and bouncing around in the inside of the camera. I sprayed the tin with some blackboard paint


 2. A simple hole in the tin is the "eye" of the camera through which the light will fall into the box. It can be punched into the container with a screw. However, it will be too big and too frayed at the edges this way, so another step is needed to make a sufficient hole.


 3.  Tin foil won't let any light shine through, so you stretch a bit of tin foil over the hole and secure it in place with masking tape.


 4. Then I made a tiny little hole in it, using a sewing needle. The tin foil won't fray and therefore the light that will fall through this hole will not create a fuzzy image on the light sensitive material at the back of the tin.


5. As a "shutter" I cut a piece of black cardboard and secured it with masking tape. For easy "shutter release" I folded the tape over so it can easily removed and closed again once the image has been recorded on the paper. My camera is closed with the plastic lid that came with the tin. To make the camera light-tight, you need to stick it in place once you have loaded the camera with the paper or film.


And that is it - from a cocoa tin to a pinhole camera in five simple steps.   


  >>>>> 


Now, to actually use your pinhole camera, you need light sensitive paper. It is available from brands like Ilford. However, to load your camera with the film, you have to operate in total darkness or under red light. So measure your container and make a template from which you can cut the light sensitive paper to size. In darkness or red light open your pinhole camera and insert the paper on the opposite side to the hole/lens. Secure it in place with blue tack. Shut the lid again and stick masking tape around the rim to make sure it is light-tight. Your camera is now ready for shooting. 

Working out the exposure time requires a maths degree - so experimenting is the way to go for those of us who can't get their head around numbers. I think it is going to take at least a couple of minutes for my camera. 


Once you have shot a picture with your camera, you can only retrieve the paper in dark or red light conditions and then develop it. Hehe, but you have to work that out yourself... There are plenty of sites on the web, though, that give you more information on this if you are intrigued. Mr Pinhole can help you work out your exposure times. Pinhole.cz has lots of info on pinhole cameras. 


Have a hole lotta fun!!!

Sunday, October 18, 2009

Antique Cabinet Before and After


My first Before and After-Post!!!


Project Drawing Room is progressing at a slowly but steady pace. There was an old, antique cabinet in the house that we thought might look good in the new drawing room. These cabinets traditionally come with a set of spindly legs and are usually placed in the corners beside the chimney breasts. As those corners in our drawing room are taken up with old in-built cupboards, we decided to float the cabinet on the wall instead. Not quite sure about the brackets with which it is held up, but its current position is growing on me. It makes a nice feature on a wall that is otherwise bare.


However, I thought it looked a bit boring, so I decided to update it a bit with a colourful inside. As it is a genuine antique, I did not really want to decoupage it and permanently fix paper to the back of it. Instead I used a piece of vintage fabric to cover the back. It is the same fabric which I used for my noticeboard way back in July.

I measured the inside of the cabinet and cut the fabric to size. Then I ironed the fabric and also ironed down a hem on each side. To fix the fabric in place I simply used some thumbtacks. They are easily removed if I don't like the pattern anymore and they won't damage the cabinet too badly. 


I think the cabinet greatly benefits from its makeover - it gives a bit of spectacle to an otherwise dignified and elegant piece of antique furniture. It is now a perfect place for the crystal glasses. And it gives my two prized tea sets - one a set of 6 differently patterned tea cups by the Russian Lomonossov Porcelain manufacture brought back 22 years ago from a study trip to St. Petersburg (then still called Leningrad!), the other a recently inherited old genuine Chinese tea set - a perfect display area.


Tuesday, October 13, 2009

Prettify your Notepads - Halloween Themed

Between work, family and college I am really stealing time every once in a while to get in a little craft session. Without my weekly dose of crafting I feel dull and bored, so I need to release creativity even if I am working creatively both in my day job and in my free time. However, my projects lately tend to be a bit short and not very elaborate at all. So please forgive me, dear readers.


Today I decided to prettify my notepads. I used to do that a lot when I was a student. But, hey, wait a minute, I am a student (again), so the notepads are in use again. But how boring is that:


Boooo, who wants to be seen with that, especially in a highly creative surrounding like a photography course. Noone! Especially not the Queen of Crafts.  So I transformed it into this:


Out came the scissors, the paper cutter, the glue, adhesive film and some pretty papers. The latter I simply downloaded and printed from the fabulous Canon site that I have mentioned before in my blog here.

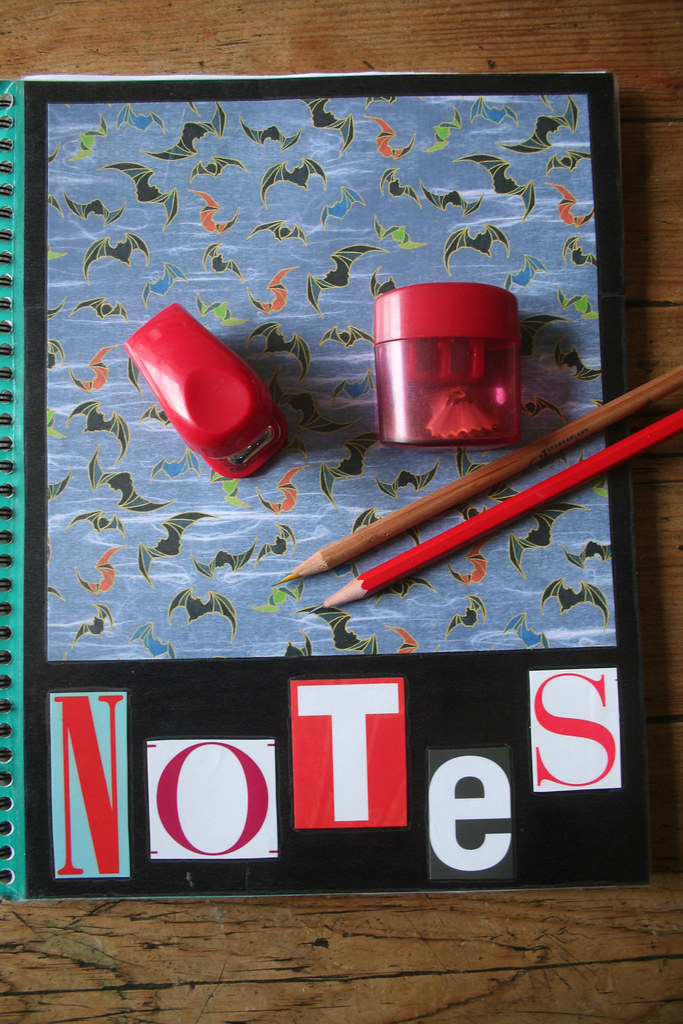
Now, let me also say, that I am actually not a Halloween fan. Tssssssssss - I know I am alienating any American readers of my blog saying that. But let me explain: Where I come from, Halloween is traditionally not a part of the seasonal festivities. Over the last few years, Halloween has crept into Germany, too, though. I am not too fond of it - I simply do not like the dark side that much, I guess. But since Halloween originated in my adopted country, Ireland, I have moderately taken on Halloween, too. So I settled on a "batty" design for my notepad-makeover. Here is what I did:


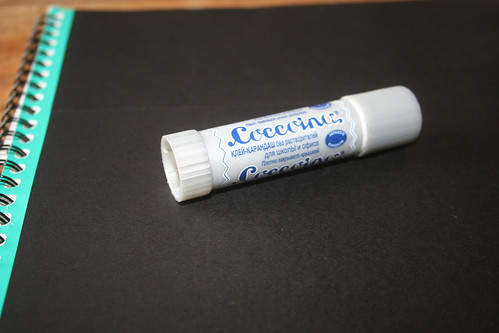
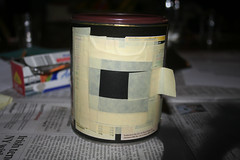
I first covered the unseemly coversheet of the notepad with some black cardboard. After cutting the cardboard to size, I simply glued it on with a glue stick. (Aside: I love the old-fashioned Coccoina glue. My grandfather used to give it to me when I was staying with him and wanted to do some creative glueing... The almond scent of the glue, which is made from potatoe starch and therefore free of chemical additives, is simply delicious and brings me right back to my "Opa Schule"...) Take care to leave a bit of space between your cardboard and the spiralbinding - you will need a bit of the cover to shine through so that you can attach your adhesive film to it.

I cut my pretty paper to fit the cover and then stuck that on with glue stick, too. In my case, there was a large bit of black cardboard left uncovered at the bottom, so I hunted for some large letters in my stack of interior design mags and cut them out. I arranged them on the cover to spell "notes" and stuck them on. Then it was time to cover the newly design notepad with adhesive film. Don't panic - it is pretty easy putting it on, as long as you use a soft cloth to wipe down the film immediately after pulling of the plastic backing. Just squeeze out the bubbles to the sides. And make sure you haven't got any bugs or hairs on the cover, otherwise you will preserve them for posterity under the adhesive film, too.


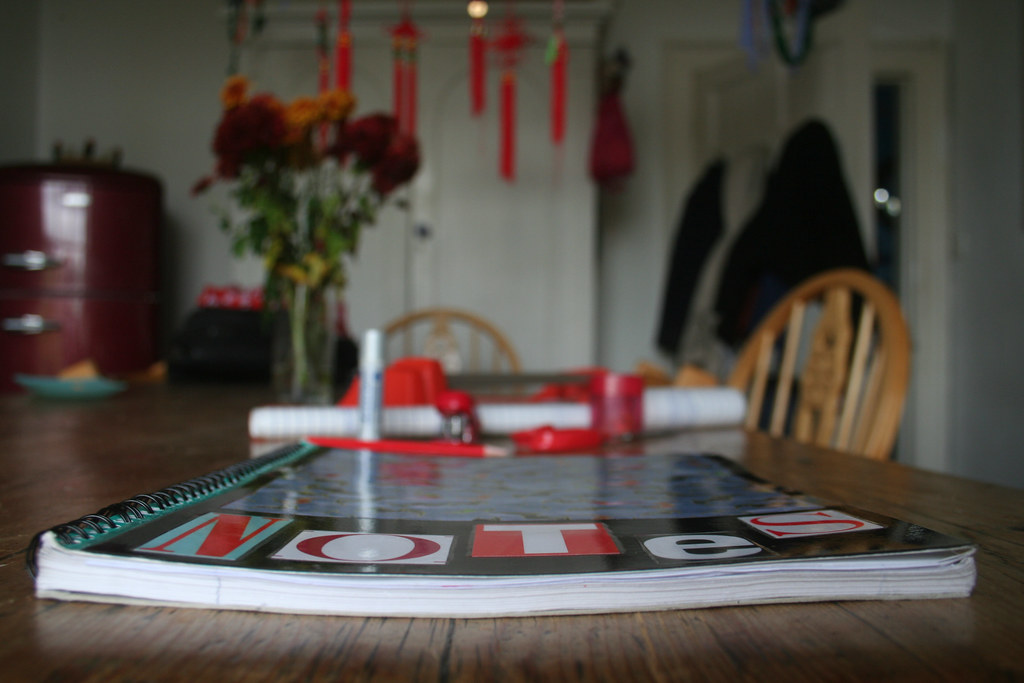
While I was at it, I covered a matching mini notepad, too. Ideal for my photography notes. "That's a lot of effort for a disposable notepad," I hear you say. Well, yeeees. But once your notepad is empty, you can cut off the cover from the pad, punch holes into it and then use it as a divider in your files. I used to do that with all my college notepads. Or stick it in a frame if it is really pretty.


So go on - treat yourself to some pretty stationary. Or give your kids a one-in-a-million halloween themed notepad for school. They'll be envied!

Friday, October 9, 2009

Internet Find: Turn your Blog into a Printed Book!

Excuse me for getting a bit overexcited here, but I found a really interesting site on the web this morning while researching for my work as a freelance journalist. You can have your blog printed as a proper, hardcover book via an American printing house. They do ship internationally, too, to various countries. Just for fun I tried it out with Craft-Werk and took a couple of screenshots for you to see:


The tool automatically comes up with a table of contents and places it at the front of your book.
You can choose from a variety of cover designs (my example didn't look great so I didn't bother making a screenshot).

All pictures are included and are placed in the text the way you had laid them out in the blog. Comments can be made visible, too.

As part of my photography course in college I am asked to keep a "visual diary" which I have decided to keep in the form of a blog. (For copyright reasons it is not on public view, so I cannot link to it here.) However, I have to hand it in as a hard copy - and that is where Blog2Print comes in. I am really glad to have found this site because it will save me from having to copy and paste my whole blog into a word document.

Check out their site here. Oh - and no, I am (unfortunately) not paid for the free PR for their services...

Thursday, October 8, 2009

A crafty card-making session...

Amazingly I was able to fit in a quick card-making session between child-minding and college. I felt the urge to be creative, so I got my loot-bag from Daintree Papers out, grabbed the spray mount and the puncher and created a few cards.


This is a scanned image, so all this is a collage of six individual cards, lazily scanned together in one go :-). They look slightly three-dimensional. That is due to the card which has a mother-of-pearl shine to it. The stripy paper is actually Japanese paper which is quite precious and expensive. So I used every bit of it - the punched out circles and the surrounding bits.

I quite like graphic designs on greeting cards - they suit every occasion and are rather easy to make. However, I felt particularly creative yesterday (...) and also made this little card for a very special occasion.


Let's hope that the receiver of this particular card is not following the blog... There are a few of them around...


Monday, October 5, 2009

Autumn decoration 2009


Finally, finally I have found the time to put some autumn decoration up in my home. I had been in Co. Wicklow over the weekend and used the opportunity to collect bits and pieces on a walk in the country. I came away with lots of twigs and sweet chestnuts. Last night I put everything together in an arrangement which now graces my kitchen wall.


I had planned to make a wreath from the twigs, but while making it I decided on a tear shape instead. It is actually easier to make - just tie the twigs together with florist's twine and instead of bending it to be a circle, tie one end into the other while leaving some twigs to stick out at the top.

Once you have made your wreath you can start decorating it. I fixed some wire onto the corn cobs (which I had knicked from a field in Germany *blushes*) and tied them to the top of the wreath. Then I took lots of straw flowers and tied their little stems with wire to the wreath. Careful - the dried stems break very easily. I also had some other dried flowers which I tied on the other side of the wreath.


The sweet chestnuts, little furry green balls (aren't they lovely?), came in pairs or in threes, so I pulled a bit of wire through the stems and then tied the wire onto the wreath. I would have preferred to tie a ribbon bow to the top of the tear shaped wreath, but since I didn't have any colour ribbon that would have suited the autumny shades, I had to use some raffia. I tied it in a bow where the ends of the wreath meet - that way I can hide the wire that holds the two ends together.


I have to admit, I find the deco is a bit on the tacky side. But well, I wanted to try making my own wreath and had to work with what I got. At least the whole thing didn't cost me anything as I had all materials at hand.

For some easier autumn decorations check out my posting from September 3rd.  

Friday, October 2, 2009

I have been mentioned!

Yoohay - I have been mentioned in another craft blog. Oh, I am so chuffed, especially as it is in the mightily creative Beckie's blog infarrantly creative, a blog that I have been following almost since the day that I started blogging myself. Beckie is an avid blogger who has fantastic ideas and great style. Well, that's a pretty personal opinion, but anyway, I like what she publishes in her blog. And I absolutely love her idea of the "Roadkill Rescue Party" - a kind of crafts competition where crafters are encouraged to revamp or rework a piece of junk which they have acquired for free, possibly from the roadside. Check out her blog yourself:


Her last project has been handmade paper beads - and she credits me for the inspiration. Remember - I blogged about my security envelope beads here. They really are easy to do, so go ahead and try it yourself!


Oh: And a big thank you to Beckie for the credit and the link!!!


Blackboard Paint - Storage Labels for Jam Jars

With my course in photography I am quite busy and therefore do not get to do as much crafting as I would like. It seems that my creativity these days goes into photography. There are plenty of projects to work on and less time for crafts. But here is a small project, another variation on the theme of blackboard paint.


As the jam-making season has drawn to a close, I had a few jam jars left over. My kitchen dresser is a horrible mess of little bits and pieces that I like to have handy but which haven't got a proper home. I found the solution to the unsightly mess with my jam jars.

I simply sprayed the metal lids of the jars with blackboard paint. Give the lids a good wash, making sure they are not greasy or dusty. Then spray with blackboard spray. Give them at least two coats and let each coat dry thoroughly. If you are too impatient and the paint is not properly dry, you will scratch it off in the process of writing on it with your chalk.


Ok, you can see what is inside the jar, anyway, but the uniformly black lids add a bit of style to the jar display in my storage shelves. You can label your jars easily with chalk and wipe it off when you use the jar to store something else in it. I now have a great home for the children's ink cartridges and my paper clips.