Between work, family and college I am really stealing time every once in a while to get in a little craft session. Without my weekly dose of crafting I feel dull and bored, so I need to release creativity even if I am working creatively both in my day job and in my free time. However, my projects lately tend to be a bit short and not very elaborate at all. So please forgive me, dear readers.
Today I decided to prettify my notepads. I used to do that a lot when I was a student. But, hey, wait a minute, I am a student (again), so the notepads are in use again. But how boring is that:
Boooo, who wants to be seen with that, especially in a highly creative surrounding like a photography course. Noone! Especially not the Queen of Crafts. So I transformed it into this:
Out came the scissors, the paper cutter, the glue, adhesive film and some pretty papers. The latter I simply downloaded and printed from the fabulous Canon site that I have mentioned before in my blog here.
Now, let me also say, that I am actually not a Halloween fan. Tssssssssss - I know I am alienating any American readers of my blog saying that. But let me explain: Where I come from, Halloween is traditionally not a part of the seasonal festivities. Over the last few years, Halloween has crept into Germany, too, though. I am not too fond of it - I simply do not like the dark side that much, I guess. But since Halloween originated in my adopted country, Ireland, I have moderately taken on Halloween, too. So I settled on a "batty" design for my notepad-makeover. Here is what I did:
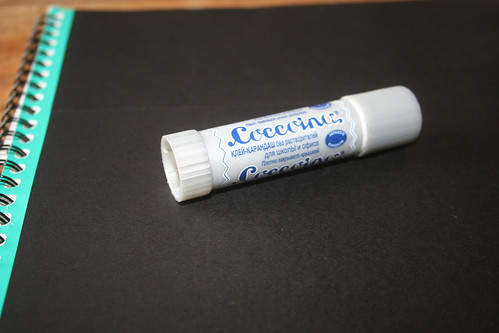
I first covered the unseemly coversheet of the notepad with some black cardboard. After cutting the cardboard to size, I simply glued it on with a glue stick. (Aside: I love the old-fashioned Coccoina glue. My grandfather used to give it to me when I was staying with him and wanted to do some creative glueing... The almond scent of the glue, which is made from potatoe starch and therefore free of chemical additives, is simply delicious and brings me right back to my "Opa Schule"...) Take care to leave a bit of space between your cardboard and the spiralbinding - you will need a bit of the cover to shine through so that you can attach your adhesive film to it.
I cut my pretty paper to fit the cover and then stuck that on with glue stick, too. In my case, there was a large bit of black cardboard left uncovered at the bottom, so I hunted for some large letters in my stack of interior design mags and cut them out. I arranged them on the cover to spell "notes" and stuck them on. Then it was time to cover the newly design notepad with adhesive film. Don't panic - it is pretty easy putting it on, as long as you use a soft cloth to wipe down the film immediately after pulling of the plastic backing. Just squeeze out the bubbles to the sides. And make sure you haven't got any bugs or hairs on the cover, otherwise you will preserve them for posterity under the adhesive film, too.
While I was at it, I covered a matching mini notepad, too. Ideal for my photography notes. "That's a lot of effort for a disposable notepad," I hear you say. Well, yeeees. But once your notepad is empty, you can cut off the cover from the pad, punch holes into it and then use it as a divider in your files. I used to do that with all my college notepads. Or stick it in a frame if it is really pretty.
So go on - treat yourself to some pretty stationary. Or give your kids a one-in-a-million halloween themed notepad for school. They'll be envied!


3 comments:
Thank you for visiting me on my SITS Day!
Sonja, bin gerade ueber Deine Craft-Werk Site gestolpert. Fantastisch! Keine Ahnung wo Du die Zeit hernimmst, aber eine wunderbare Inspiration. Muss unbedingt die candle-shades probieren und die Papiersterne und die aufgepeppten Kladden und und und...
LG Ellen
Hallihallo Ellen - freut mich, dass es dir gefällt. Du bist ja auch so kreativ - du solltest mal zeigen, was du so alles gemacht hast!
Post a Comment