FYI


Wednesday, January 27, 2010

Bead Ball Earrings

Sorry, this is not brandnew, but I wanted to show you what I made. The bead balls have kept me in thrall enthralled. Unfortunately I have run out of beads at this point, but I have a vague feeling that I might repurpose something from the depth of a big old trunk in my house... 

Anyway, before ran out of beads, I managed to make a pair of matching bead balls. I decided to turn them into earrings. I am not quite happy yet with the way I have attached them to the actual earring, but I like them enough to be wearing them today. 


Hehe, I would have loved to show them in situ, dangling from my earlobes. But - frankly - despite being a photographer I just couldn't get a decent picture of myself with the earrings. *doh*. Well, besides - my ear doesn't make a particularly pretty sight. So you get the drift from the pic up there...

If you are new here and haven't seen how I made them, go to my blog post HERE.


Best,


Tuesday, January 26, 2010

Upcycled Packaging

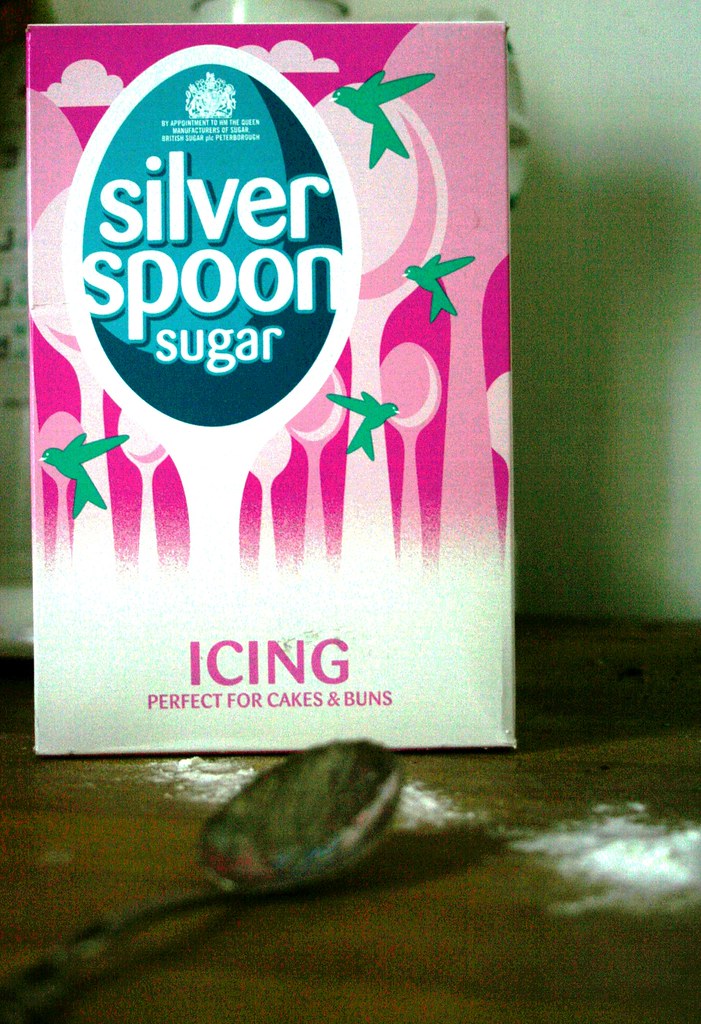
Have you ever noticed how beautiful commercial packaging can be? We all love antique enamel signs and biscuit tins and we know how carefully they were designed decades ago. Most of the packaging nowadays seems to be utalitarian, cheap and cheerless. So imagine my delight, when I saw this beauty of an icing sugar packet in the shop. Well, I needed to buy some icing sugar, anyway, but I would have bought it regardless, just for the cute and nice design.


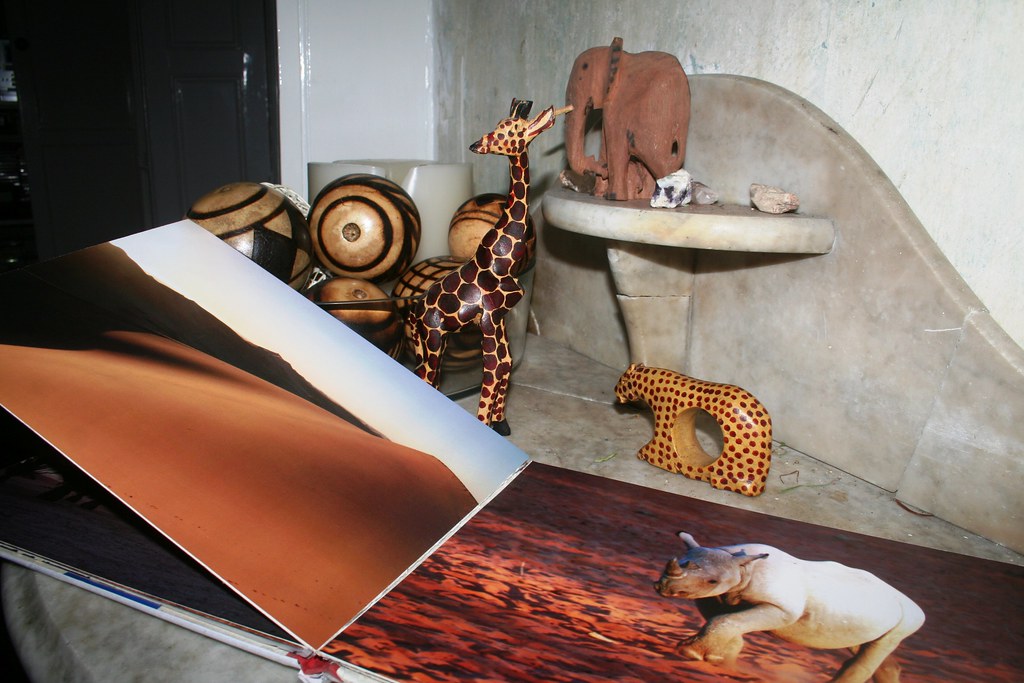
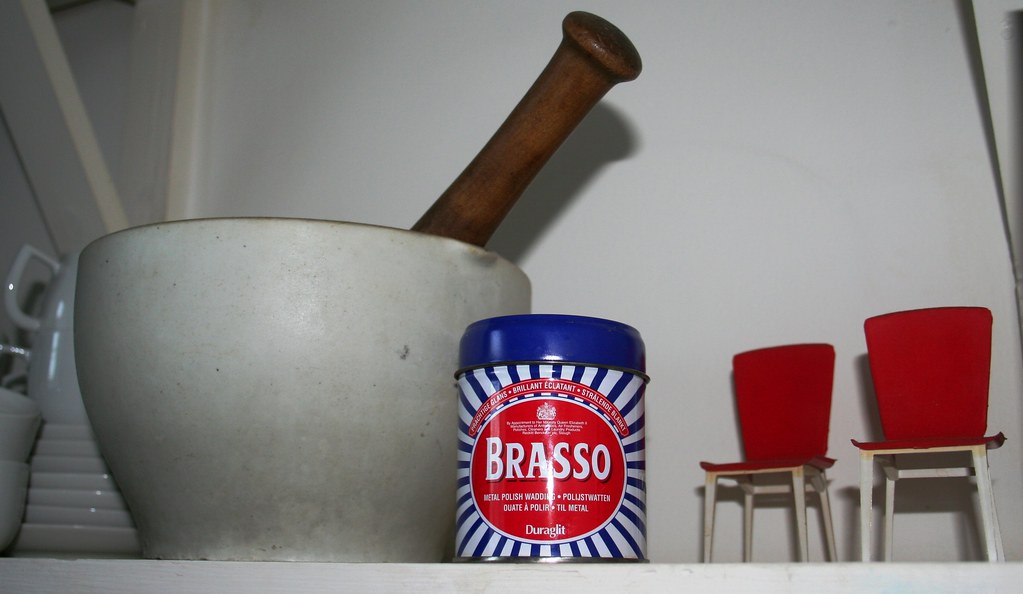
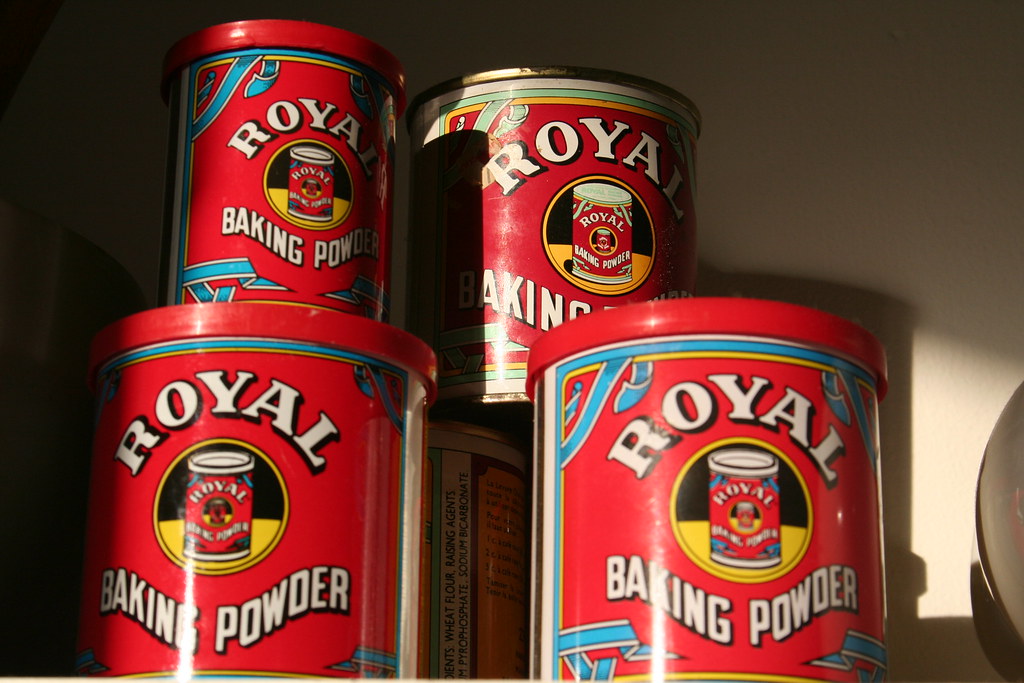
I have always had a soft spot for nicely designed containers and tins. Here is a selection of - empty but beautiful - tins that I just cannot throw out. They are attracting dust in my kitchen...


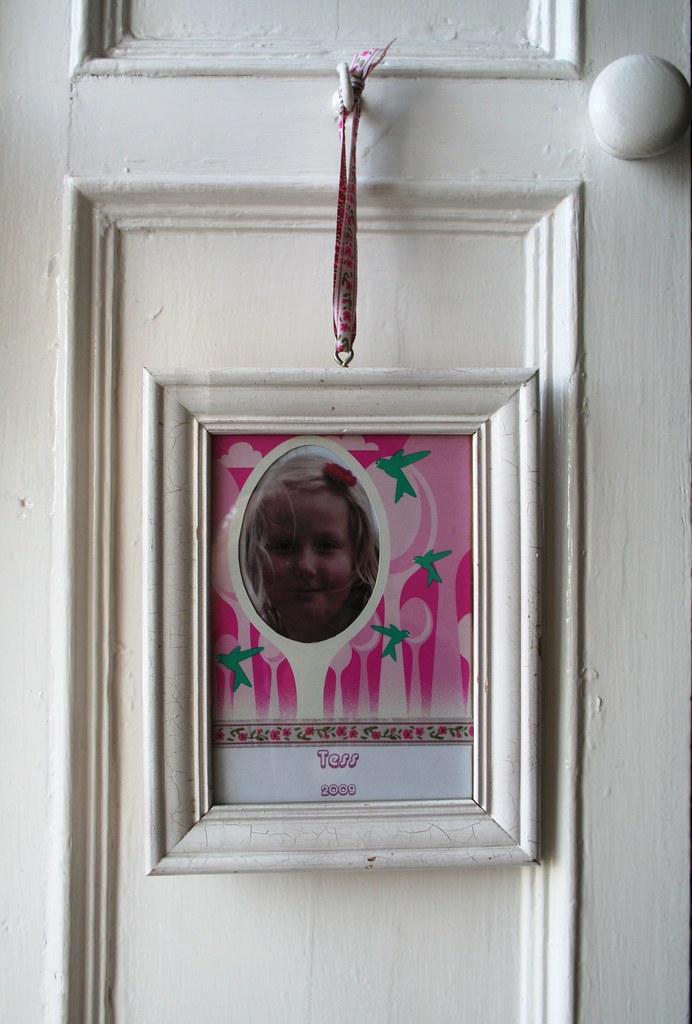
Anyway, back to the icing sugar box - I am not really a pinky-pink girly-girl, but the box was just so sweet, if you pardon the pun. It didn't take me long to figure out what to do with the lovely humming bird-design. It's kind of obvious, even:


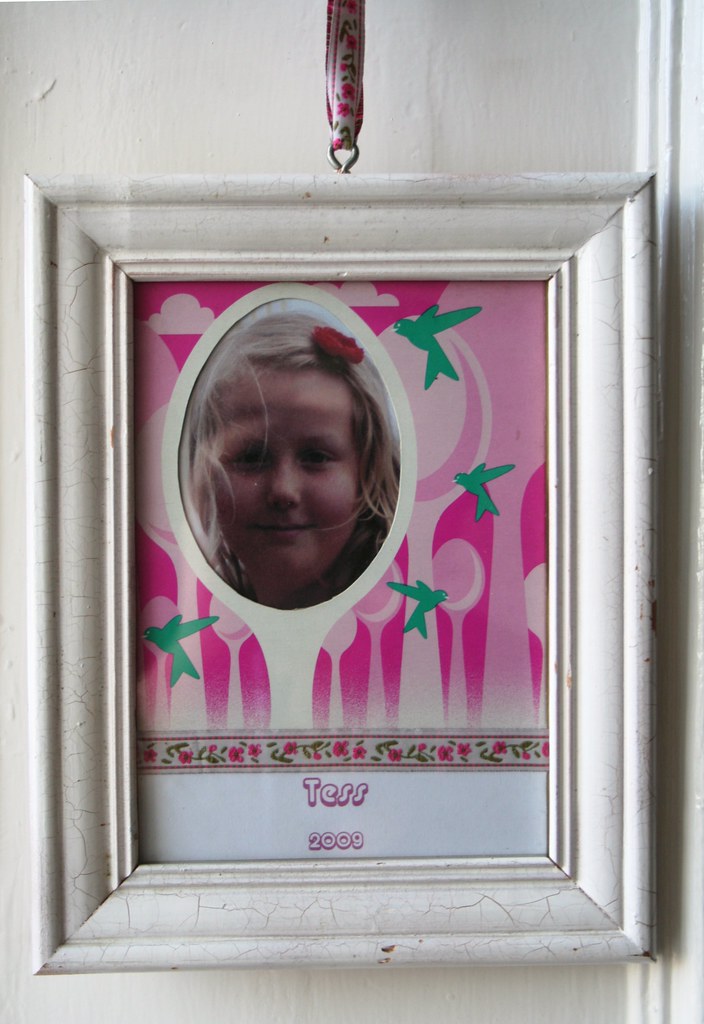
I trimmed the front of the box and then cut out the "spoon". The opening created exactly the right size and shape for a sweet little portrait. Next I printed out a recent picture of my daughter and cut it the right size to fit behind the opening.

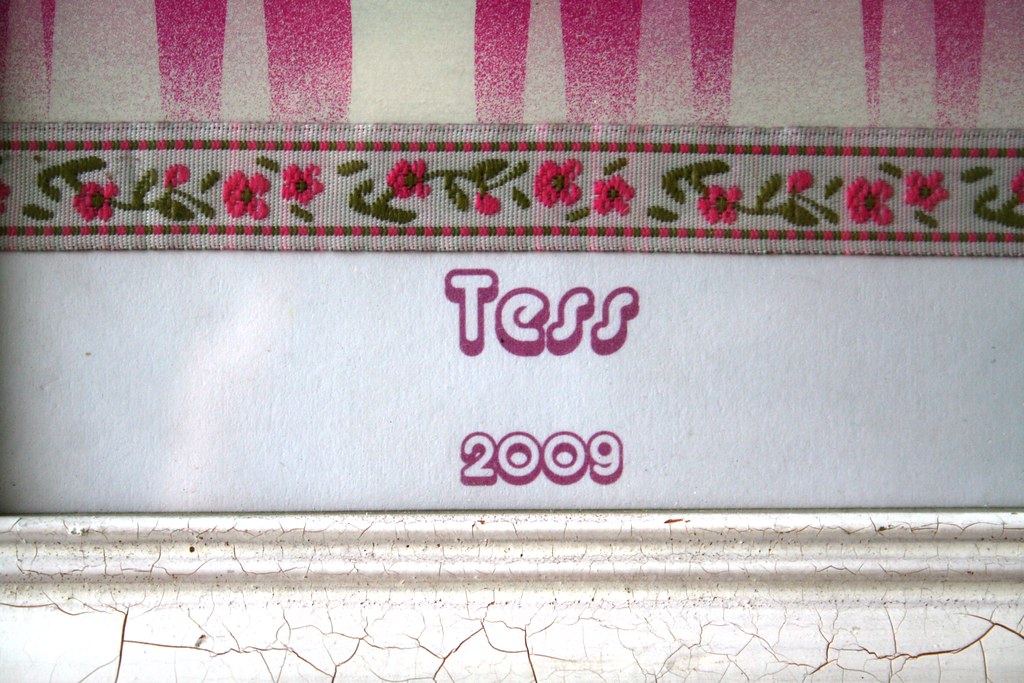
I also had to cover up the writing at the bottom of the design, so I simply printed out my daughters name and the year her photo was taken and glued it over the writing. It looked a bit bare like that, so I embellished the picture with a bit of ribbon that I had at hand. I actually used some nifty glue dots to stick it over the picture.

I had an old white frame the right size at hand. And presto! A sweet little portrait to hang up in my daughter's room. Ooops, I have just remembered that she doesn't like pink. Well, maybe she'll graciously overlook that...

Best,


Linking to


DIY Day @ ASPTL

Monday, January 25, 2010

Bead Balls - An Exercise in Patience

Now, here is another thing I have been working on the last few days. I came across a pattern for "beaded beads" that looked straight forward enough for me to attempt it. Candie posted an extensive and clear tutorial for the bead balls with lots of photos, so I sat down with my bead box and a string of nylon thread and made this:


I don't want to attempt another tutorial for this as Candie's instructions are detailed, so please check them out here. But I will show you what I made and how I adapted the bead balls. If you look closely at the photo above (and disregard the horrible, piggy fleshiness that is my hand *ugh*), you will see that I enclosed a pearly bead in the bead ball. I simply popped that into the ball before I threaded the last little bead on. A little surprise, so to speak...


Without getting into a tutorial, I'll just write down a couple of observations that might help you when you are making these. My recommendation is to make a couple of these bead balls with slightly larger beads first before you start on the fiddly tiny ones. You need 30 beads of the same size, preferably round ones, and about 20 inches of nylon thread. Count out your beads and put them on a saucer on your crafting table! Making these bead balls is addictive, as Candie warned in her tutorial...

I have to admit, it took a few attempts before I got the bead balls right. But  I ploughed on until I got it right. The whole process is fairly logical and regular, but I found I really understood the process of weaving them together, when I used different colour beads for the various parts. I.e. start with 5 beads of one colour. Then have 15 beads of a different colour. And for the last part have 10 beads of yet another colour. It just means you understand the pattern and the weaving better. It will help you to make your second bead ball in just one colour...


Nonetheless I got a couple of them wrong and finished before I had a regular ball shaped pendant. They were more of a three-quarter globe, with the last bit missing. I found a use for those, too, though. I popped a red bead into one and then fixed the ball onto a ring.

Another three-quarters finished ball became the centre of one of my corsages. It looks lovely like that and was easier to sew on than a full ball, I think.


I am still wondering what to do with my green-and-blue bead ball - I think I will turn it into a pendant once I have figured out how to fix a little hoop onto it. The obvious use would be earrings - Candie shows several of hers. My daughter loves this red-and-black raspberry bead ball - not sure yet, what to do with it, but it already has a matching gift box *haha*...  

 
Best,


Linking up to
         Making


Sunday, January 24, 2010

Paper Boxes - Cheap and Cheerful Packaging

Hello! I am still here - but was busy with my *real* life for the last few days. Not too busy to craft, though, and there are three (3!!!) things I will show in Craft-Werk over the next days. Not all of it is quite finished yet, but there is one thing that I would like to show off already.

If you are following the blog regularly, then you will know that I was quite excited to submit a donation to the Craft Hope for Haiti-initiative. And you may remember that I was thrilled my donated flower corsage got sold very quickly. I have now received the details of the buyer and the corsage is ready to be shipped on Monday.  Lying in bed this morning, I was wondering how I could ship it without it getting squashed and damaged. And then I had the Eureka moment - why not fold the Origami box that my mum always makes as her little party piece?


This is another really simple Origami piece - one that even I can do... In order to get a slightly sturdier box, I printed some white cardstock with a cheerful, dotted design that I had downloaded from Canon Creative Park. (Seriously - I can't mention this enough: The Canon site is just fantastic!!! No need to buy pricy Origami paper anymore! There are tons of nice designs under the "Scrapbook" tab which you print on paper - and there you have it!!!)


For this little box you need square paper - so just cut your A4 size, printed paper, determine a square shape and cut off the excess paper. Then you can quickly fold your box in a matter of minutes. You need to place the "nice" side down on your table when you are folding, so that the design will be visible on the box. Neatly, it will be visible both on the outside and on the inside. The more exact you are when folding, the neater it will come out, of course. As with most (all?) Origami you do not need to glue anything down - it is all held in place by the folds! Cool!

Update: I have been persuaded to upload a video tutorial for this origami box, as well. So here comes the fuzzy clip - apologies for quality. But you will get the general drift of the project.


My box was made from a square piece of paper that was 21x21cm (roughly 8.5x8.5 inches). The resulting box is 7x7cm in size (2.75x2.75 inches). If you want a matching lid for your box, just make your square paper a little bit smaller - maybe cut off half a centimetre on the two sides. Then the two boxes will neatly slide into each other. So here it is - isn't the corsage nicely packaged?


This is a cheap and cheerful way of packaging little gifts. Fill it with M&Ms for Valentine's Day. Or if you are an Etsy seller, here is a cute box for protecting your precious handmade items when you are shipping to someone. It doesn't cost anything or  take long, but cute packaging makes such a difference for your buyer. Just imagine how pleased they will be when they open their delivery and find this...


Make them in all sizes - I made another small one just for fun and to show here - this would be great for a ring or any kind of small jewellery gift.


Best,

Wednesday, January 20, 2010

More good news: Featured on One Pretty Thing

What a great day today was. Ehm, or yesterday, at this point. Not only did my donated hand-crafted flower corsage get sold for Craft Hope for Haiti (see previous post), but one of my projects has been featured on One Pretty Thing.

oneprettything


Rachel posts several daily updates on the coolest crafts on the web. It is thematically categorized according to season and other topics. My recycled calendar was featured in the Daily DIY section, alongside some fantastic other crafts projects. You can check it out here. Yay - and I am proudly sporting a new "featured" button on the left!!!


Thanks, Rachel, for including me in yesterday's illustrious highlights!!!

Tuesday, January 19, 2010

Craft Hope... and sold!


Did you check out the Craft Hope for Haiti etsy shop, dear readers? Lots of nice things to buy there, and doing a good deed while you buy. 

Click the button to see the shop: Craft Hope Spreading seeds of hope one stitch at a time

I received an e-mail from the organisers behind Craft Hope at 2.25 pm today, letting me know that my flower brooch had been posted in the shop. When I checked the link to my item just now (10 pm), I found out that it has already sold! Yaaaaaaaaaaaaaaayyyyyyyyyyyyyyyyyyyyyy! You can check my listing here. So thank you to the buyer! You have proven that you have a good heart - and style...


 Wondering whether I should make another one and donate it???


I Heart Origami Hearts

I don't know about you, but I am totally crap at origami. It is with horror that I remember a one-day Japanese language course where the kind tutor also showed us the traditional origami crane that all school children in Japan can make with their eyes closed. Well, I couldn't even do it with my eyes open!!!


While out on Sunday, a friend of a friend entertained the kids at the restaurant by folding the crane from a piece of scrap paper that was left on our table. I was mightily impressed - and wished that I had a little party piece like that to awe my little audience with. Also, my ambition was piqued, and I looked up origami crane instructions on the net. "If she can do it, so can I!" the Queen of Crafts thought, "thou shallt not be craftier than us!" Well, my attempts at recreating the crane were pathetic - and landed in the waste paper basket!!! But not being one to give up easily, I found another origami piece which I was able to do - yoohoo. Origami hearts!


Do you want to make one, too? I have developed an origami heart fetish and made about 20 yesterday. It's dead easy. Usually origami pieces are made from square paper. This project is so neat because you use a rectangular piece of paper - A4 size is just right. (Or A5, A6, whatever size you want your heart to be!) So no cutting or trimming needed! The other cool thing is that you only need paper that is decorated on one side. The pattern works in such a way that only the decorated side will be visible on the finished heart. That means you can even use scrap paper - recycle it here!


I usually take photos for my tutorials, but with origami I find pictorial instructions useless. I never understand the little arrows and instructions. So I stole borrowed my son's little digital camera to record my first ever clip tutorial. Tadaaaaaaaaaa! Craft-Werk goes 21st century! I proudly present my first attempt at a video tutorial. (Disclaimer: Sorry about the picture quality  - must be the poor pixel settings of the camera - and the typing sounds in the background. I hope it is not too distracting!)


Ugh, was that me? Do you also hate hearing your voice? Anyway, I hope you could see how easy and quick it is to make this little paper heart. I decided to make them into ornaments to hang from a few branches. You are asking me why go through all the fuss of folding when you could simply cut out a heart shape and hang it up like that. Point taken - but these origami hearts are nicely three-dimensional. And it's good to learn something new, isn't it?

My mantlepiece in the drawing room was in need of some colour and happiness. I had some coloured paper in my stash which I used. I also experimented with colourful pages ripped from a magazine (didn't like those so much, though). But the best results were with scrap paper that I had printed chiyogami patterns on. I have recommended the site before - Canon has a whole webpage dedicated to crafting. You can download beautiful paper designs there - for free - and print them on your normal paper. Check it out - Canon Creative Park


No two of my origami hearts are the same. They would look nice just on their own, but I decided to embellish them with bits and pieces that I had lying around - bells, buttons, ribbon, beads, even a little shell. My favourite, though, is what I have dubbed the "You hold the key to my heart"-heart.


I am not a fan of the whole Valentine's Day season, but these ornaments would make a lovely display. You could string them up on a bit of ribbon and hang them on the mantle. They also make an original Valentine's message - remember: only one side of the paper is visible on the finished heart, so you can write a message to your Valentine on the inside and then fold it up. Nifty!!!


Best,


PS: Am linking this to


and


DIY Day @ ASPTL
 

21 January: Have just linked this to


Get your craft on Thurs.


22 January: Also linked to

and monogram


Monday, January 18, 2010

Craft Hope - Buy and Give in One Go

Dear Readers,

no doubt you have heard and read about the terrible human tragedy that is happening in Haiti due to the earthquake. It's time to get up off our crafty little bottoms and do something. Since we can't all go there and help ourselves, here is a wonderful way of doing your thing to relieve the suffering in Haiti.


Some kind people on internet craft platform etsy have come up with the most wonderful idea - they have organised a craft shop where crafters can donate items, the proceeds of which will all go to Doctors without Borders. Lots of beautiful crafted items are for sale there - head on over and do your good deed for the day. Buying has never felt so good - you buy and the money goes to a good cause. Please check Craft Hope, NOW!


Alternatively, please donate a craft item that you have made and let them sell it. I know you all are crafty and inventive - now your talents can also benefit those, who need our help. 


I have just made another corsage and donated it to Craft Hope for Haiti. It is nothing big - but I sincerely hope it will find a buyer and some money is generated.Craft Hope Spreading seeds of hope one stitch at a time


Go on, go over there! This is money well spent!!! And don't forget to highlight the store on your blog, too!


Thanks,