FYI


Showing posts with label frame. Show all posts

Saturday, March 30, 2013

A Pastelly Easter

All set for Easter? The eggorations have been up for a couple of weeks now and I have not really added anything new this year. In fact I re-used stuff again, in a slightly different way. The old frame keeps getting used - it really has been the best decorating device ever.


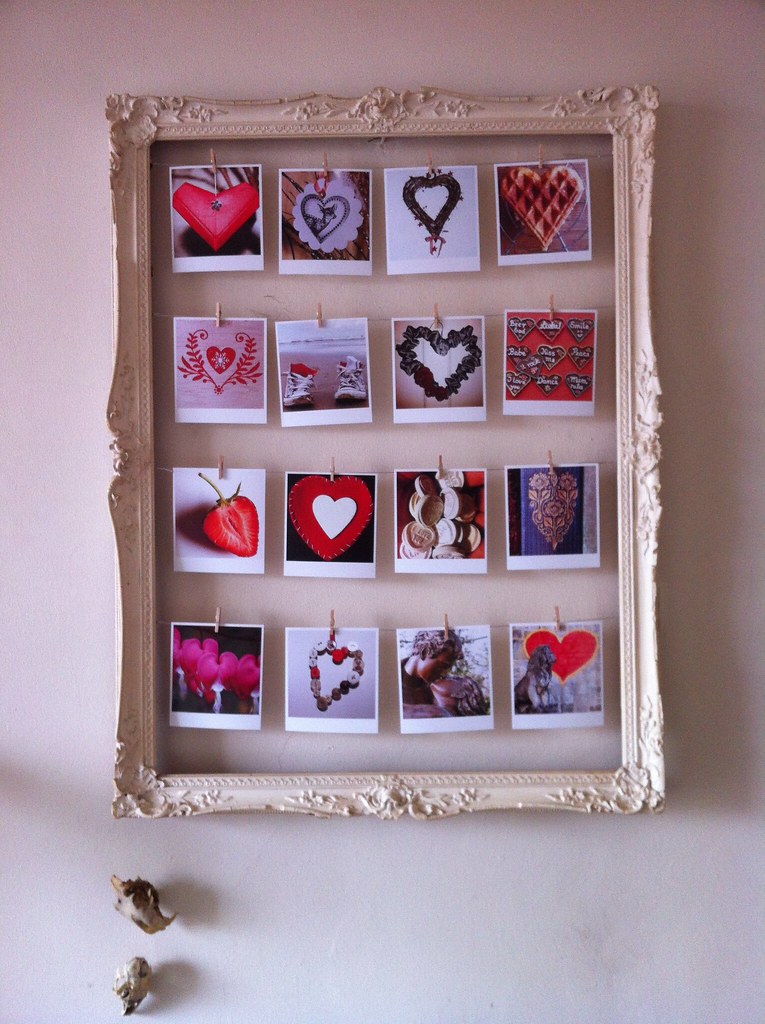
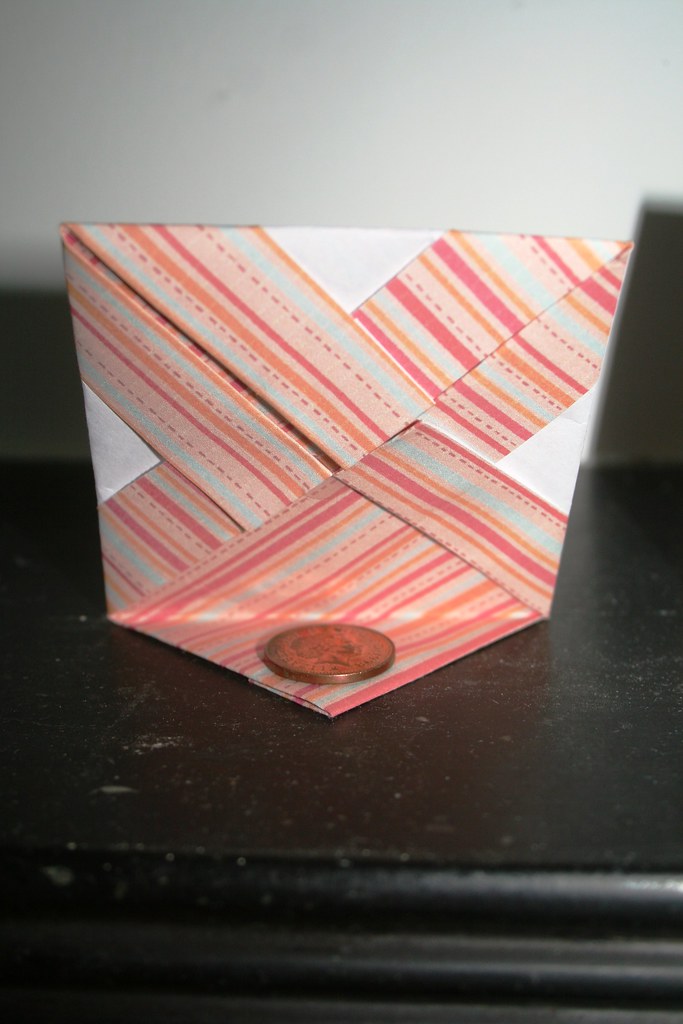
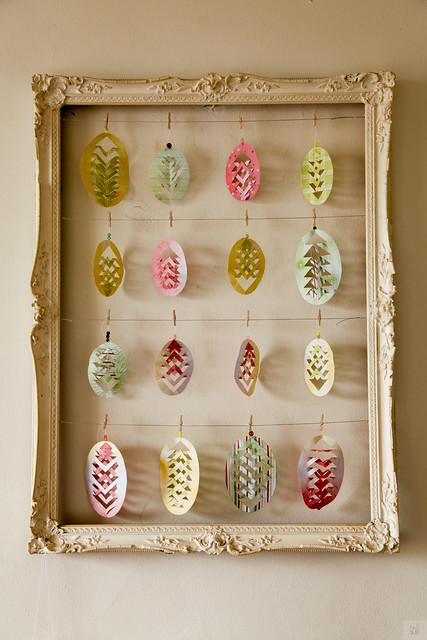
I had actually planned to take the little strings out of the frame once I took my Valentine-y love heart display out of it. But then I found my paper eggs from three years ago in the box of Easter stuff. Three years ago - my oh my, I had all but forgotten that I had made them, but as it turns out, they were one of the really popular posts here on my blog.  Back then I wrote a whole tutorial about making them. Check it out here - there is also a template you can download. It is very easy and the sort of stuff you can do with your kids. In fact, the initial egg came from my daughter, then 8 years old.


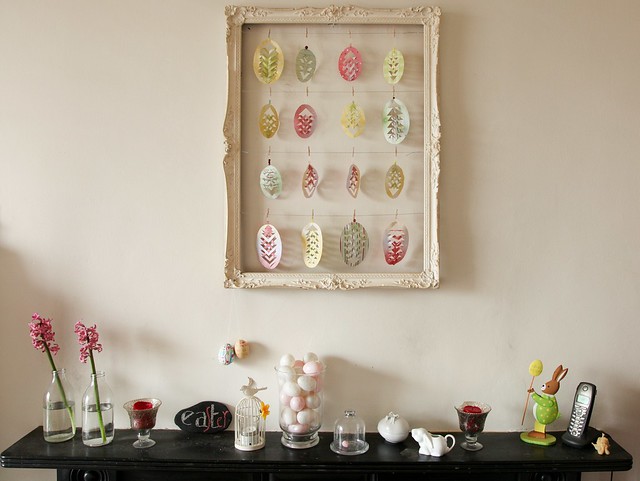
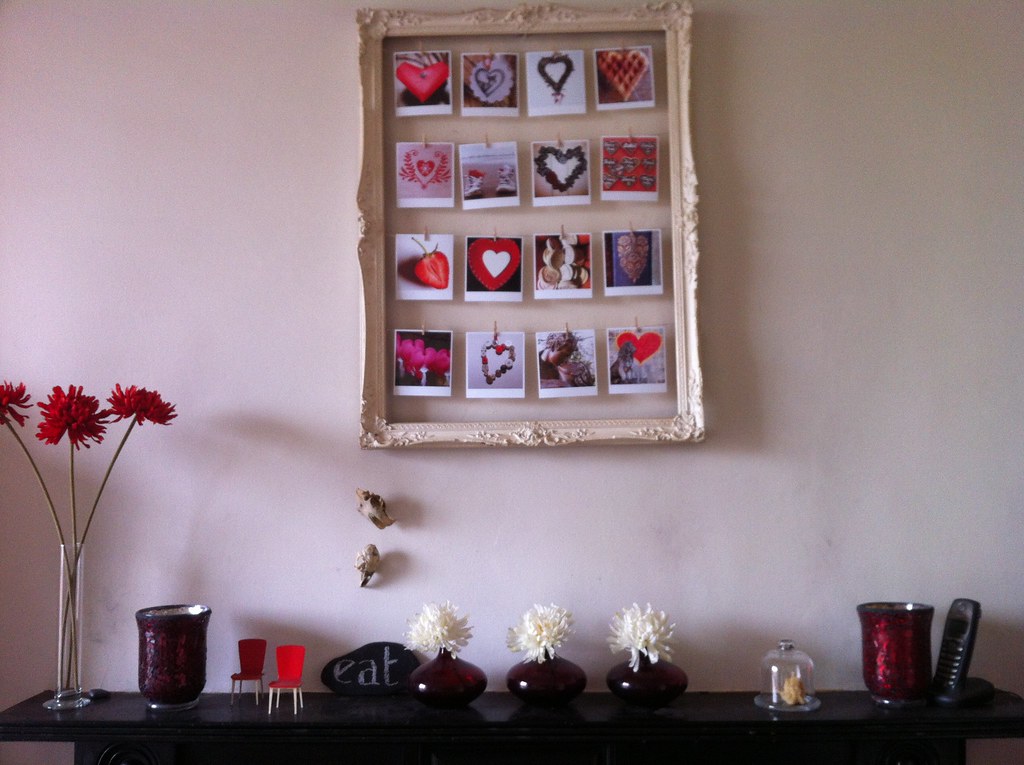
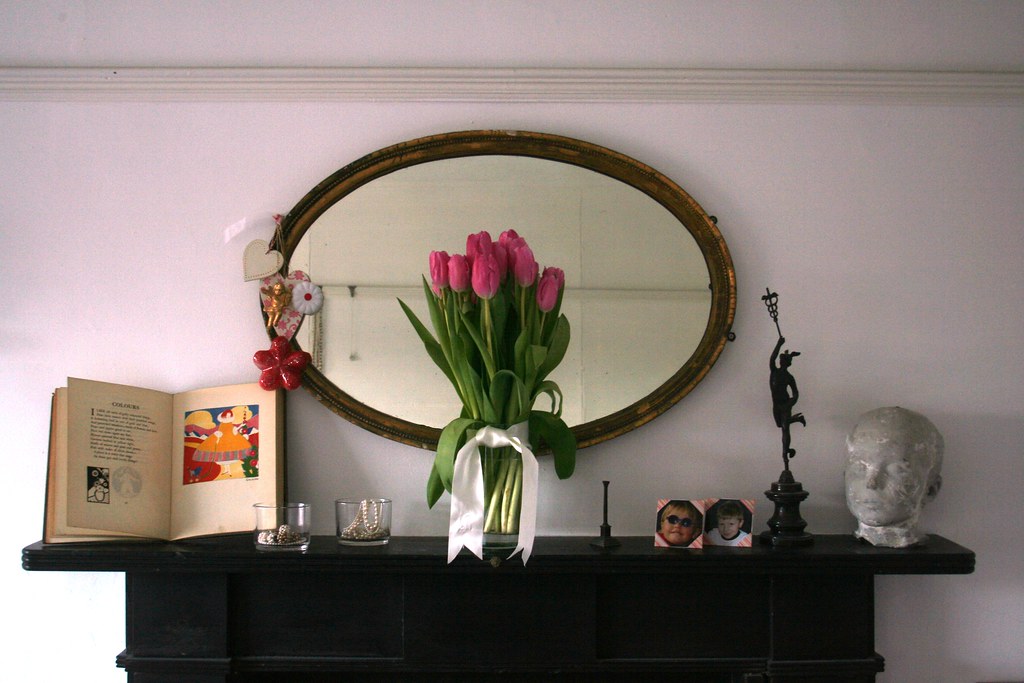
With the eggs all slightly pastelly, I had to forego my usual red deco on the kitchen mantle. Good thing I still had all those white and pink Easter eggs from the Euro shop from last year. They were popped into a vase, and together with a few white bits and pieces, the kitchen this year has a slightly paler theme.

All that remains now is to look forward to my first piece of chocolate in 6 weeks tomorrow. Honestly, I can't wait! 

Happy Easter, all!

Friday, February 1, 2013

Spring Time

Today is the beginning of spring. Sounds mad - but in Ireland it traditionally is the first day of spring on St Brigid's Day - the first of February. High time for me to get rid of my New Year's message that had been gracing the "Frame of Frills" in my kitchen.

I wanted a quick and nice update to my show off area empty frame. That was easily done by actually chucking the previous display into the bin: the letters spelling H A P P Y   N E W   Y E A R were all warped and I felt not the slightest pang of regret when I put them in the bin. Instead I put up this:


Just a selection of photos, strung up with tiny little wooden clothes pegs. I went for a bit of a friendly theme with the hearts. No connection with Valentine - but it would probably fit the occasion as well.

This is just one of the easiest deco things you can do. Go through your photoalbums and dig out all the nice memories you want to surround yourself with. Or follow a theme - mine was "hearts" and "red/pink". You can easily create polaroid-y prints by cropping your images into squares and then printing them on paper/card/photo paper. Just cut them in such a way that you leave a wider edge of white at the bottom.  Or, for those who want it even easier, I recommend online photo converters such as polaroin, instantizer or (my personal favourite site) bighugelabs. - After that it is just arranging and hanging.


Kitchen mantle February style. Bring on the winter depression, I am ready...

Best,

PS: Linking to Categorically Crafting @ Someday Crafts

, That DIY Party @ DIY-Show-off

Thursday, January 17, 2013

Frame-Work

Ok, I better show you this before January passes and it is definitely too late to have this message anywhere:


It's the old trusty empty frame again... It has been keeping me company in my kitchen for four years now and it has seen many transformations. Essentially it has framed anything from a bunch of milk jugs via wreaths to an assortment of Christmas baubles.

I actually put the thin silver string into the frame for my last Christmas display. It was an idea I had when I came across a pack of 50 mini silver pegs and silver string in the Irish equivalent to the Dollar Store. It was € 1.50 and was actually meant for stringing up Christmas cards. Instead I fixed the string to the frame and then hung all those misc Christmas decorations on there that usually just sit in a corner of the empty Christmas deco boxes. Here's the Christmas frame (sorry, anachronistic, but just for comparison purposes...)


Oh Cod, the photo quality is atrocious. Don't tell anyone I am a photographer. I was being lazy and only snapped pictures with my iPhone. That has got to stop from now on, back to proper photographs.

Anyhow, there you have it - the frame doing its service. I am already thinking up a slightly Valentine-esque display for February. Watch this space!

Monday, March 19, 2012

Good Morning, Sunshine!

The other day I saw this really cute print on etsy. It really spoke to me - not just because it was yellow, but because it said "Good morning, sunshine" - and sunshine used to be my nickname, years ago... It would be the perfect picture to wake up to or to be greeted with in the bathroom when I get up to do my early morning shift. And it got me going...


Sorry, boys, I have to release you and wipe you down!
There is actually a yellow zone in my house. It's the downstairs bathroom. It has a few splashes of yellow here and there but it needed some more. And when I came across some free printable yellows courtesy of dimple prints via Tatertots and Jello, I got the kick up my backside to finally do something about my yellow love.  I scoured our "frame cabinet" - a cupboard in our sitting room which is full of old frames with some unnamed ancestors in it. And I found two nice frames. But *eeeeek*, look at the state of them:

That's already better, isn't it? No idea who the ancient tottie is - the family had four daughters, so he's not one of "ours"... I had to dismantle the frames to wipe them down - and of course I cut myself in the process. That's one thing I hate about the old stuff in the house: I am always slightly suspicious of the dust of the centuries that covers everything in here. If I vanish from the blog, you'll know that my right middle finger has turned gangrenous *ggg*

It also turned out that the frame on the right was actually not grey but green. Oooops, doesn't quite go with my colour scheme, but well...

Anyhow, I stuck the sunny prints into the frames and *boom* instant lift!


Curious what the rest of the room looks like??? I'll give you a look tomorrow!


Best,


Friday, December 3, 2010

A closer look

Hehe, I am getting into the teasing game. I keep including photos in the blog that have something in the background which I will come back to in a later post. So, wanna take a closer look at what I have in my frame above the kitchen mantle? Ah, go on. You know you want to. Go on, go on, go on, go on, go on, go on, go on, go on, go on...

 
The frame is familiar, I know. The previous years I have always displayed a few Christmas baubles, suspended from ribbon in the frame. This year, I felt, it was time for something different. And since I had picked up this branchy heart in an online sale somewhere, I just decided to make it a bit more Christmassy.


The vichy-check ribbon stayed on. I only wound some red stars and beads on silver wire around the heart.


Presto! Easy does the trick. I love the way the shadow of the glass stars shines all red onto the wall.


Best,

Sunday, October 24, 2010

Halloween Mantle

Hello guys - I was out of the country for a few days and then busy settling back in, so didn't get anything crafty done. But this evening I finally managed to do what I had been meaning to do for quite a while. I was sick and tired of my jugs - and have at the same time updated my kitchen mantlepiece according to season.


Right, Halloween time it is! I dug out my nice ceramic pumpkin and set it up on my kitchen mantlepiece, flanked by those autumnal red apples. And I took down the darling jugs of January (check them in all their glory here ) and replaced them with a wreath heart.

All I did was really put a nice ribbon onto the heart, tie it and add some bells.

My blackboard-painted pebble is making an appearance again, too, this time with a Halloween "boo!"


Now that the days are getting dark again, I have put lots of candles on all mantles, whether it is in the kitchen or the drawing room. I love the warm light they give. And yet, the candle light draws some fittingly eery shadows from the frame. Almost gothic...


Happy pumpkin-carving, everyone!

Best,

Tuesday, March 2, 2010

Keep calm - Craft-Werk is still around

I am increasingly busy with my college work, so not much time for crafting at the mo :-(. Proposals are waiting to be written up, studio work needs organising, ideas and concepts have to be developed. My creative energy is channelled into photography at the moment. But I couldn't resist a cute little link that I saw on Yasemine's blog Love live survive home today. 
You all know those "KEEP CALM AND CARRY ON" posters. Don't we all want to have one of those on our walls? Well, now you can print one of those out yourself - and even customize it with your own slogan - for free, of course. Just go to keepcalm-o-matic and they will do the rest for you. You can choose slogan, background colour, font and even the little image at the top. Punch it all in, click generate and you have it downloadable in jpg format. As a craftress, I had to generate this one:


Did I mention I am mad about photography?


Arrrrgh, disclaimer: Upon viewing my post I just realized that the above slogan looks like a call to arms, i.e. let's shoot someone on January 30th... noooooooooooooo!!!!!!!!!!! For the photography-uninitiated: "shooting" is photographing and 1/30 is not a date but the shutter speed of 1/30th of a second... *phew* had to make that clear...

Anyway, once I had generated and saved them, I knew that I couldn't just leave them sitting on my hard-drive. They had to be displayed. Out came an old frame from the big stash. Problem: there were three spaces for images in the mount, so I had to come up with another slogan from the Ministry of Propaganda. Besides crafting and photography my other big interest is politics, so I made another slogan. As the generator only has a limited number of symbols, none of them fitted my own slogan. So I simply recreated the poster in MS Word, using Wingdings for the symbol. It took about 20 print outs to get the sizing and font vaguely alright - I have a whole heap of discarded posters on my desk now - maybe I should go out and start papering lampposts with my messages... But I did eventually get it right and now have my slogans on the wall above my desk. 

I love it - I keep glancing up there to enjoy the retro-feeling and the messages that are close to my heart.
So, go on and make some for yourself. Here is the final message from the Ministry of Propaganda:


Best,
   

Friday, January 29, 2010

Displaying your Treasures

Seems that I am on a treasure finding trip at the mo. Looking through my daughter's bookcase, I found a lovely old book of poems for children, illustrated with cute but simple graphics. Unfortunately there was no date of publication in the book. Just from the style of illustrations I would guess it is from the 1920s. In any case, the pictures are lovely, and I decided to display the book so that it gets the attention it is due.


The mantle in the bedroom was lacking a bit of care. So there was the perfect display space for the book. As usual my mantle is rather sparsely decorated - partly because I am not the only one looking at the decorations and my better half does not go for frilly, elaborate displays. So here is the compromise.


Do you see the two photos on the mantle? They were a two-minute addition when I felt that the mantle was too bare. I didn't have any frames handy, so I did some little magic with origami again. Here's what I did:


I printed some origami designs on scrap A4 size paper. I cut it into half and then trimmed the resulting A5 size pages into two squares. Then I folded the paper to produce this photo display, where you tuck your photo under the corners. It even comes with its own "stand".

I made a little video tutorial for you - as you know I hate picture tutorials for origami, so this will show you how it is done.


Easy or what? With a bit of measuring and thinking you can make these to suit all photo sizes. Makes giving a photo as a gift a bit more substantial, I think, and you can choose your paper according to your decor.

Here is the backside of it. As you can see I simply glued a penny onto the bottom "quarter" of the frame. The remaining three quarters I fixed in the middle with a glue dot. It stands perfectly on its own and does a great job.

Best,


Just in time to link to


Tuesday, January 26, 2010

Upcycled Packaging

Have you ever noticed how beautiful commercial packaging can be? We all love antique enamel signs and biscuit tins and we know how carefully they were designed decades ago. Most of the packaging nowadays seems to be utalitarian, cheap and cheerless. So imagine my delight, when I saw this beauty of an icing sugar packet in the shop. Well, I needed to buy some icing sugar, anyway, but I would have bought it regardless, just for the cute and nice design.


I have always had a soft spot for nicely designed containers and tins. Here is a selection of - empty but beautiful - tins that I just cannot throw out. They are attracting dust in my kitchen...


Anyway, back to the icing sugar box - I am not really a pinky-pink girly-girl, but the box was just so sweet, if you pardon the pun. It didn't take me long to figure out what to do with the lovely humming bird-design. It's kind of obvious, even:


I trimmed the front of the box and then cut out the "spoon". The opening created exactly the right size and shape for a sweet little portrait. Next I printed out a recent picture of my daughter and cut it the right size to fit behind the opening.

I also had to cover up the writing at the bottom of the design, so I simply printed out my daughters name and the year her photo was taken and glued it over the writing. It looked a bit bare like that, so I embellished the picture with a bit of ribbon that I had at hand. I actually used some nifty glue dots to stick it over the picture.

I had an old white frame the right size at hand. And presto! A sweet little portrait to hang up in my daughter's room. Ooops, I have just remembered that she doesn't like pink. Well, maybe she'll graciously overlook that...

Best,


Linking to


DIY Day @ ASPTL

Tuesday, January 12, 2010

Trickling-Sand Picture

I love beaches, sea, sand and desert. And when I was on the holiday of a life-time in Namibia two summers ago, I followed my friend Tanja's (of Notizblog) advice and brought back a bottle of Namib Desert sand as a souvenir. I was going to put it in a jar and display it. Or use it in a hurricane and place a candle in it. Then yesterday I had another idea - make one of those trickling-sand-pictures that you have to turn around and see the sand trickle down from one part of the picture to the other.


It is probably strategically wrong to start off a post with the admission that the project in question did not turn out quite to my satisfaction. Well, maybe my standards are too high, but I must say that I encountered a couple of problems along the way which I had to solve with improvisation. In general, however, I really like the idea, so that is why I am showing you this project.


What you need is a picture frame (with glass), photos, mountboard or cardboard, (hot) glue, scalpel and sand. You will print out two pictures, glue mountboard onto it, cover it with glass and put it into the frame. But I already made my first mistake right at the beginning: Choose two pictures and print them in such a way that they both look towards the shorter edges of your rectangular frame. (See correct example to the left!!!) I stupidly printed them both facing inwards *doh*... Anyway, I didn't realize my mistake until well into the project, so I ploughed on, determining the image size, using the glass of the frame as my guideline. Trim your picture with a trimmer.

In order to have space for the sand to trickle under the glass, you need too create a frame that you will stick onto the picture. I used mount board which is about 1mm thick. That is enough space - well, depending on the size of your sand particles. Namib desert sand is beautifully red and very fine (sorry, can't resist showing you a picture here:)


Totally unnecessary aside: The sand of the Namib desert is really red, as you can see in this close-up. The red colour is caused by the iron in the sand which oxydises and turns the sand red. Near the coast, the sanddunes of the desert are much lighter in colour as the water has washed the sand. The further inland you look, the darker red the dunes become as the sand re-oxydises.
The black particles visible here are metal - as impressively proven by our guide who hid a magnet in a plastic bag, brushed over the sand with bag and then held the bag up to show all the tiny bits of black "sand" stuck to the bag.


Back to project: So create a passepartout/mount for your picture, about 1cm wide. If you are lucky you may find a mount in a shop that is just the right size, but I had to make my own. Using a scalpel and a ruler, I marked the lines and cut out the mount. I actually went for four mitred pieces of cardboard rather than a simple mount with a rectangular piece cut out in the middle. That's what I would recommend you to do!!! Mitred edges are annoying!!! Trust me!


Glue your picture to the backboard of your frame. And then stick your mount onto your picture. Cut a thin strip of mount which will create a border in the middle of your picture and has two openings through which the sand can trickle. The size of the openings depends on the size of the sand grains - don't make them too big or the sand doesn't trickle but "rush"... Glue the thin strips onto the picture as a divider between the two images.


Now you fill the sand into your picture. Lay it flat and cover the image with sand. You probably need the sand to roughly cover one of the halves. It's difficult to tell but if you check by putting your sheet of glass on top you should be able to figure out how much sand you need.  


Now comes the tricky part. I used hot glue to stick the sheet of glass onto the picture/mount. You have to work quickly and tidyly here - which I didn't manage! Glue around the edges of the mount and on the dividing strips in the middle. Take care to get lots of glue on there so that the glass sits tightly on the mount. No gaps!!! I managed to both spill glue into the pic and leave gaps on the edges. Don't worry about the appearance - you'll cover the edges with another mount before you stick the picture back into the frame.  However, if necessary, make the frame sand-tight by glueing up the sides of the glass/mount/picture "sandwich". Check that no sand trickles out!


Are you still with me? Sorry it is such a convoluted post... really looks and sounds more difficult than it is. Complications all due to my own f*ck ups stupidity. Anyway, we are basically there. I lastly cut another mount ( this time from thin cardstock) and a dividing strip for middle, to disguise the ugly glue marks.  I stuck this directly onto the glass and then fitted the mount-glass-mount-pipcture sandwich (it keeps getting bigger and bigger, that sandwich) in the frame. Voila. Can you see the sand trickle on the left???


 So here is the finished trickle-picture, putting my desert souvenir into use:


That's the project finished - thank you for reading, if you are still here!!! Apart from displaying holiday shots this way, this would make a lovely present for a child if you substituted the sand with salt and made it a winter scene. Your kids could even draw their own winter pictures over which you could place the trickle frame!  


PS: I can't resist showing you where exactly I picked up my sand: in the Namib desert on the Namibian coast. The Namib desert meets the Atlantic here - and the cold Benguela current makes this a truly unique place. Despite being in the desert, we sported long trousers and fleece coats as the wind was very chilly. We were taken there on a private tour by landrover. Our guide drove us two hours into the desert. Then we left the car in the sand and ventured on by foot. What a wonderful memory! 


28 January: Linking to