FYI


Showing posts with label papercraft. Show all posts

Monday, March 18, 2013

Peekaboo

Alright, with Patrick's Day out of the way (belatedly happy Paddy's Day, all afiliated Hibernophiles out there!), I can finally get down to the first decorating highlight of the year. Easter is around the corner. And don't I know it - this year's fasting exercise is streeeeetching my patience. No chocolate since mid-February. A self-imposed Facebook ban. No crisps. I am surviving, but I *am* looking forward to a chocolate feast on Easter Sunday. But I digress. It's still about a week too early to bring the Easter eggs out. Mr Craft-Werk objects, as you know. Especially when we are talking silly relics of religious rituals. But where there is a pair of scissors, there is also a will.

"Peekaboo"
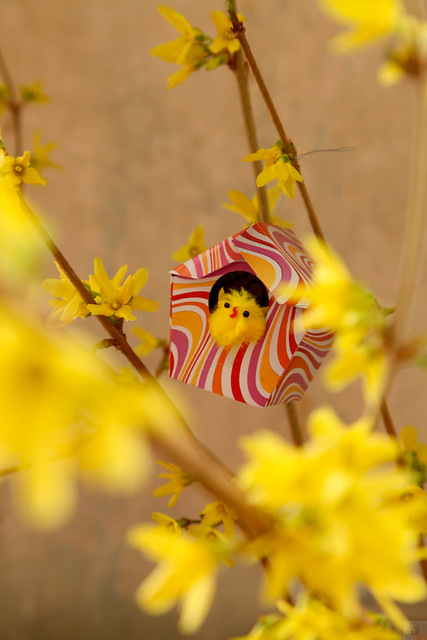
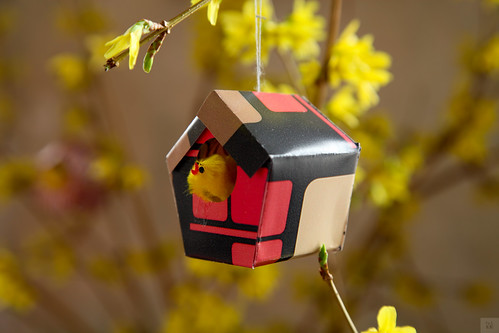
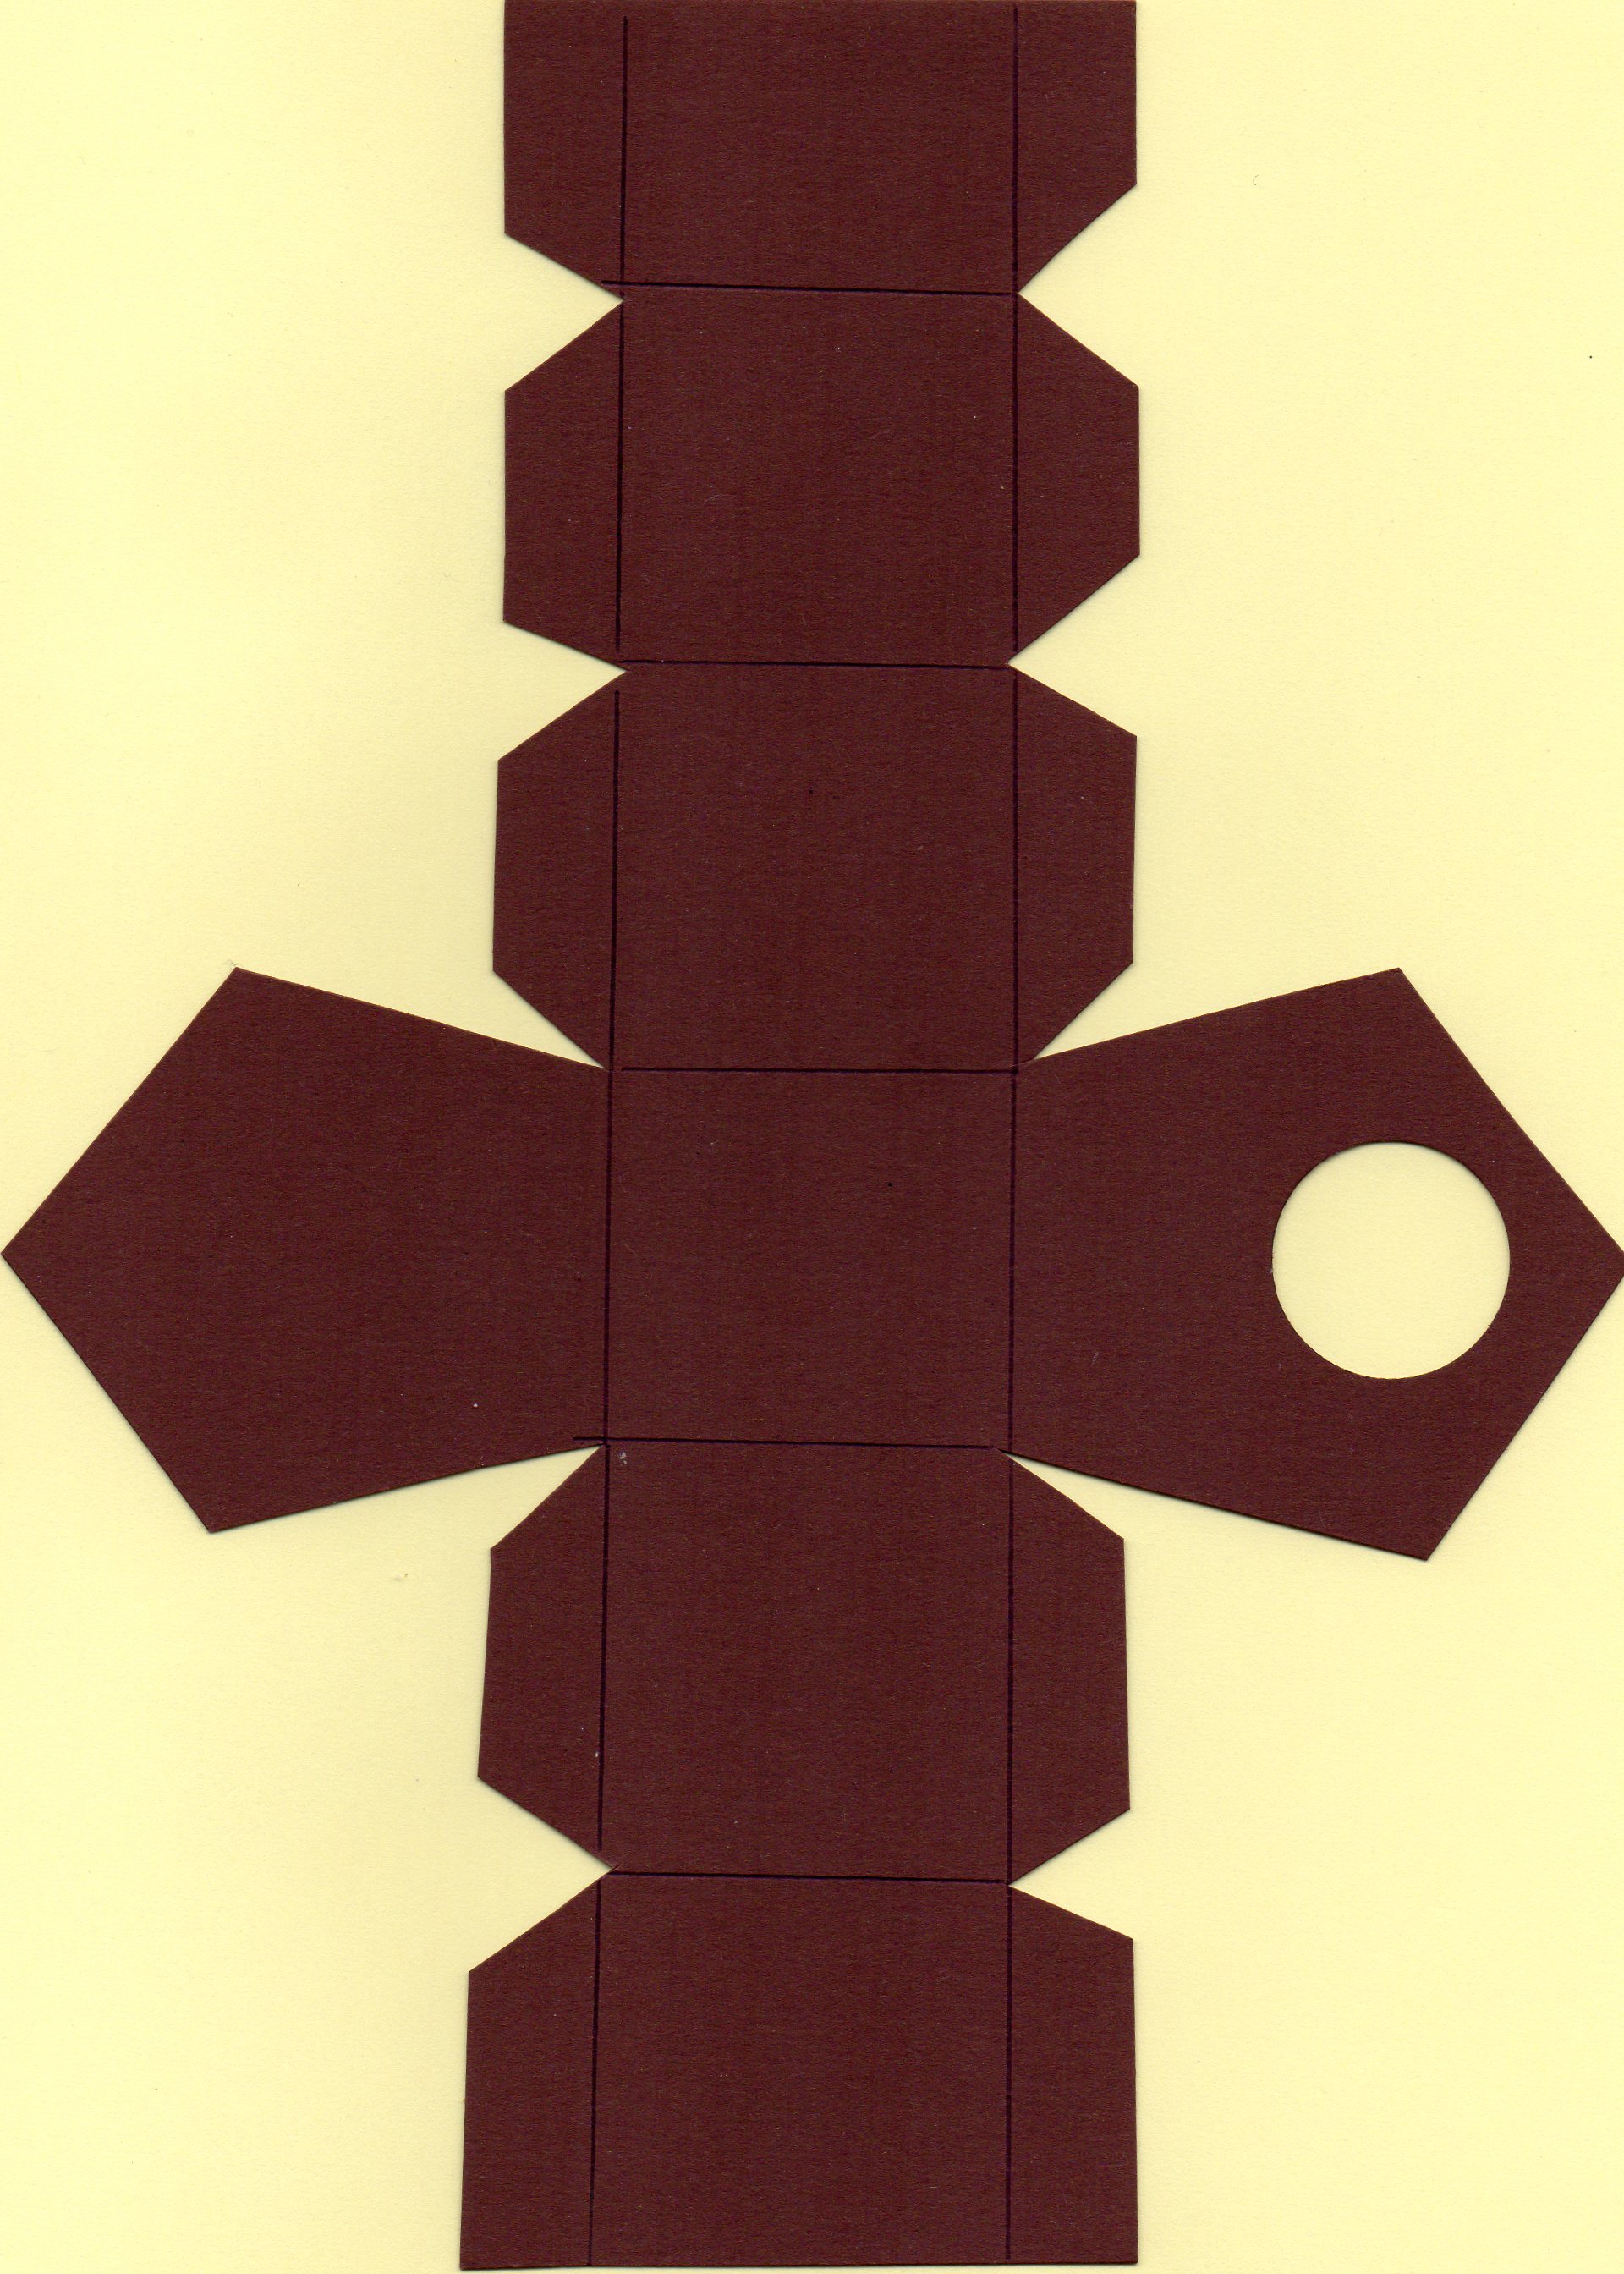
I came up with these whimsical little bird houses with chicks peeking out of them after I found a whole stash of those pipe-cleaner chicks in my craft-materials box. "What can I do with them?" I thought to myself. I came up with a little paper birdhouse that is very easy to make - all it needs is some nice cardstock, glue and a pair of scissors.

First of all I made a template from which I could cut a number of those shapes. I drew it up simply by estimating and experimenting. Feel free to use the image to the right: Print it on a piece of card stock to use as your template. (I scanned it at the highest resolution I could - just resize in the size that you need.)

When you look at my template you will hopefully see the lines that I drew on the template. They are the folding lines. Fold up the two main bits - the front of the birdhouse with the hole in it, and the back. before you then fold the sides over so that they form the two sidewalls and the roof, fold the edges in, in order to glue them to the front and back of the house. Ah, you'll work it out as you go along.


For some nice, colourful paper in spring colours I "blasphemed" and ripped photos out of a book on funky wallpapers. (I feel bad about destroying a book - there is something sacrosanct about books, isn't there?) The pipe cleaner chicks were simply popped into the finished birdhouses and secured with a drop of glue.


And that is it - here they are, my colony of chicks, frolicking in- and outside their houses. They blend in pretty well with the first branches of forsythia from my garden. They bring a smile to my face, every time I look at them.


Happy spring time!


Best,


Thursday, November 12, 2009

Notebooks - Before and After

I recently came across some notebooks that were perfectly usable but hideously ugly. While I had a bit of time to fill, I quickly gave them a makeover with some beautiful origami paper which I had recently bought in muji. I really like that shop  - they are a no fuss, no frills and - most importantly - no label store which sells all kinds of well-designed bits and pieces. The origami paper was conveniently sized to fit my two notebooks.


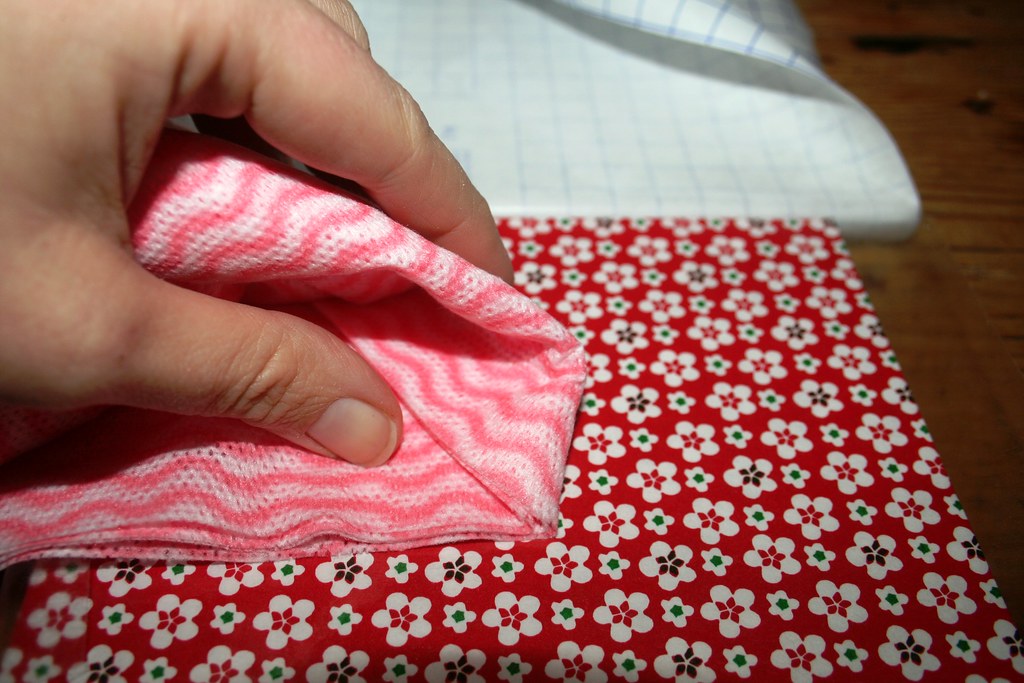
This is what the notebooks looked before. I basically glued the paper squares to the notebook covers with a glue stick. Then I took clear adhesive film and covered the books with it, carefully pressing it down with a soft cloth to avoid any air pockets to be trapped under the film.


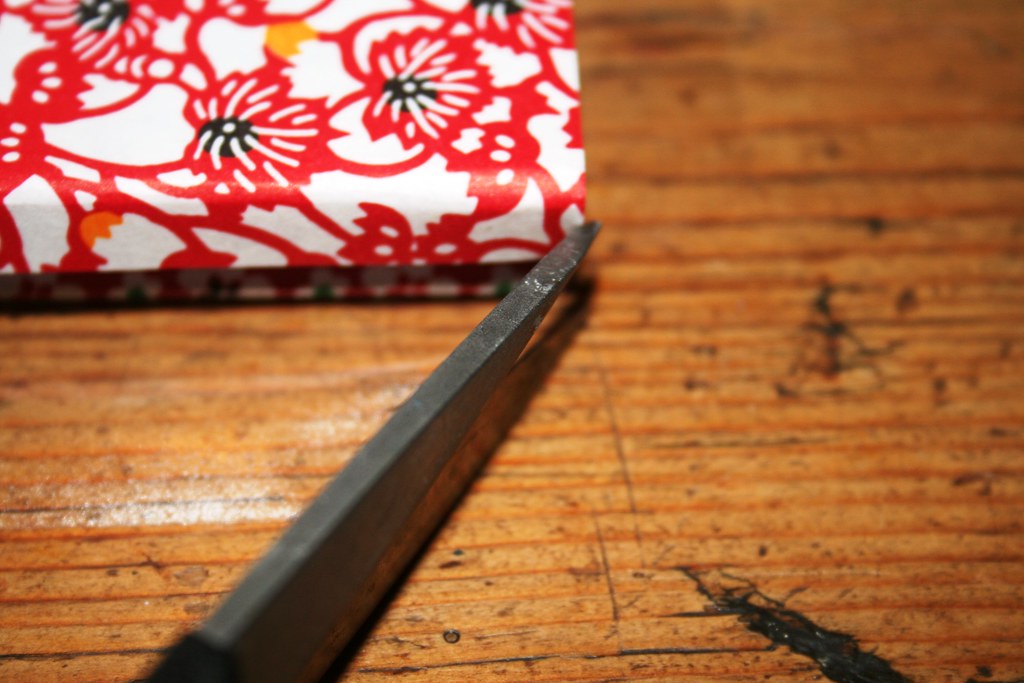
Once I had covered both sides, I cut off the edges of the sticky film and then folded the edge over to the inside of the cover. Unfortunately the clear film is invisible on the two pictures I shot for illustration, but you might get the drift...

Anyway, they turned out looking much nicer than the boring originals. What will I write into them?


Sunday, November 8, 2009

Candlelight and Silhouettes

I love November. After the summer and the autumn, November is finally the month when I start my retreat into the home. The long, dark evenings start early and are perfect for curling up in front of the fire with a good book, a cuddly child, a tender loved one or a glass of mulled wine (or preferably all of these at the same time... yes, I intend to get a large sofa, soon!). And then there is also the anticipation of advent and pre-Christmas which means going out to buy presents, wrapping them and spending time making presents for friends and family. I just love it and can't wait for it.

Candles are an essential part of my autumn ritual. They get lit every evening when the family sits down for dinner. And when my daughter came home from school with a silhouetted candle decoration, I decided to copy her and make my own.


Here is what I used to make it: an A4 sheet of black cardboard, different colour translucent paper, scissors, a scalpel, a ruler, a lead pencil and a glue stick. I started out by roughly designing my silhouette on a piece of paper (cheapskate I am, I used some scrap paper, hence the green dots). The buildings are all well-known sights of my home-town, Dublin.


I transferred my design onto the cardboard using the help of a ruler and a pencil. I first cut out the straight bits with my scissors. The windows had to be cut out with a scalpel. Make sure you put some newspaper underneath so you can press down hard and cut out the little windows. I did it all free hand and actually like the irregularity of the design, but you can of course draw it all with the help of ruler etc.


To make it a bit more colourful, I glued some colourful transparent paper behind some of the buildings. When you do this, make sure you do it all in one go and do not hold your silhouette up to admire it! You might mix up the front and the back of the silhouette and glue paper against the front by mistake - which is exactly what happened to me *duh*. I had to go over the glue marks with black marker to hide them...


The princess of crafts aka my daughter also got stuck in her own project and created another silhouette:


Finally, glue your silhouette on an A4 size piece of translucent paper. I used orange paper and then cut it in a semicircle shape - looks like an autumn sunset when propped against a candle lantern.


The silhouette now graces the mantlepiece until it will be taken over by Christmas decorations. Can you tell which Dublin buildings I have tried to represent??? 

Wednesday, November 4, 2009

Inspired - inspiring

Isn't it cool to see how many creative people there are out there? Crafting is immensely satisfying, anyway, because after a bit of thought, planning and effort you will finally hold the fruits of your labour in your hand and you can enjoy what you have created yourself. Blogging about crafting is like that, too, because what you write is instantly visible and documents what you have made. But what is almost more satisfying is finding out, that not only your musings are read by others but that they can also inspire others to make something.

So I was really pleased to find - rather belatedly - that my friend "Schnattchen" had taken up the challenge and prettified her notepads, too. Her new covers look really nice and personal. Cool! Check it out: Angesteckt - Schnattchens Newsticker.

Tuesday, October 13, 2009

Prettify your Notepads - Halloween Themed

Between work, family and college I am really stealing time every once in a while to get in a little craft session. Without my weekly dose of crafting I feel dull and bored, so I need to release creativity even if I am working creatively both in my day job and in my free time. However, my projects lately tend to be a bit short and not very elaborate at all. So please forgive me, dear readers.


Today I decided to prettify my notepads. I used to do that a lot when I was a student. But, hey, wait a minute, I am a student (again), so the notepads are in use again. But how boring is that:


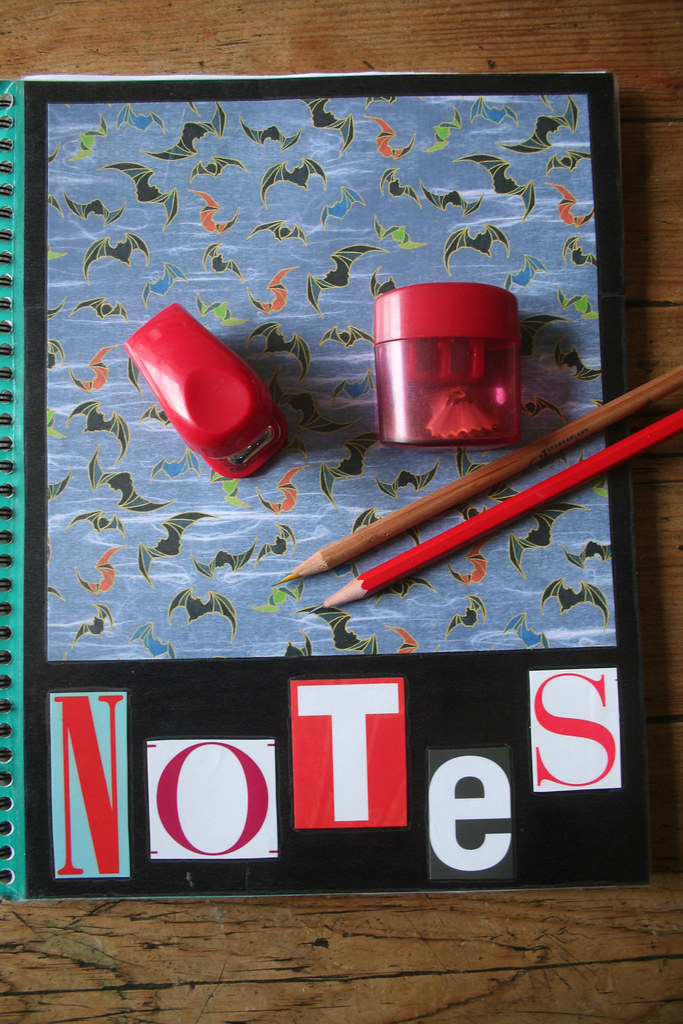
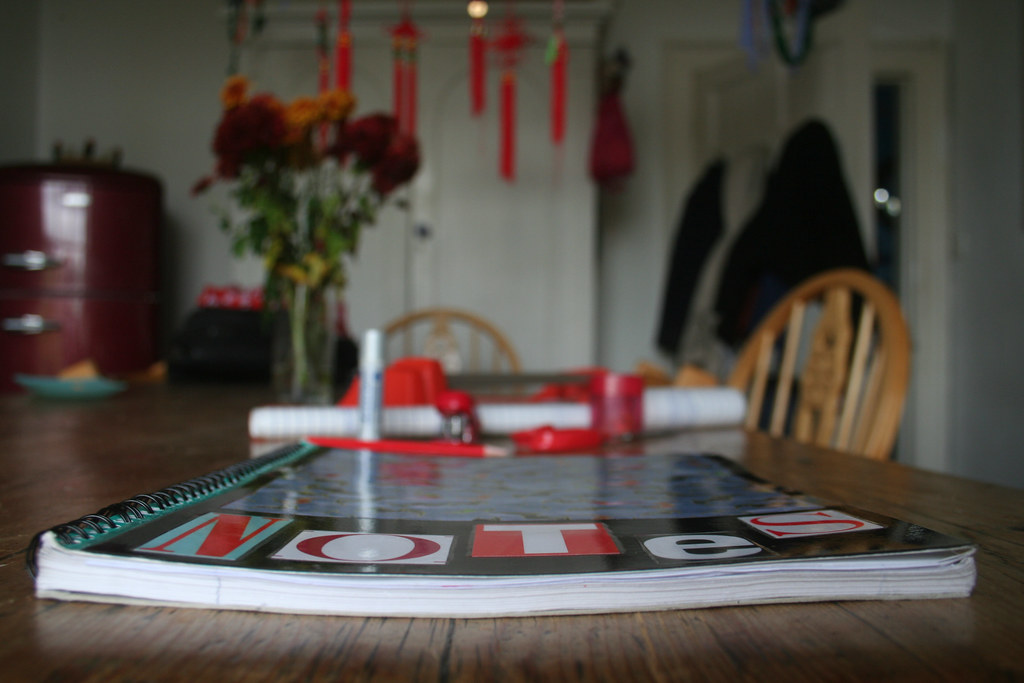
Boooo, who wants to be seen with that, especially in a highly creative surrounding like a photography course. Noone! Especially not the Queen of Crafts.  So I transformed it into this:


Out came the scissors, the paper cutter, the glue, adhesive film and some pretty papers. The latter I simply downloaded and printed from the fabulous Canon site that I have mentioned before in my blog here.

Now, let me also say, that I am actually not a Halloween fan. Tssssssssss - I know I am alienating any American readers of my blog saying that. But let me explain: Where I come from, Halloween is traditionally not a part of the seasonal festivities. Over the last few years, Halloween has crept into Germany, too, though. I am not too fond of it - I simply do not like the dark side that much, I guess. But since Halloween originated in my adopted country, Ireland, I have moderately taken on Halloween, too. So I settled on a "batty" design for my notepad-makeover. Here is what I did:


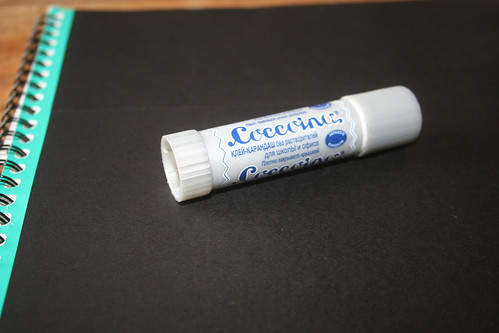
I first covered the unseemly coversheet of the notepad with some black cardboard. After cutting the cardboard to size, I simply glued it on with a glue stick. (Aside: I love the old-fashioned Coccoina glue. My grandfather used to give it to me when I was staying with him and wanted to do some creative glueing... The almond scent of the glue, which is made from potatoe starch and therefore free of chemical additives, is simply delicious and brings me right back to my "Opa Schule"...) Take care to leave a bit of space between your cardboard and the spiralbinding - you will need a bit of the cover to shine through so that you can attach your adhesive film to it.

I cut my pretty paper to fit the cover and then stuck that on with glue stick, too. In my case, there was a large bit of black cardboard left uncovered at the bottom, so I hunted for some large letters in my stack of interior design mags and cut them out. I arranged them on the cover to spell "notes" and stuck them on. Then it was time to cover the newly design notepad with adhesive film. Don't panic - it is pretty easy putting it on, as long as you use a soft cloth to wipe down the film immediately after pulling of the plastic backing. Just squeeze out the bubbles to the sides. And make sure you haven't got any bugs or hairs on the cover, otherwise you will preserve them for posterity under the adhesive film, too.


While I was at it, I covered a matching mini notepad, too. Ideal for my photography notes. "That's a lot of effort for a disposable notepad," I hear you say. Well, yeeees. But once your notepad is empty, you can cut off the cover from the pad, punch holes into it and then use it as a divider in your files. I used to do that with all my college notepads. Or stick it in a frame if it is really pretty.


So go on - treat yourself to some pretty stationary. Or give your kids a one-in-a-million halloween themed notepad for school. They'll be envied!
Thursday, October 8, 2009

A crafty card-making session...

Amazingly I was able to fit in a quick card-making session between child-minding and college. I felt the urge to be creative, so I got my loot-bag from Daintree Papers out, grabbed the spray mount and the puncher and created a few cards.


This is a scanned image, so all this is a collage of six individual cards, lazily scanned together in one go :-). They look slightly three-dimensional. That is due to the card which has a mother-of-pearl shine to it. The stripy paper is actually Japanese paper which is quite precious and expensive. So I used every bit of it - the punched out circles and the surrounding bits.

I quite like graphic designs on greeting cards - they suit every occasion and are rather easy to make. However, I felt particularly creative yesterday (...) and also made this little card for a very special occasion.


Let's hope that the receiver of this particular card is not following the blog... There are a few of them around...


Sunday, September 13, 2009

MoW Security Envelopes - A Post Scriptum: Make your own beads

The Queen of Crafts has a short attention span. And therefore my mind wandered away from the security envelopes rather quickly after making a few projects with them. On the other hand, the Queen of Crafts doesn't like unfinished business. And therefore you are now getting a post scriptum - another security envelope project.

I used the security envelope paper to make my own beads. The project couldn't be any simpler:


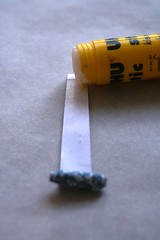
First, cut your envelopes into strips of paper. If you want slightly rounded beads, make sure you cut the strips slightly diagonally. I used a paper cutter/guillotine for quick and straight cutting.

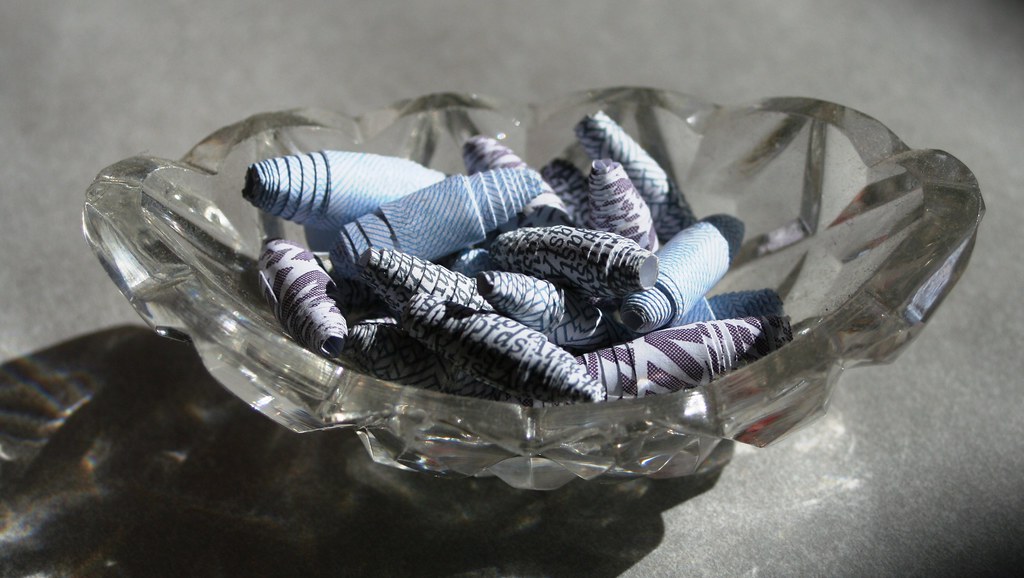
Then roll up the paper strip. The start is a bit fiddly, but you will soon get the hang of it. Start with the slightly wider end of the strip. Hold the bead between thumb and index finger and pull the paper a bit so that the paper is rolled really tightly. Fasten the end of the paper with a little bit of glue. I tried spray mount as well as pritt stick - both glues work equally well.

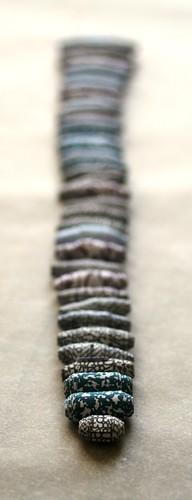
That's it - you have made a bead. Depending on how wide you cut your paper strips and how long you left the strip, you get longer or "fatter" beads. I tried to make round beads but never could get the paper the right shape for that... However, I do like those barrel-shaped beads. If you want the beads to last a bit, you should give them a coat or two of clear varnish. In the absence of proper varnish I used nail varnish again.

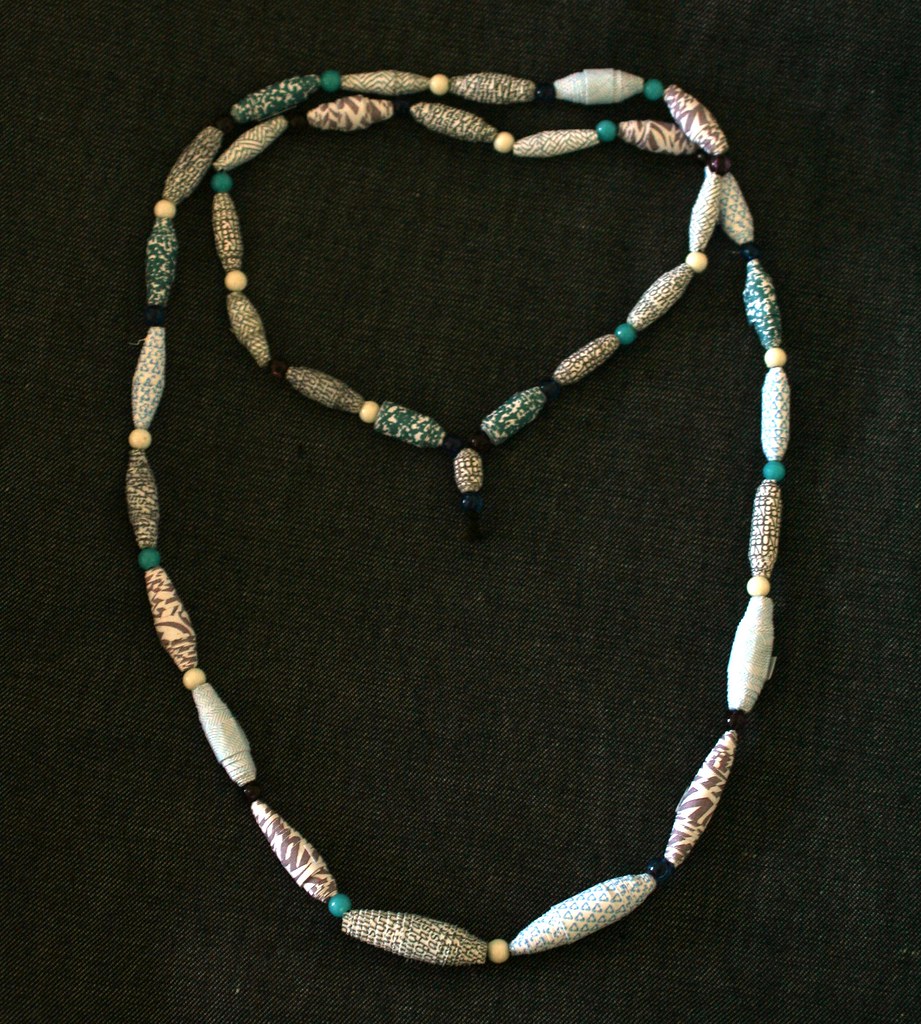
Once I had made a number of beads from different security envelopes, I decided to turn them into a necklace. I took a length of black string and
threaded it through a sewing needle for easier threading. I had sorted my beads according to size, so it was very easy to thread them onto the string in a nice pattern. I put small plastic beads in between them for a bit of extra sparkle.

It was not that quick a project - making each individual bead takes a bit of time and you will need at least 30 for a nice long necklace. This is mine:


This might actually be a nice little project for a child. You could use paper that you like - an ad torn from a magazine and cut into strips will be colourful and nice. Or use plain paper and paint the beads afterwards.


Friday, August 28, 2009

Material of the Week - Tracing Paper

Apologies for delayed update. Last week of school holidays and I have been very busy with my children's social life. No time for my own projects, unfortunately, although I was dying to try my latest idea and post it here. This week's material of the week is tracing paper. It's a supereasy project and at the same time a very personal present for friends and family.

The summer is slowly coming to an end and days will be getting darker. I like all seasons, but the lack of light does get me down a bit, I have to admit. So no harm in thinking of some nice lighting ideas now. And I came up with an idea that combines my love of crafting with my passion for photography. I can now have my own images glowingly remind me of my favourite memories: Paper lanterns made from tracing paper, printed with photos.


I bought a pad of tracing paper in my stationer's. The tracing paper is size A4 and 112 gsm, basically the thickest tracing paper I could get. I simply printed some of my favourite photos onto the tracing paper which I had cut to size beforehand.

I then used my sewing machine to sew two sheets of tracing paper together. I experimented with various stitches and lengths to see what is the best design. I quite like the longish zig-zags.

In order to make your lantern glow, just pop a nightlight into a glass votive and then carefully slide the lantern over it. Make sure the nightlight sits in the glass and there is not an open flame touching the paper. - As I didn't have enough glass votives I also used jam jars and wineglasses. Experiment with the right size votive so that you avoid the shadow of the glass rim on your image. (See right)


You can experiment with images - make a photo of a candle glow with the nightlight. Or light up a sunflower from the inside. Lots of possibilities. - Almost makes me look forward to darker evenings now, curled up in front of the fire with a steaming cup of tea by my side, a good book on my lap and the photo lanterns on the mantlepiece. Awwwwwwwwwwwww...

Friday, August 21, 2009

Material of the Week - Security Envelopes

I had promised to come up with a few posts in which I was working with the same material. Unfortunately I was really busy this week, sometimes not getting to sit at the computer nor even do some crafting. However, I finally finished another project with the security envelopes.

Essentially I made security envelope envelopes *grins*. I cut out little rectangles, folded them over and cut a little triangular flap. Then I made a little cut into which the flap can be pushed to keep the envelope shut. The last bit was sewing the sides of the envelope together. You could also glue them, but I liked the effect of the stitch on the paper. Charming little envelopes for a cute message to the boyfriend...


Are you sometimes frustrated with your large wallet, stuffed full with credit cards, supermarket clubcards, insurance contact details etc.? I am and I don't always want to carry the whole, bloody thing with me. Instead it easier to keep cards in a little protective cover. Following the same principle as above I also incorporated the envelope windows so that I can see which card is inside the cover. I used a circle punch to make a little dent at the side for easier pulling out of the cards. You could also use these as business card holders.

I am the sort of person who is prepared for any eventuality. That is why I always carry a few stamps in my wallet. (You never know when the urgent need to send a postcard overcomes you...) To stop the stamps from getting folded and smudged, I made a couple of little stamp holders.

When I made the place cards the other day, I had some circles and paper left over which I used to make a card. Here it is in its custom made envelope:

You see, lots of fun with some every-day-paper. And that's not all. There is another post to come with security envelope projects. Soon!!!