Black is such a classy colour. I mostly wear black (apart from my trademark red), but I do not really use it much in my interior dreamings. But I have noticed that an awful lot of re-dos that I see in blogs is done with black paint. Well, here is a little idea that might appeal to all you lovers of the colour black out there. 'Cause today I made a couple of classy silhouettes.

 The inspiration for this project came from a whole wall of silhouettes. These are two silhouettes of ancestors. I think they are late 18th and early 19th century respectively. Before the invention of photography in 1836, the cheapest way for the burgeoning bourgeoisie to have a portrait done, was having a silhouette cut. If you look closely at the lady on the left, you will notice the fine detail and care that went into these "likenesses". This silhouette was not cut, though, but painted. The outline of the head was painted black and then the details such as the hair and the ear were added. They even included the eyelashes. Isn't this lady beautiful? (I am thinking Elizabeth Bennett, here...)
 Here is another silhouette, which I believe is pre-19th century, just based on her hairstyle. Again, this is a painted silhouette. The fine details of hair and bows would have been impossible to cut. Both miniatures are about 3-4 cm in size (approx. 1 - 1.5 inches). - Isn't it wonderful to think that these likenesses are still around, long after the two ladies are gone? They certainly we held very preciously and are mounted in sweet little wooden frames with gilt edges...
 I decided on a slightly more modern version of the silhouette by inverting the colours - light silhouette against a dark background. The paper I chose for the silhouette came from my stash of security envelopes. I haven't been able to stop collecting those ever since my ill-fated "Material of the Week"-adventures last year... (See some other projects with security envelope paper here: paper beads, a little garland, card decorations and mini-envelopes.)
 Sorry, no photos of the individual steps, but it is pretty self-explanatory: I printed a photo of my own, regal head in profile onto the back of the security envelope paper. Then I cut it out with small scissors. (Brrrr, hate using flash - leaves very ugly shadows on the pics. Obviously, the frame is perfectly round, not oval...)

 The idea for the frames came to me the other day when I was doing the recycling. While taking the lids off all the empty jars that were going into the glass recycling, it occurred to me that they make perfect little frames. So out came the blackboard spray (proper black spray paint would do much better, but I haven't got any), and I gave the two chosen lids a good spray. Make sure you choose lids that are not of the "twist off"-variety. Those have irregular rims and do look too much like lids...
Be patient until your spray paint has dried and then stick your silhouette into the lid. (
The idea for the frames came to me the other day when I was doing the recycling. While taking the lids off all the empty jars that were going into the glass recycling, it occurred to me that they make perfect little frames. So out came the blackboard spray (proper black spray paint would do much better, but I haven't got any), and I gave the two chosen lids a good spray. Make sure you choose lids that are not of the "twist off"-variety. Those have irregular rims and do look too much like lids...
Be patient until your spray paint has dried and then stick your silhouette into the lid. (As usual I was impatient, scratched the not-yet-dried surfaces and had to touch up with a marker *tstststs*.) Since my ribbon collection is newly organised *yoohay*, I quickly found a length of black velvet ribbon onto which I stuck the lids miniatures. It looked a bit too bare like that, so I embellished a bit with bits of pieces in my "miscellaneous" box.
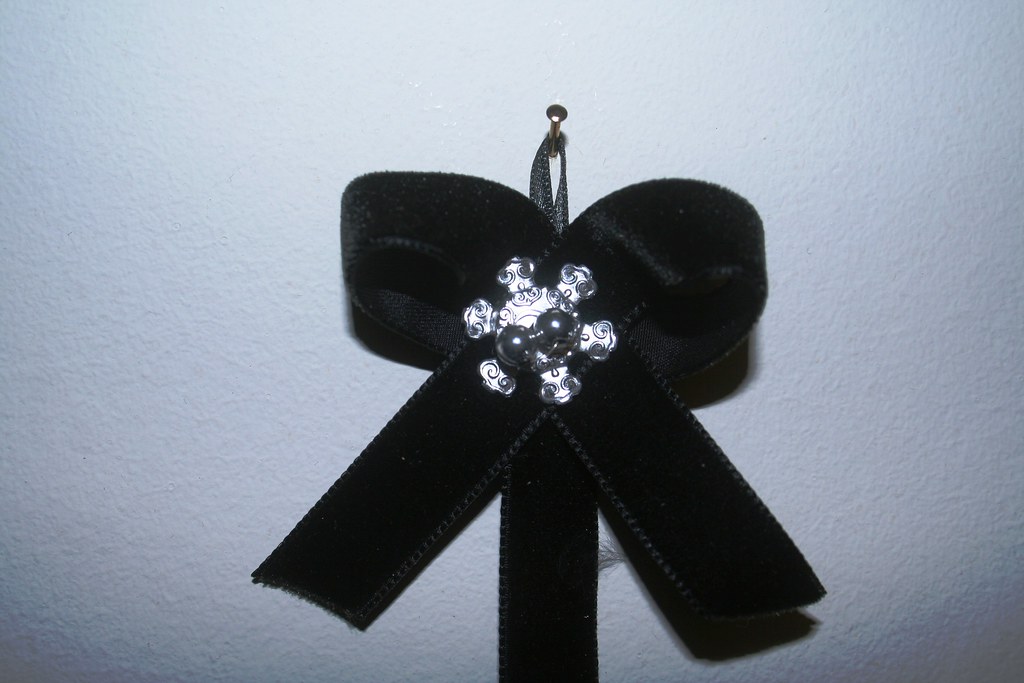
To hang the length of ribbon, I made a bow. Cheapskate that I am, I had some little silver beads on thin wire (dismantled from a Christmas cracker... I know, I am a total crackpot, saving fiddly bits like that...). And guess what the silver star/snowflake ornament on the bow is? .... It's the hanger from a Christmas bauble!!! When taking down the Christmas decorations, one bauble smashed and I kept the hanger (yeah, definite crackpot, Sonja!). I simply flattened it. Then I put the wires from the beads through the star and pushed it through the velvet bow and the ribbon. I also attached a small satin ribbon to hang it up.
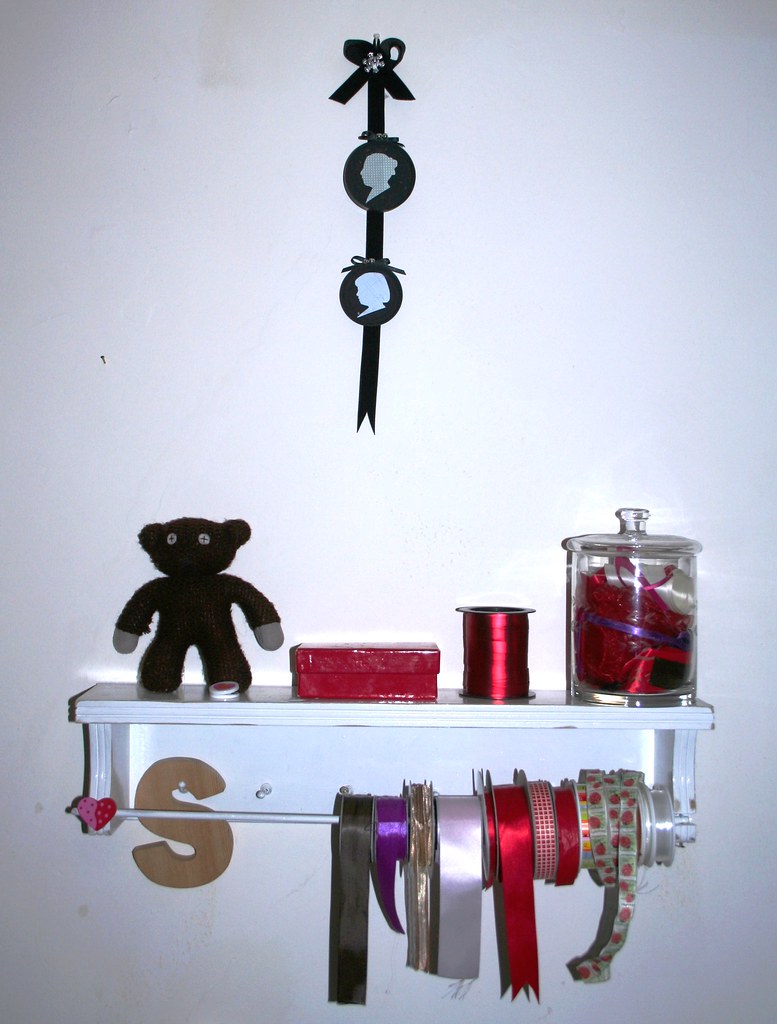
Lastly, I glued the lids onto the ribbon. Continuing with the tradition of keeping the ladies' likenesses, I also made a silhouette of my daughter. And here it is, my silhouette display - preliminarily hung above the shelf beside my desk.
So, there is a classy little project for you - that will cost you nothing, but is priceless!
Best,
 Linking to:


http://itssoverycheri.com/2010/02/14/its-so-very-creative-party/?

I had promised to come up with a few posts in which I was working with the same material. Unfortunately I was really busy this week, sometimes not getting to sit at the computer nor even do some crafting. However, I finally finished another project with the security envelopes.

 Essentially I made security envelope envelopes *grins*. I cut out little rectangles, folded them over and cut a little triangular flap. Then I made a little cut into which the flap can be pushed to keep the envelope shut. The last bit was sewing the sides of the envelope together. You could also glue them, but I liked the effect of the stitch on the paper. Charming little envelopes for a cute message to the boyfriend...


 Are you sometimes frustrated with your large wallet, stuffed full with credit cards, supermarket clubcards, insurance contact details etc.? I am and I don't always want to carry the whole, bloody thing with me. Instead it easier to keep cards in a little protective cover. Following the same principle as above I also incorporated the envelope windows so that I can see which card is inside the cover. I used a circle punch to make a little dent at the side for easier pulling out of the cards. You could also use these as business card holders.

 I am the sort of person who is prepared for any eventuality. That is why I always carry a few stamps in my wallet. (You never know when the urgent need to send a postcard overcomes you...) To stop the stamps from getting folded and smudged, I made a couple of little stamp holders.
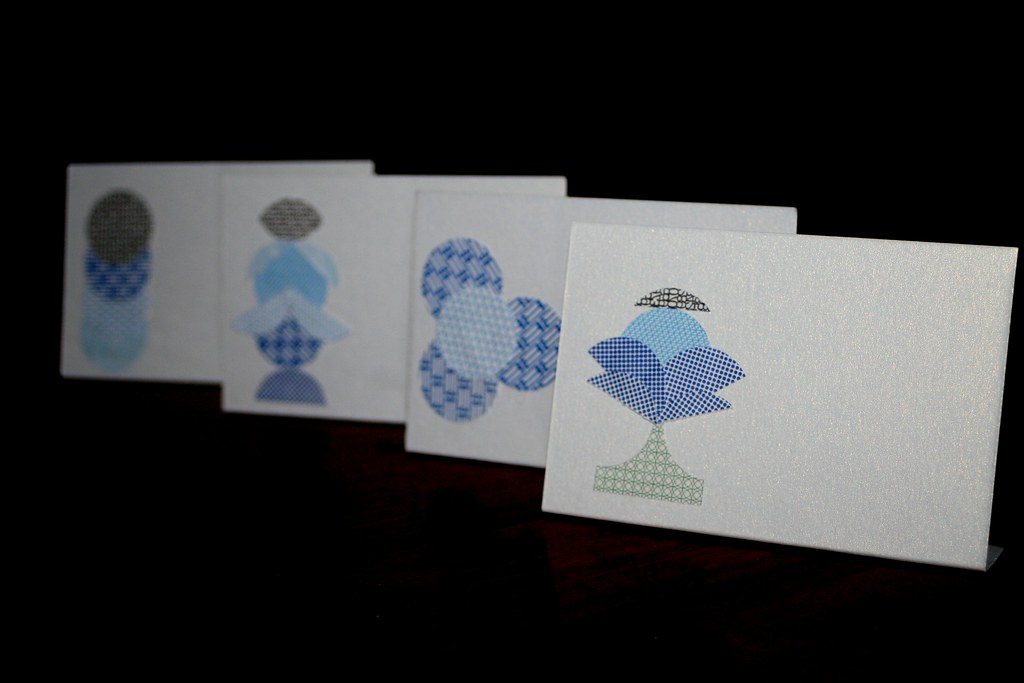
When I made the place cards the other day, I had some circles and paper left over which I used to make a card. Here it is in its custom made envelope: You see, lots of fun with some every-day-paper. And that's not all. There is another post to come with security envelope projects. Soon!!!

 The inspiration for this project came from a whole wall of silhouettes. These are two silhouettes of ancestors. I think they are late 18th and early 19th century respectively. Before the invention of photography in 1836, the cheapest way for the burgeoning bourgeoisie to have a portrait done, was having a silhouette cut. If you look closely at the lady on the left, you will notice the fine detail and care that went into these "likenesses". This silhouette was not cut, though, but painted. The outline of the head was painted black and then the details such as the hair and the ear were added. They even included the eyelashes. Isn't this lady beautiful? (I am thinking Elizabeth Bennett, here...)
 Here is another silhouette, which I believe is pre-19th century, just based on her hairstyle. Again, this is a painted silhouette. The fine details of hair and bows would have been impossible to cut. Both miniatures are about 3-4 cm in size (approx. 1 - 1.5 inches). - Isn't it wonderful to think that these likenesses are still around, long after the two ladies are gone? They certainly we held very preciously and are mounted in sweet little wooden frames with gilt edges...
 I decided on a slightly more modern version of the silhouette by inverting the colours - light silhouette against a dark background. The paper I chose for the silhouette came from my stash of security envelopes. I haven't been able to stop collecting those ever since my ill-fated "Material of the Week"-adventures last year... (See some other projects with security envelope paper here: paper beads, a little garland, card decorations and mini-envelopes.)
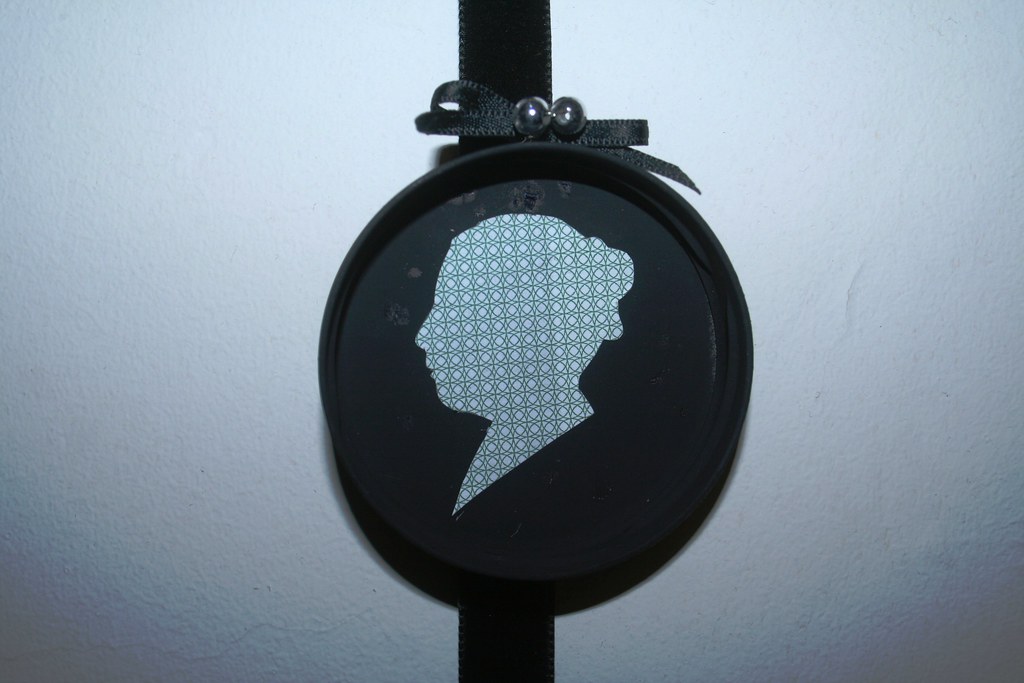 Sorry, no photos of the individual steps, but it is pretty self-explanatory: I printed a photo of my own, regal head in profile onto the back of the security envelope paper. Then I cut it out with small scissors. (Brrrr, hate using flash - leaves very ugly shadows on the pics. Obviously, the frame is perfectly round, not oval...)
 The idea for the frames came to me the other day when I was doing the recycling. While taking the lids off all the empty jars that were going into the glass recycling, it occurred to me that they make perfect little frames. So out came the blackboard spray (proper black spray paint would do much better, but I haven't got any), and I gave the two chosen lids a good spray. Make sure you choose lids that are not of the "twist off"-variety. Those have irregular rims and do look too much like lids...