FYI


Showing posts with label autumn. Show all posts

Monday, September 17, 2012

The Season of Fruitful Mellowness

It is upon us, that season of fruitful mellowness. In more than one sense. I am free. I have finished my college degree (admittedly already several months ago - but as is usual, I stepped right from the high of finishing three years of college into a depression over the purpose-less future of my now degree-decorated life). So my life is now mellow again and I can return to my second favourite past-time: crafting.

And with the season that is in it, my first project revolved around the fruitfulness of autumn. Yes, it is foraging time again. And after shamefully missing blackberry season last year and having to resort to shop-bought berries for my raspberry jelly 2011, I was adamant I was going to pick some blackberries this year and make that jelly truly my own.

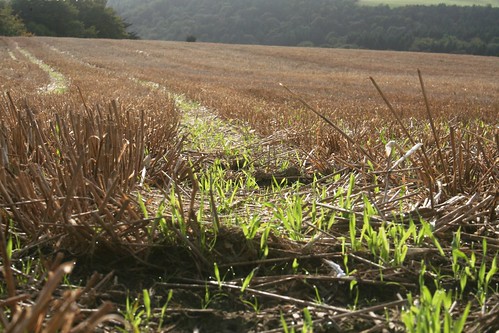
And so I did - I went blackberrying yesterday, up the back of Bray Head on a narrow country lane. The blackberries were not all ripe yet, and you had to look hard to find them. Some even grew in the grass at the bottom of the hedgerow. And the bushes certainly resisted me - in concert with the nettles they seem to team up with. My poor hand bears the reminders of nettlesting and bramblescratch. In the end we came away with what turned into nearly two and a half litres of blackberry juice. 

(If you want instructions on how to make jelly, check this post from last year.)
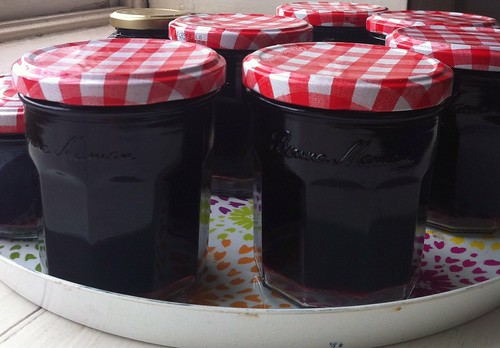
Much to my delight, the jelly set beautifully. I came away with six and a half jars of what I call "really fruity" blackberry jelly. This is jelly that is made with jam sugar that uses twice as much juice for the amount of sugar that is usually recommended. The result is a slightly less overly sweet, but much more intensely fruity jelly. (Unfortunately I yet have to find a jam sugar brand that produces this kind of sugar in Ireland. I actually imported the jam sugar from Germany this summer. Over there it goes by the name of "2:1".) A second batch of jelly had to be made with the remainder of normal jam sugar - i.e. you use as much sugar (in weight) as fruit juice to make it. This is my so-called "really sweet" jelly, a stash of only three jars.

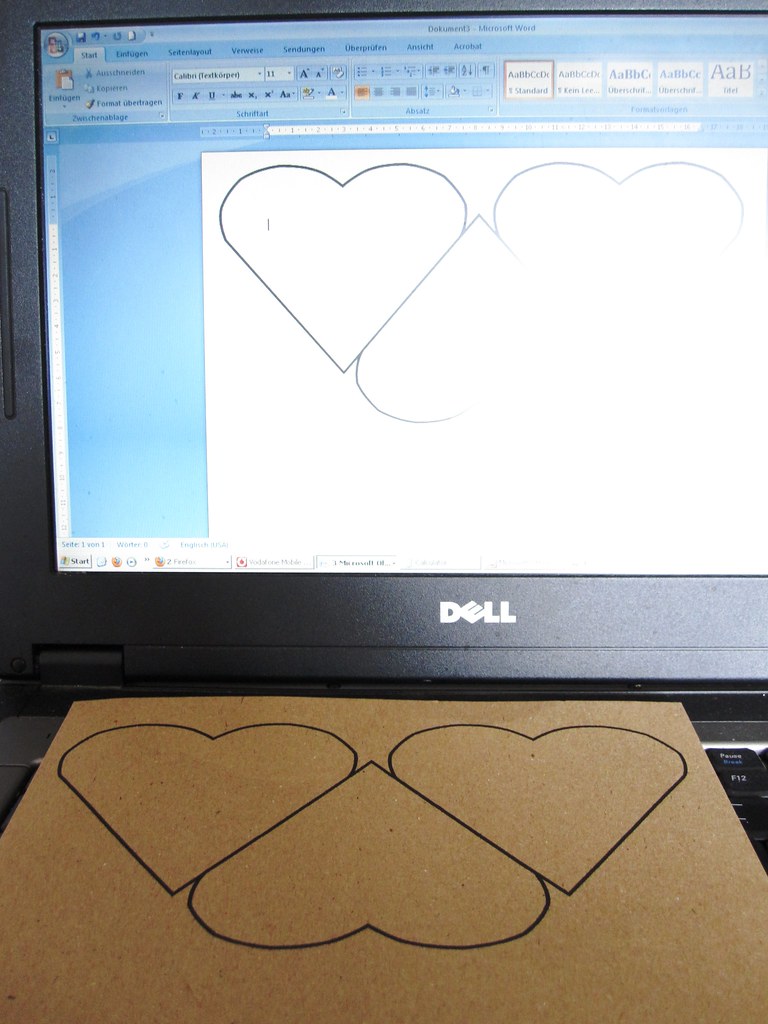
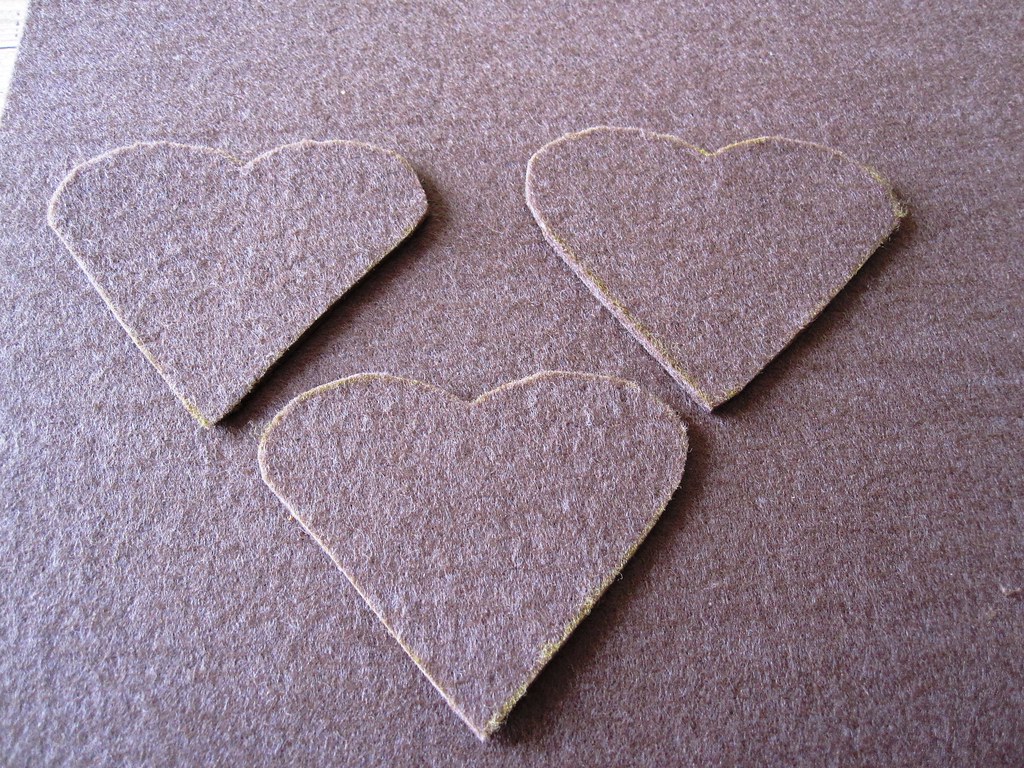
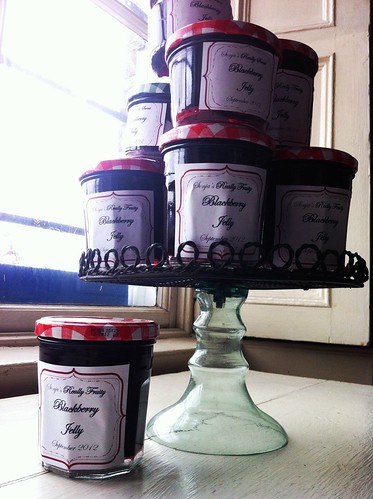
But as usual I cannot get the ultimate satisfaction for a job well done unless even the details are right. In this case the jars needed labels - because they had to be distinguishable for the two types I made. And I couldn't rest until I had designed my own little label to my own specifications. Such fun to play around...


Now, with the labels stuck on, I am really happy with my jelly. Can't wait to taste it. (Feel free to copy the image and edit it for your own use. Just by cutting out my name and the month you could re-use it for your own purpose.)


Best,


Thursday, September 23, 2010

It's Oktoberfest-Time

I know, it is still September, but right now the well-known annual beerfest in Munich is on again. In German it is called "Oktoberfest" - despite always happening in the month of September. Very unlike the usually pedantically correct Germans to misnome their festivals... (There is an explanation for that, of course - the first Oktoberfest occurred on the 12th October 1810 on the occasion of the wedding of King Ludwig I. of Bavaria to his wife Theresia. It became an annual event - which was eventually moved into September because the weather is nicer then. If you want more info on it, check this site: Oktoberfest.de/)

Anyhow, no German fun fair without the traditional gingerbread hearts. They come in all sizes - depending on how much you love the person you intend to buy it for. And they usually have corny slogans written on them, such as "Darling" or "Kiss me" or "Beer God". You can eat them, too, but they are mass-produced, cheap gingerbread decorated with sickly sweet icing - I usually let them collect dust for a while put them on display,  and then discreetly dispose of them uneaten.

They are kind of sweet, though, and to make them last longer, here is a little crafty idea: With a little bit of felt and some puff paint, you can make them yourself. Nice decoration - and no calories *grins*. I started out by creating a heart template in Word. You can download it here in Scribd, if you want it.
Hearts Template                                                            

Having printed my template on a piece of card and then cut it out, I traced around it on my background material. The material is 3mm thick felt - nice and sturdy, just the right colour for gingerbread. I used a golden gel pen to trace onto the felt - it came out very faint, which makes it hard to cut around it later. White pencil works better, I found out later. You need a good, sturdy pair of scissors to cut through the thick material! (My index finger still feels numb after cutting out 20 hearts last night... *ouch*)

Now for the fun bit. I had ordered some puffy paint for this project. This is the first time I have used the paint - and it is not quite as easy as eating a gingerbread heart. Ok, the paints come in a nozzled bottle with which you directly paint or write on the surface. But the difficulty is that you have to squeeze the bottle while writing - resulting in rather squiggly lines. Ah well, first try.

Once you are happy with your design, you let the paint dry for at least six hours. After that you puff up the paint by placing the hearts in the oven at 150°C. The instructions say that the paint only needs 10 to 60 seconds to puff up, however, I found with my gas-oven, that it needed much longer than that. But well, that could be my temperamental oven... You can also use a hairdryer and fluff the paint with that.


I didn't take any pictures of the last step - hot glue a brooch needle onto the back of the heart, and off you go, celebrating Oktoberfest.

I'll be making many more of these in the next few days as I have been asked to supply some crafts for a stall at the local Oktoberfest. Hopefully I will master the art of squeezing the bottle and create a few sleeker hearts.

Best,

Sunday, September 12, 2010

Getting into Autumnal Mood

I really don't want to let go of summer. But slowly autumn is creeping in... The days are so much shorter already. When I get up at 6 am, it is dark outside. And by 8 pm it is night again. Although we have had some sunshine recently, temperatures have dropped to 15 to 18°C. And the virginia creeper on the terrace of houses next to us has already turned dark red. So it is time to face the facts - autumn is upon us.


Today I picked the last flowers from the garden. And they seemed to have put their last bit of energy into their blooms. The mombretias were bigger than ever.


I cut a few of them and teamed them with those lovely Japanese daisies.


(A little exercise with shallow dof - can't resist photo experiments, sorry...).

So the drawing room is getting autumnified.


Have a nice Sunday!

Best,

Monday, October 5, 2009

Autumn decoration 2009


Finally, finally I have found the time to put some autumn decoration up in my home. I had been in Co. Wicklow over the weekend and used the opportunity to collect bits and pieces on a walk in the country. I came away with lots of twigs and sweet chestnuts. Last night I put everything together in an arrangement which now graces my kitchen wall.


I had planned to make a wreath from the twigs, but while making it I decided on a tear shape instead. It is actually easier to make - just tie the twigs together with florist's twine and instead of bending it to be a circle, tie one end into the other while leaving some twigs to stick out at the top.

Once you have made your wreath you can start decorating it. I fixed some wire onto the corn cobs (which I had knicked from a field in Germany *blushes*) and tied them to the top of the wreath. Then I took lots of straw flowers and tied their little stems with wire to the wreath. Careful - the dried stems break very easily. I also had some other dried flowers which I tied on the other side of the wreath.


The sweet chestnuts, little furry green balls (aren't they lovely?), came in pairs or in threes, so I pulled a bit of wire through the stems and then tied the wire onto the wreath. I would have preferred to tie a ribbon bow to the top of the tear shaped wreath, but since I didn't have any colour ribbon that would have suited the autumny shades, I had to use some raffia. I tied it in a bow where the ends of the wreath meet - that way I can hide the wire that holds the two ends together.


I have to admit, I find the deco is a bit on the tacky side. But well, I wanted to try making my own wreath and had to work with what I got. At least the whole thing didn't cost me anything as I had all materials at hand.

For some easier autumn decorations check out my posting from September 3rd.  

Thursday, September 3, 2009

Falling for Autumn

I hate to admit it, but I think summer is over. The days start really dark again and the weather has turned. Here in Ireland we are humble again, wishing for nothing else but that it stays dry.

As I will be away for the weekend, going to a fantastic open air festival with a lot of music, art, theatre, poetry, food etc. etc., I thought I should update craft-werk with something ready-made. Also, I like to be seasonal and topical. And with my intro above you can guess what it is: autumn decoration.

Now, let me say first of all, that I am not a "centrepiece girl". And I am also not exactly a gifted florist. I subscribe more to what might be called "The Gumby School of Flower Arranging" (please, please click this link if you like Monty Python - it explains my relationship with floristry pretty well...) As you probably have figured out if you are following my blog on a regular basis: The Queen of Crafts does not like lengthy projects and detailed instructions. Same applies to my attitude towards flower arranging. And therefore my centrepieces are the easiest projects ever.

Here is last year's autumn deco:
(Really sorry, by the way - for some reason blogger always shows this image sideways... Ah well, you get the drift!)

Assembling it was great fun, because it involved a nice walk in the little park opposite my house. Myself and the daughter went over and collected as much autumn material as possible. I had great aspirations for a sophisticated arrangement. Back home, however, when thrown into a wicker wreath, the coincidental arrangement looked pretty good without further tweaking. So I left it that way.

The year before I did something similar: Gather as much stuff as you can and then throw it all in a bowl of some shape or form. Mine was actually a wrought iron basket with four candles, which is really meant as a type of advent wreath (traditional German affair where each of the four Sundays before Christmas you light another candle). Nonetheless, it looked good in it.

I placed a saucer or desert plate in the basket so the smaller bits didn't fall out. Isn't autumn surprisingly colourful? Spot all the things I put in there - berries, ivy buds and leaves, chestnuts and leaves, acorns, a dried up artichoke flower.

So - get out there, go for a walk, pick up lots of colourful nature stuff and start arranging, ladies (and gents)!
Mr Gumby will be disgusted!!!!