FYI


Thursday, October 8, 2009

A crafty card-making session...

Amazingly I was able to fit in a quick card-making session between child-minding and college. I felt the urge to be creative, so I got my loot-bag from Daintree Papers out, grabbed the spray mount and the puncher and created a few cards.


This is a scanned image, so all this is a collage of six individual cards, lazily scanned together in one go :-). They look slightly three-dimensional. That is due to the card which has a mother-of-pearl shine to it. The stripy paper is actually Japanese paper which is quite precious and expensive. So I used every bit of it - the punched out circles and the surrounding bits.

I quite like graphic designs on greeting cards - they suit every occasion and are rather easy to make. However, I felt particularly creative yesterday (...) and also made this little card for a very special occasion.


Let's hope that the receiver of this particular card is not following the blog... There are a few of them around...


Monday, October 5, 2009

Autumn decoration 2009


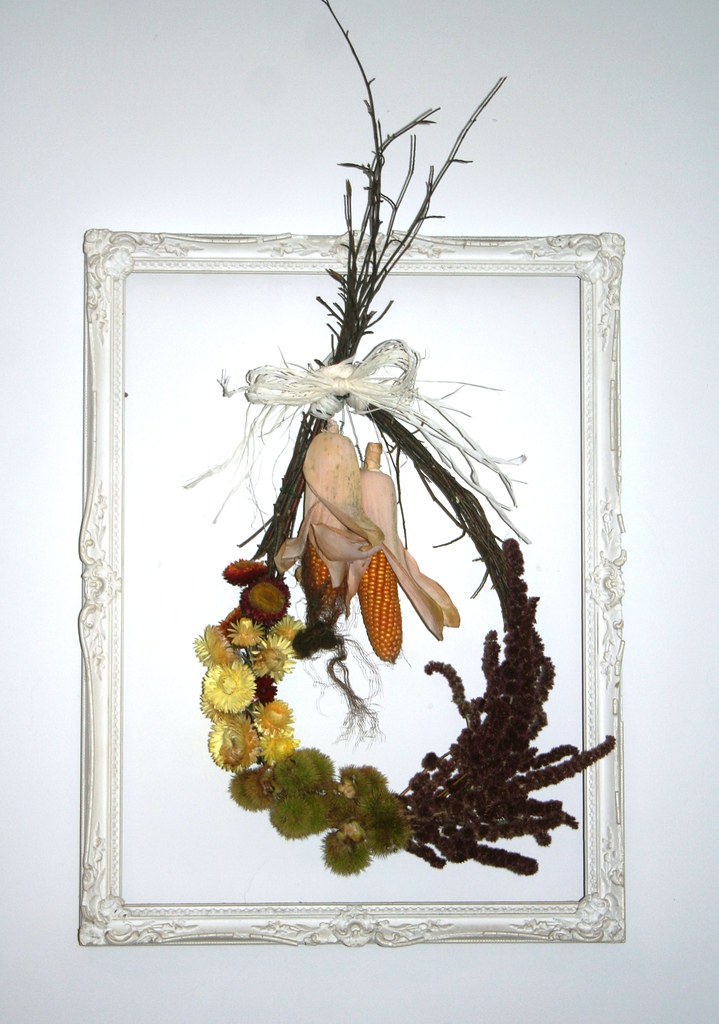
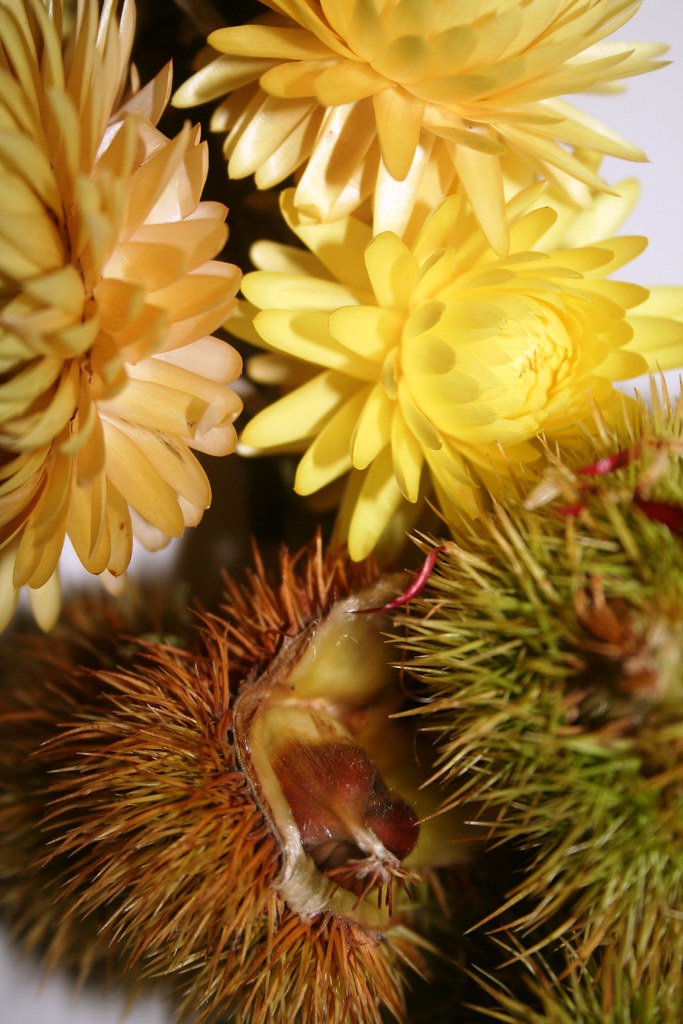
Finally, finally I have found the time to put some autumn decoration up in my home. I had been in Co. Wicklow over the weekend and used the opportunity to collect bits and pieces on a walk in the country. I came away with lots of twigs and sweet chestnuts. Last night I put everything together in an arrangement which now graces my kitchen wall.


I had planned to make a wreath from the twigs, but while making it I decided on a tear shape instead. It is actually easier to make - just tie the twigs together with florist's twine and instead of bending it to be a circle, tie one end into the other while leaving some twigs to stick out at the top.

Once you have made your wreath you can start decorating it. I fixed some wire onto the corn cobs (which I had knicked from a field in Germany *blushes*) and tied them to the top of the wreath. Then I took lots of straw flowers and tied their little stems with wire to the wreath. Careful - the dried stems break very easily. I also had some other dried flowers which I tied on the other side of the wreath.


The sweet chestnuts, little furry green balls (aren't they lovely?), came in pairs or in threes, so I pulled a bit of wire through the stems and then tied the wire onto the wreath. I would have preferred to tie a ribbon bow to the top of the tear shaped wreath, but since I didn't have any colour ribbon that would have suited the autumny shades, I had to use some raffia. I tied it in a bow where the ends of the wreath meet - that way I can hide the wire that holds the two ends together.


I have to admit, I find the deco is a bit on the tacky side. But well, I wanted to try making my own wreath and had to work with what I got. At least the whole thing didn't cost me anything as I had all materials at hand.

For some easier autumn decorations check out my posting from September 3rd.  

Friday, October 2, 2009

I have been mentioned!

Yoohay - I have been mentioned in another craft blog. Oh, I am so chuffed, especially as it is in the mightily creative Beckie's blog infarrantly creative, a blog that I have been following almost since the day that I started blogging myself. Beckie is an avid blogger who has fantastic ideas and great style. Well, that's a pretty personal opinion, but anyway, I like what she publishes in her blog. And I absolutely love her idea of the "Roadkill Rescue Party" - a kind of crafts competition where crafters are encouraged to revamp or rework a piece of junk which they have acquired for free, possibly from the roadside. Check out her blog yourself:


Her last project has been handmade paper beads - and she credits me for the inspiration. Remember - I blogged about my security envelope beads here. They really are easy to do, so go ahead and try it yourself!


Oh: And a big thank you to Beckie for the credit and the link!!!


Blackboard Paint - Storage Labels for Jam Jars

With my course in photography I am quite busy and therefore do not get to do as much crafting as I would like. It seems that my creativity these days goes into photography. There are plenty of projects to work on and less time for crafts. But here is a small project, another variation on the theme of blackboard paint.


As the jam-making season has drawn to a close, I had a few jam jars left over. My kitchen dresser is a horrible mess of little bits and pieces that I like to have handy but which haven't got a proper home. I found the solution to the unsightly mess with my jam jars.

I simply sprayed the metal lids of the jars with blackboard paint. Give the lids a good wash, making sure they are not greasy or dusty. Then spray with blackboard spray. Give them at least two coats and let each coat dry thoroughly. If you are too impatient and the paint is not properly dry, you will scratch it off in the process of writing on it with your chalk.


Ok, you can see what is inside the jar, anyway, but the uniformly black lids add a bit of style to the jar display in my storage shelves. You can label your jars easily with chalk and wipe it off when you use the jar to store something else in it. I now have a great home for the children's ink cartridges and my paper clips.

Tuesday, September 22, 2009

Crafting with Fruit - Damson Liqueur

Over the weekend I went up North to the farm of a friend. It is right in the middle of nowhere, with soft Irish hills surrounding it. His farm has a large apple orchard, and autumn is the perfect time to go up there. For obvious reasons (says the thrifty Queen of Craft with a sly smile...) Not only are the apples ripe for harvesting, but the hedgerows are laden with blackberries, sloes, hips etc.

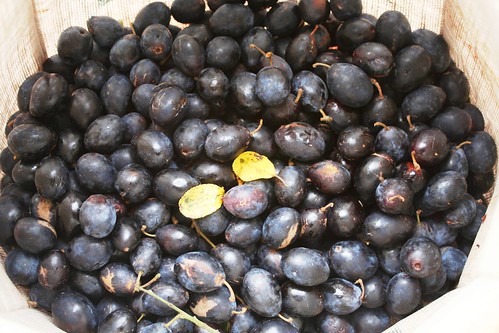
I spent a morning foraging for blackberries and damsons. It is sooo satisfying to pick fruit from a tree. You pick and pick and pick and you fill up your little basket. Or your large linen bag - I came away with about 5kg of damsons because I just couldn't stop. You see, damsons are quite hard to get here. And autumn just wouldn't be the same for me without the traditional German damson cake. I made one of those for my friend on the farm, but I was still left with loads of damsons which I took home. But what to do with them?

After my college class last night I spontaneously decided to make damson liqueur. It was more than easy and I had all ingredients to hand (thanks to some leftovers from a recent party).

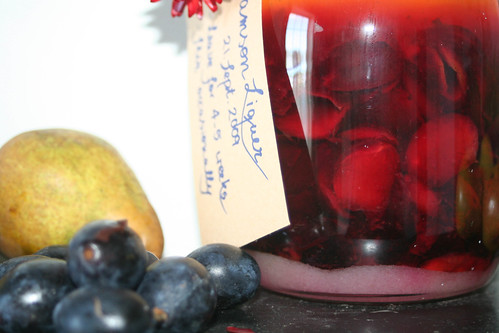
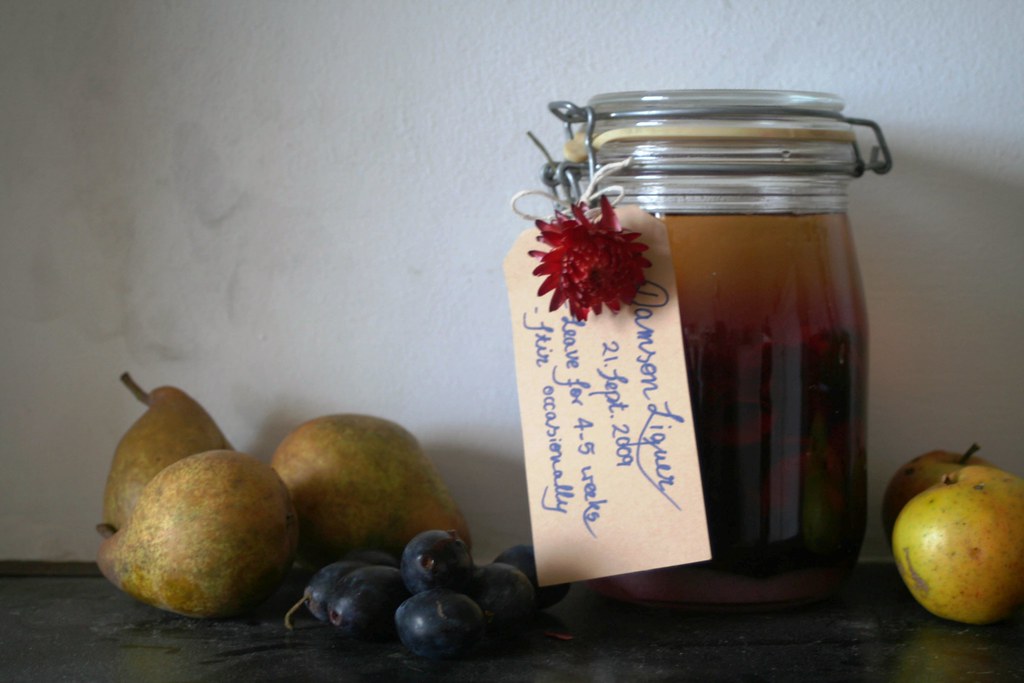
I washed 500g damsons and took the stones out of the fruit. Then I put 150g sugar and 2 sachets of vanilla sugar into a large glas jar. I filled the jar with 500ml white rum and stirred the concoction. Lastly I added the damsons and stirred again. Done!

You need to leave the liqueur to sit for four to five weeks. Open the jar occasionally and give it a stir. I think it actually makes a lovely still life on my kitchen mantlepiece even before it is ready to sip:


Monday, September 21, 2009

MoM - Blackboard Spray: A Pebble and A Mini Blackboard


While I was at it with the blackboard spray, I grabbed a couple of other things that were at hand and easily transformed.


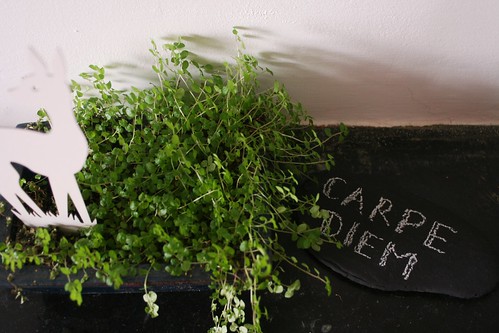
I had a flat pebble, picked up on the beach a while ago. With a couple of coats of blackboard spray it makes a nice little "reminder stone". It has enough space to write a little thought for the day. It currently graces my mantlepiece with my thought for the day.

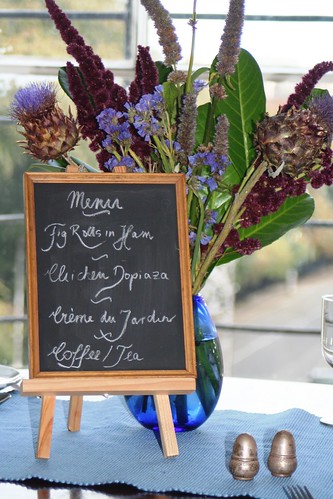
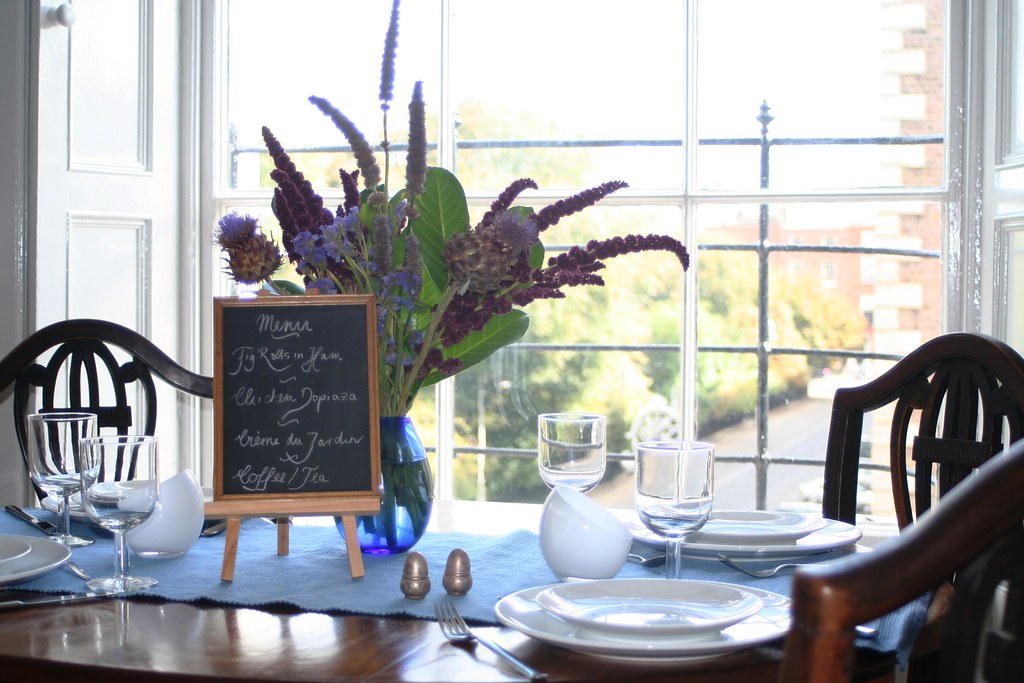
Among the 500 assorted frames and pictures which are languishing in various cupboards in my house, I found a smallish one with a simple wooden frame. I took out the glass and simply sprayed it. As I didn't prime the glass, it needed about three coats of spray. It now is a lovely little menu board for a nice dinner party. What do you think?


15 January 2010: *ugh* just in time this evening to link this to

Sunday, September 20, 2009

Announcement: MoW becomes MoM - And what you can do with Blackboard Spray

Ok, it's time to face up to the truth: The whole Material-of-the-Week-thing didn't quite work for me. I still like the idea of showing more than one meagre project that involves a particular material within a certain period of time. But my chosen time frame simply put too much pressure on me to craft and to update the blog. After all - there is a life beside blogging...

So I have decided to turn the MoW into a MoM! No, I am not going to focus on mommy-crafts now (how boooooooooring), but instead I will choose a Material of the Month from now on. That will make it easier for me to pick a material and then come up with ways of using it. And besides that I will still have time to update the blog with other crafts ideas which I have come up with but that do not feature the MoM.

Here is this month's MoM: Blackboard Spray!


Ireland is not exactly a crafter's paradise. I do not really know why but there are very few Crafts Shops around. And those that do exist do not have the huge array of crafts supplies that you would find at home in Germany. Generally I find that Irish people are not as dexterous as Germans, for instance. Also, I have the impression that home-made gifts are not appreciated here as much as back home. (Although this does actually not apply to my Irish family and my circle of friends here - they are all special *haha*. Or maybe they have just learned to humour the Queen of Crafts???*thinks*)

Anyway, I was shopping in a stationer's last week and when picking up a can of spray varnish (which I baaadly need because I am slowly but surely running out of my clear nail varnish which has been misappropriated too often for crafts projects), I came across a can of Blackboard Spray purely by chance. I did not really have any particular project in mind, but I knew I had to have the stuff. And at € 5,00 it was a chance I could easily take.

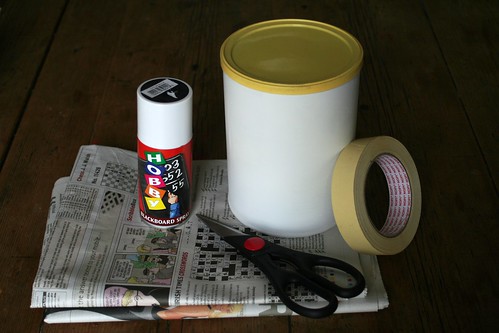
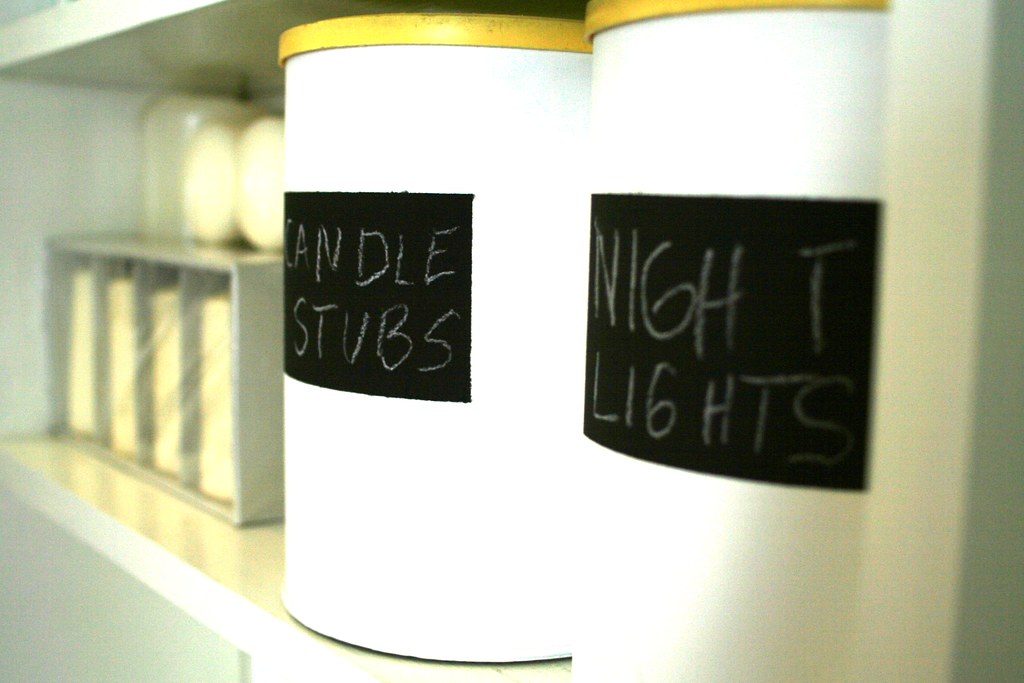
The ideas came pretty quickly, though, and I couldn't wait to use the stuff. So here is what I came up with: Rewritable blackboard labels for storage cans. Here is what you need: Some tins, masking tape, newspaper and blackboard spray.

I still had a few large tins with plastic lids back from the days when I had to make formula milk for my baby children. (Yes, that is a good while ago - I am such a hoarder...) I sprayed the tins with white, matt fridge paint.
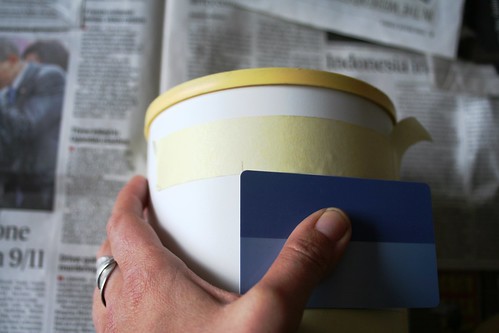
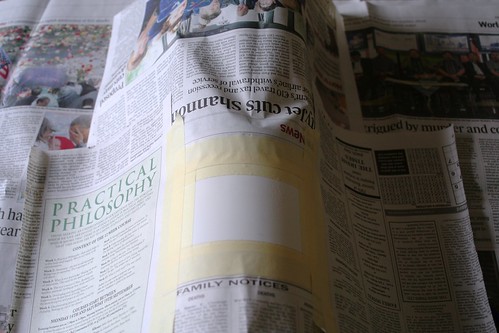
Then I masked off a rectangle on the tin with masking tape. If you want to make it easier, use a credit card or cut a template the size of your envisaged label and then draw around it with a pencil marking the shape on the tin. Use masking tape to create the rectangle on your tin. Then use newspaper and more masking tape to cover the rest of the tin so it doesn't get any spray markings.


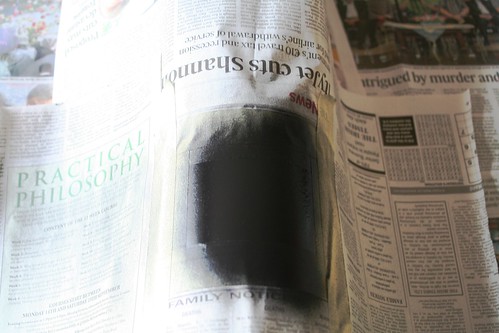
Then spray away. For best results you should spray at least two coats, leaving the first coat to dry for a minimum of one hour. (If you are too impatient you will botch the label - the chalk will scratch of the blackboard paint when you write on it. Trust me - it's happened to me like that!) Carefully peel off the newspaper covering and the masking tape.


And voilá - you are there. Some fancy rewritable labels on your nice white storage tins. Go with any decor and always look stylish. Ha, and hardly cost anything.


Edit: I am linking this to Remodelaholic's Linking Party!


Thursday, September 17, 2009

Earring-Recycling - Make something shiny and new with those lonely single earrings...

Beware of autumn and winter, ladies - "It's Lose an Earring-Time Again"!

If I were to write a blog entry for every earring I have lost, I'd fill this blog pretty quickly. Last autumn and winter alone I lost at least four earrings. I blame the thick scarf that I was wearing - it kind of pushed the earrings out when I was briskly walking home after work. Losing my earrings really annoyed me. Ok, most of the earrings I wear are cheap costume jewellery. They didn't cost a bomb. But I liked them and some of them held special memories. And what's more: I was left with several single earrings that I had no use for because wearing just one dangly earring looks daft. It bugged me that I had all these earrings lying around but wasn't using them anymore...


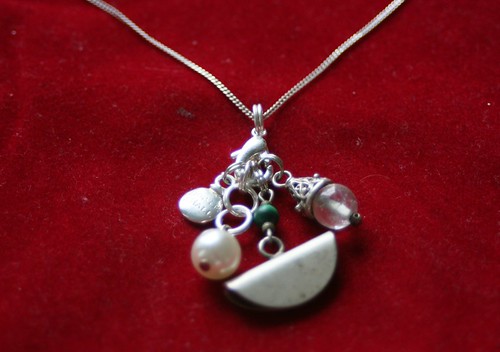
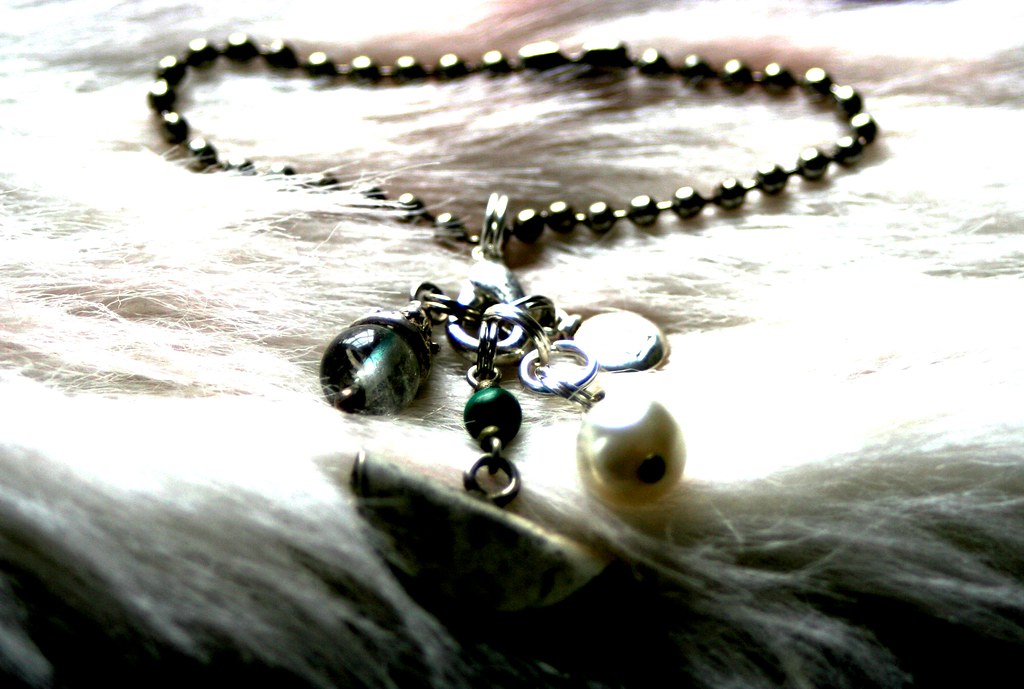
So I had to come up with a way of recycling single earrings. I toyed with the idea of going to a jeweller's and having them fitted onto a charm bracelet. But are these cheap things worth the expense of having them fitted? No. Then - Eureka! - I had the inspired idea. I decided to turn them into a charm pendant. They are all the rage right now.


Here is what I did:

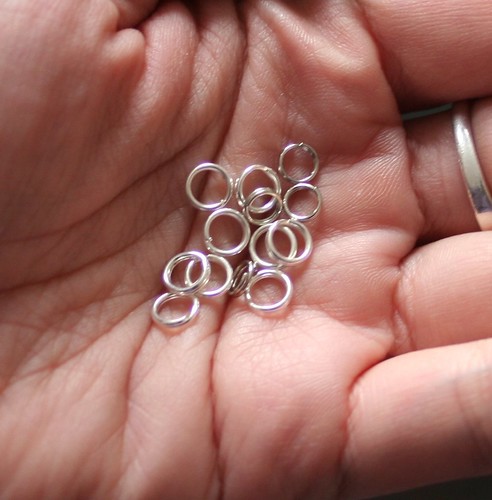
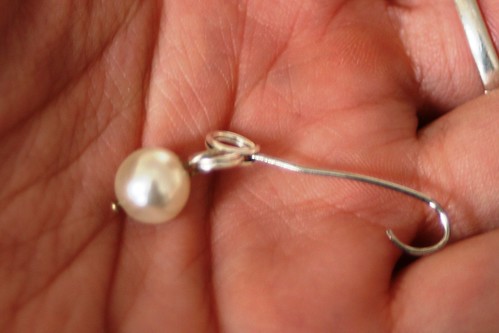
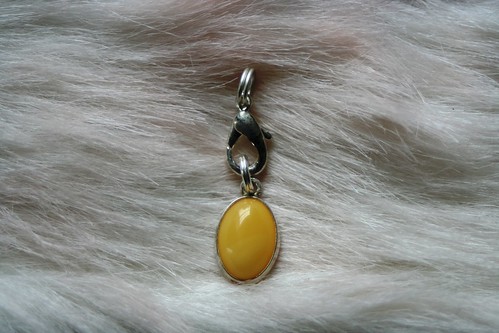
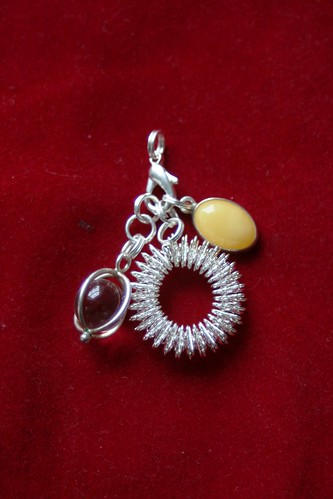
First I took the dangly bits all off the actual earring. (Keep those - you never know whether you might need them some other time...) In my bead box I had lots of silver necklace carabiners which came with little hoops. Those hoops are actually little coils, so I simply pushed the dangly bits onto the coils. That was quite fiddly, but you can use a piece of wire or simply your fingernail to push the wire of the coil apart and then squeeze your earring onto the hoop. Now the earrings are individual pendants which could already go onto a necklace.


I also put a hoop onto the fasteners in order to thread them more easily onto a necklace. The carabiners are integral to my design, because you can easily attach a number of pendants onto them for the current fashion.

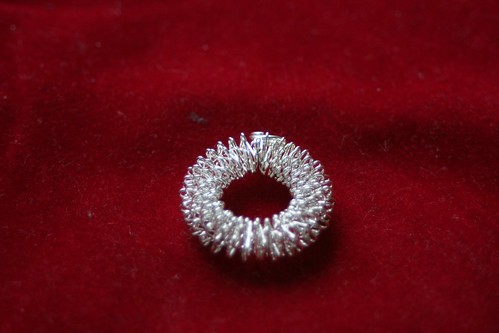
I also had this silver wire circle which is actually for massaging your fingers. I never do that - but I like the design of the thing. So I attached a hoop to that, too, and also use it as a pendant. - Some of the pendants are very small and look lost behind the wire circle, so I made a little chain of hoops to hang them from.


If this kind of pendant is too bling for you, why not use it as a key ring. I think, my key ring is very posh and I look forward to showing it off!!!


Sunday, September 13, 2009

MoW Security Envelopes - A Post Scriptum: Make your own beads

The Queen of Crafts has a short attention span. And therefore my mind wandered away from the security envelopes rather quickly after making a few projects with them. On the other hand, the Queen of Crafts doesn't like unfinished business. And therefore you are now getting a post scriptum - another security envelope project.

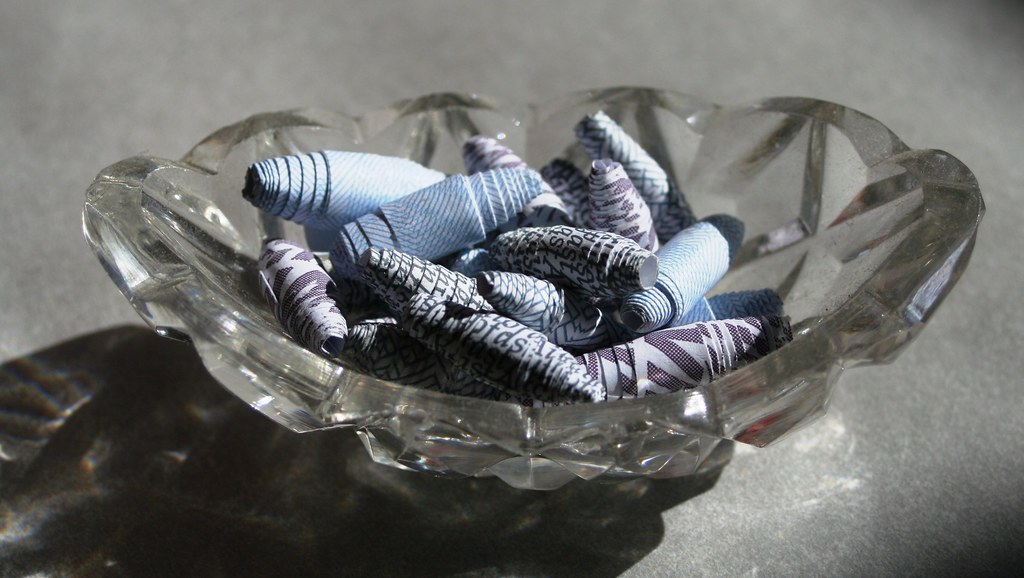
I used the security envelope paper to make my own beads. The project couldn't be any simpler:


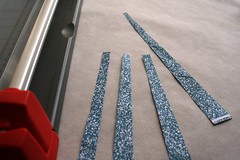
First, cut your envelopes into strips of paper. If you want slightly rounded beads, make sure you cut the strips slightly diagonally. I used a paper cutter/guillotine for quick and straight cutting.

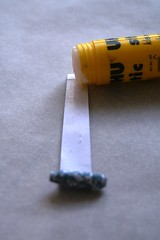
Then roll up the paper strip. The start is a bit fiddly, but you will soon get the hang of it. Start with the slightly wider end of the strip. Hold the bead between thumb and index finger and pull the paper a bit so that the paper is rolled really tightly. Fasten the end of the paper with a little bit of glue. I tried spray mount as well as pritt stick - both glues work equally well.

That's it - you have made a bead. Depending on how wide you cut your paper strips and how long you left the strip, you get longer or "fatter" beads. I tried to make round beads but never could get the paper the right shape for that... However, I do like those barrel-shaped beads. If you want the beads to last a bit, you should give them a coat or two of clear varnish. In the absence of proper varnish I used nail varnish again.

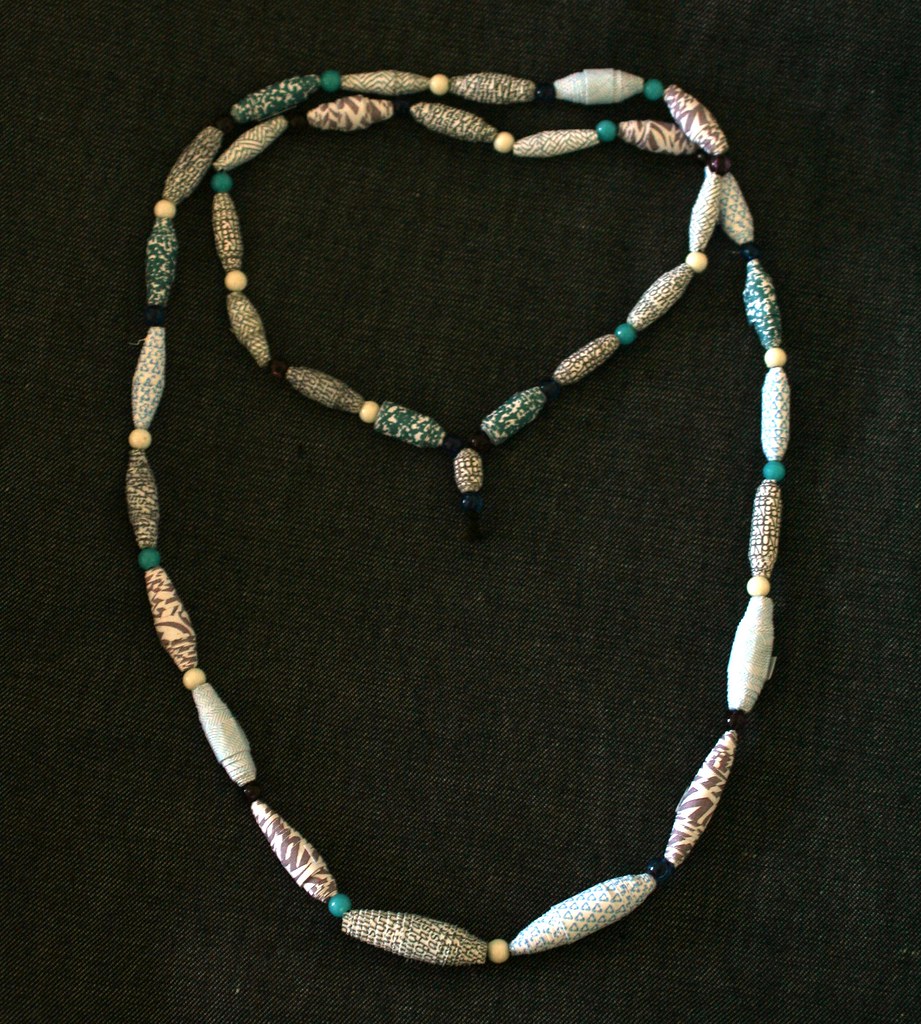
Once I had made a number of beads from different security envelopes, I decided to turn them into a necklace. I took a length of black string and
threaded it through a sewing needle for easier threading. I had sorted my beads according to size, so it was very easy to thread them onto the string in a nice pattern. I put small plastic beads in between them for a bit of extra sparkle.

It was not that quick a project - making each individual bead takes a bit of time and you will need at least 30 for a nice long necklace. This is mine:


This might actually be a nice little project for a child. You could use paper that you like - an ad torn from a magazine and cut into strips will be colourful and nice. Or use plain paper and paint the beads afterwards.


Thursday, September 10, 2009

A Lame Post to Keep the Blog Going - and Cheesy...

Sorry, esteemed readers, I know this is gonna be a slightly lame post, but rather like the Queen of England the Queen of Crafts sees her calling as a duty, not just a privilege... And therefore I need to post something in the blog as it is already 7 days *gasp* since I updated last...

I have actually been crafty this last week, despite having been totally stressed out with work *sigh dramatically*. Project 1 is not really finished and project 2 just doesn't really convince me. Hm. So what can I do? Maybe I can bribe you with a lovely slice of cheese cake?


The reason I am thinking a cheese cake is worthy of mention in my craft blog - apart from the fact that this is the first cheese cake that I have baked in my ten years in Ireland - is that I discovered the secret that seems to be well-kept by the world's top cheese cake bakers. I have often baked them back home where there is no shortage of what we call "Quark". No - not the formerly well-known print-layout programme nor the elementary particle, but the soft cheese which is largely unavailable in English-speaking countries. Much to my dismay. It doesn't even have a proper name in English. Well, the dictionary tells me it is called "cheese curd" - doesn't sound very appetizing...

Anyway, the best boyfriend of all actually went out of his way last weekend and tracked down some Quark in a Polish shop in town. (It appears he was missing me while I was bopping away at the fantastic music festival I attended... *awwwwwwwww*) So I couldn't wait to do some baking with it.
However, the tricky bit with this cake is that the top of it usually caves in after you take it out of the oven as the filling consists of a fluffy mixture of eggs, aforementioned Quark, butter, flour, sugar and milk. But it came out beautifully and did not cave in.

And here is the best kept secret: While baking the cake, take it out of the oven exactly at half time. Use a knife to cut between the tin and the cake. Leave it to stand outside the oven for 5 minutes - and then bake 'til the end. That will do the trick. Don't spread the secret any further - just bask in the glory!

Enjoy!


PS: Want the recipe? Send me a message or comment!